Let’s start building the frontend dashboard for our online stores platform.
The first page we will add to our frontend dashboard will allow our users to access the WooCommerce sales reports on the frontend.
Follow these steps:
1- Open the frontend dashboard site
Go to Network Admin > WP Ultimo > Sites.
Find the Frontend Dashboard Site.
Click on Manage.
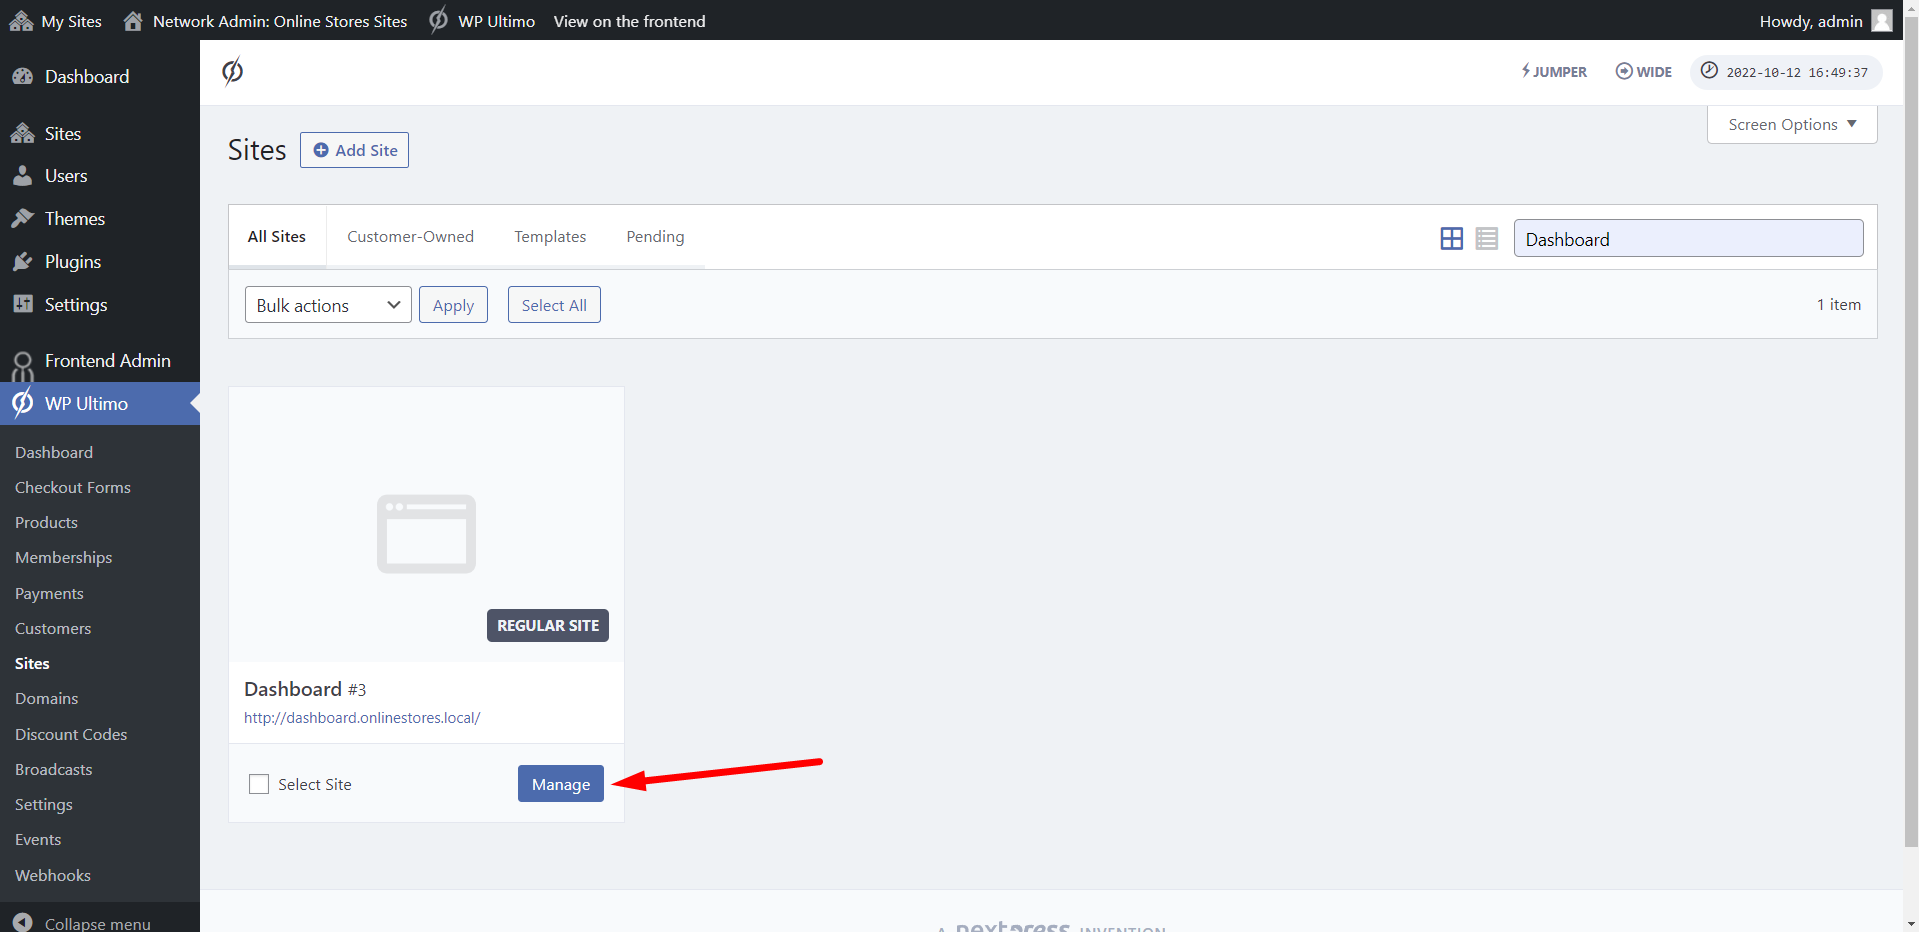
Click on Dashboard.

2- Add a new page
Go to Pages > Add New.
- Enter the page title.
- Select Elementor Canvas as the page template.
- Click on Edit with Elementor.

3- Insert the dashboard template
Now it’s time to insert the dashboard template to this new page.
Click on Add template.
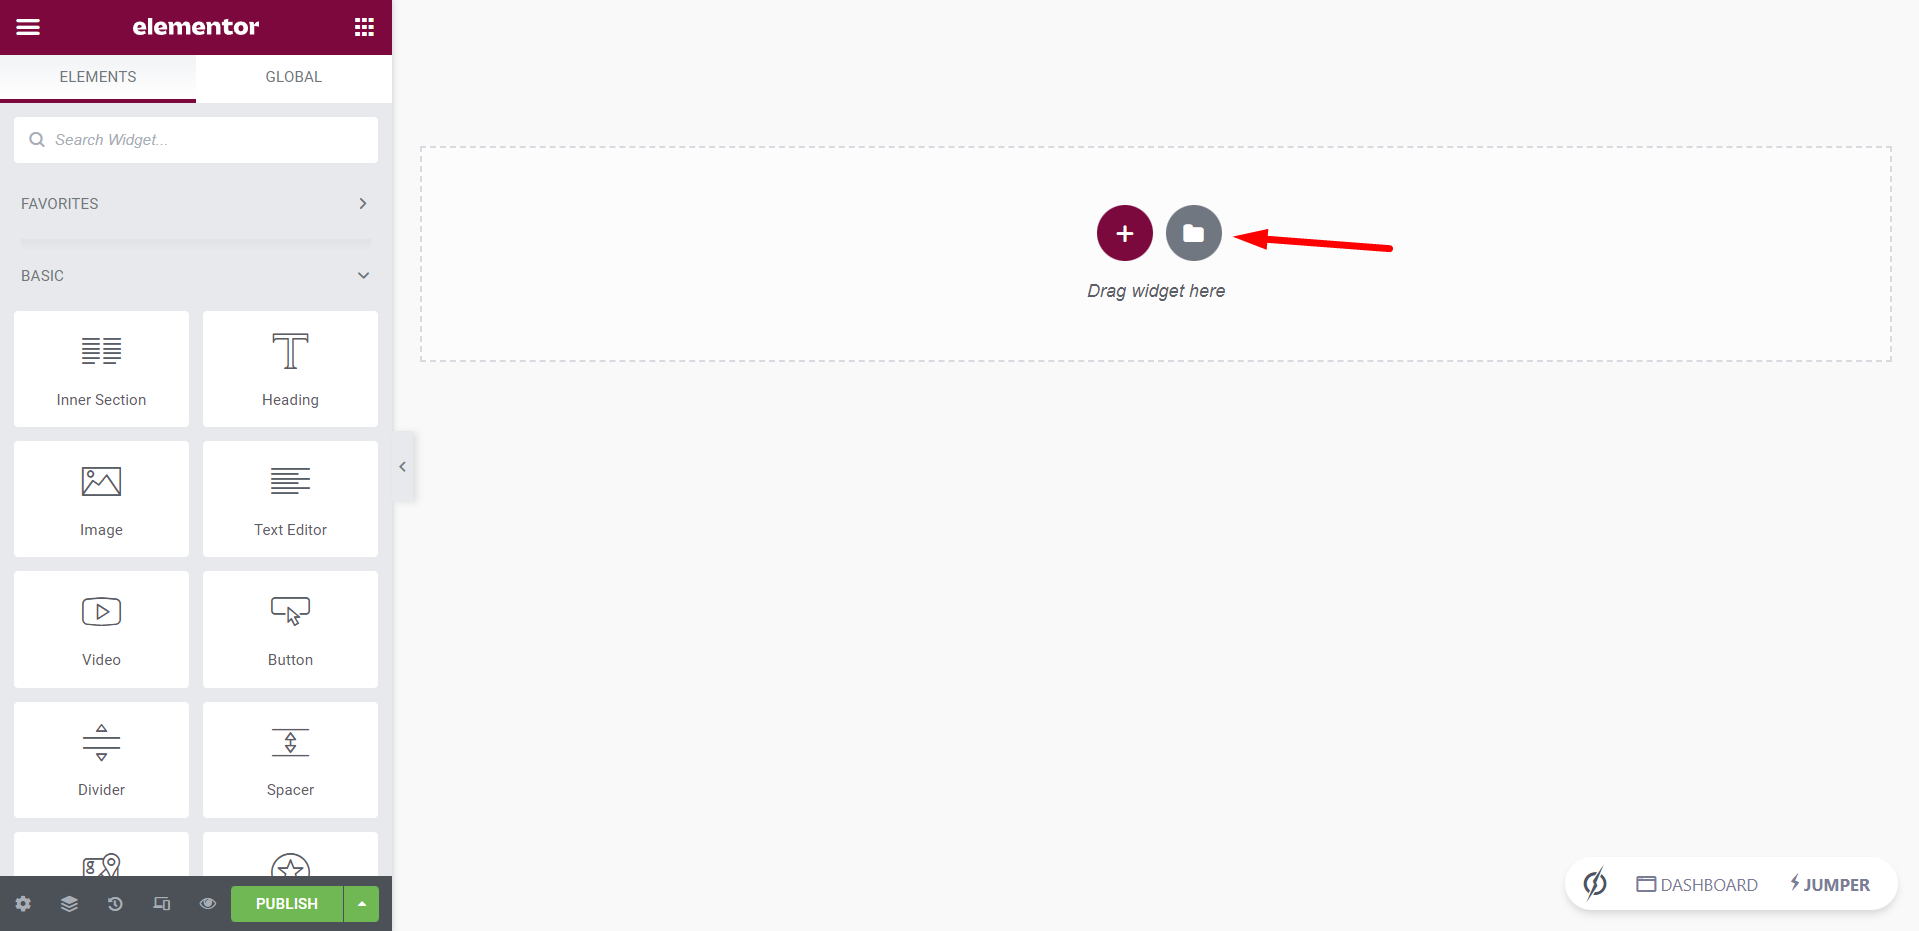
Go to My Templates.
Find the dashboard template.
Click on Insert.
4- Display the WooCommerce reports on the frontend
To display the WooCommerce reports on the frontend, you need to display the following shortcode on the page content area:
[vg_display_admin_page page_url="admin.php?page=wc-admin&path=%2Fanalytics%2Foverview"]
Once you paste the shortcode, click on Preview changes.

Note – With this shortcode allows you to display any wp-admin page on the frontend. You just need to add the wp-admin URL between the quotations. You can add complete URLs or relative URLs. Throughout this course, we’ll give you the exact shortcodes to save some time.
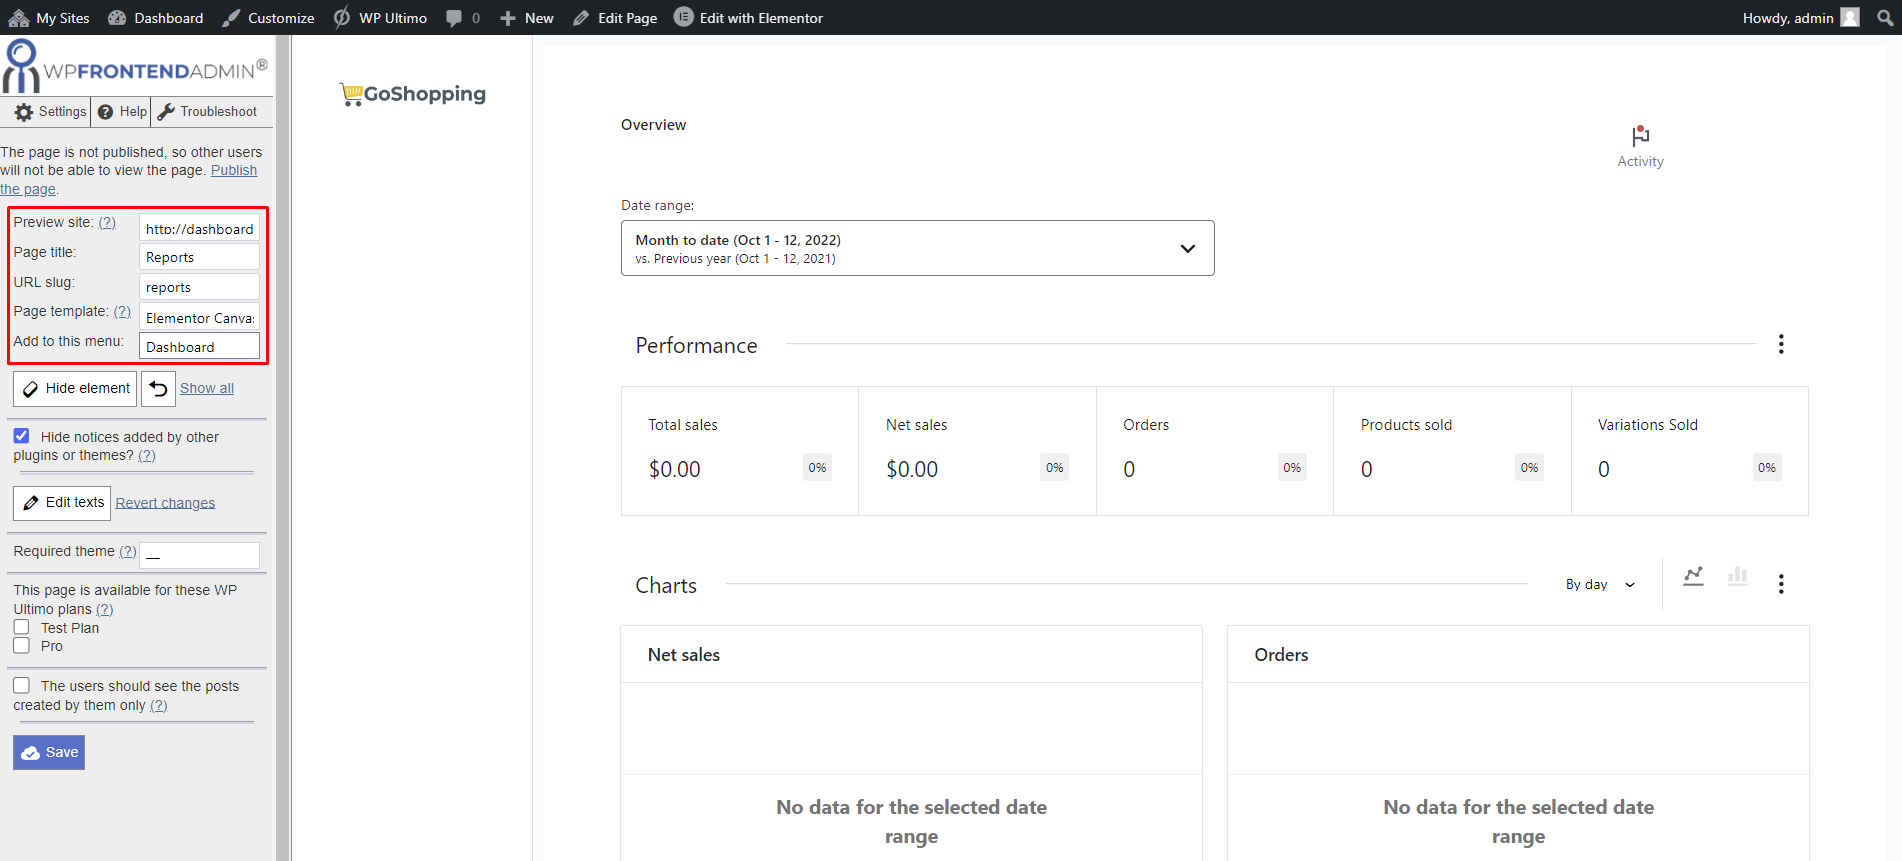
5- Set up the WooCommerce reports on the frontend
With WP Frontend Admin, you can use the Quick Settings panel to set up you frontend pages.
It allows you to remove any unnecessary elements, edit texts, restrict pages based on the WP Ultimo plan, etc.
Let’s start by selecting the following settings:
- Preview site: By default, WP Frontend Admin shows content from the current subsite for your customizations. But you can show content from a different site if you want to customize elements that depend on the other site’s theme. In this case, we won’t select any site here, since we don’t have other subsites.
- Page title: We’ll call it “Reports”
- URL slug: We’ll leave “reports”
- Page template: Elementor Canvas
- Add to this menu: Select the navigation menu of the frontend dashboard.
You can hide any unnecessary elements from this page.
- Click on Hide element
- Click on the element you want to hide from this page.

Besides, you can edit texts on this page:
- Click on Edit texts.
- Change all the texts you want.
- Click on Stop editing texts.

You can tick the Hide notices added by other plugins or themes checkbox.
You can also select the WP Ultimo plans for which this page will be available. We won’t tick any plan because we want this page to be available for all plans.
Once you’re done, click on Save and the page will be complete.

You can go to Elementor and publish the page.
This is what the sales reports page will look like on the frontend once your dashboard is complete.

In the next lesson, we’ll see how to display the WooCommerce products page on the frontend dashboard.