Let’s learn how to build a front-end dashboard for WooCommerce shop managers.
Shop managers are responsible to run the operations side of a WooCommerce store. They can manage the WooCommerce settings, create and edit products, access WooCommerce reports, view and manage orders, etc.
Now, here is something important about the Shop Manager role: Users with the Shop Manager role also have the permissions of users with the Editor role. This means that Shop Managers can create, edit, publish and delete WordPress posts and media files. They can moderate, edit, and delete comments, and add and edit categories and tags.
Unfortunately, this involves giving Shop Managers access to areas of the website that they don’t really need to use. But we can solve that!
Normal vs. custom frontend dashboard
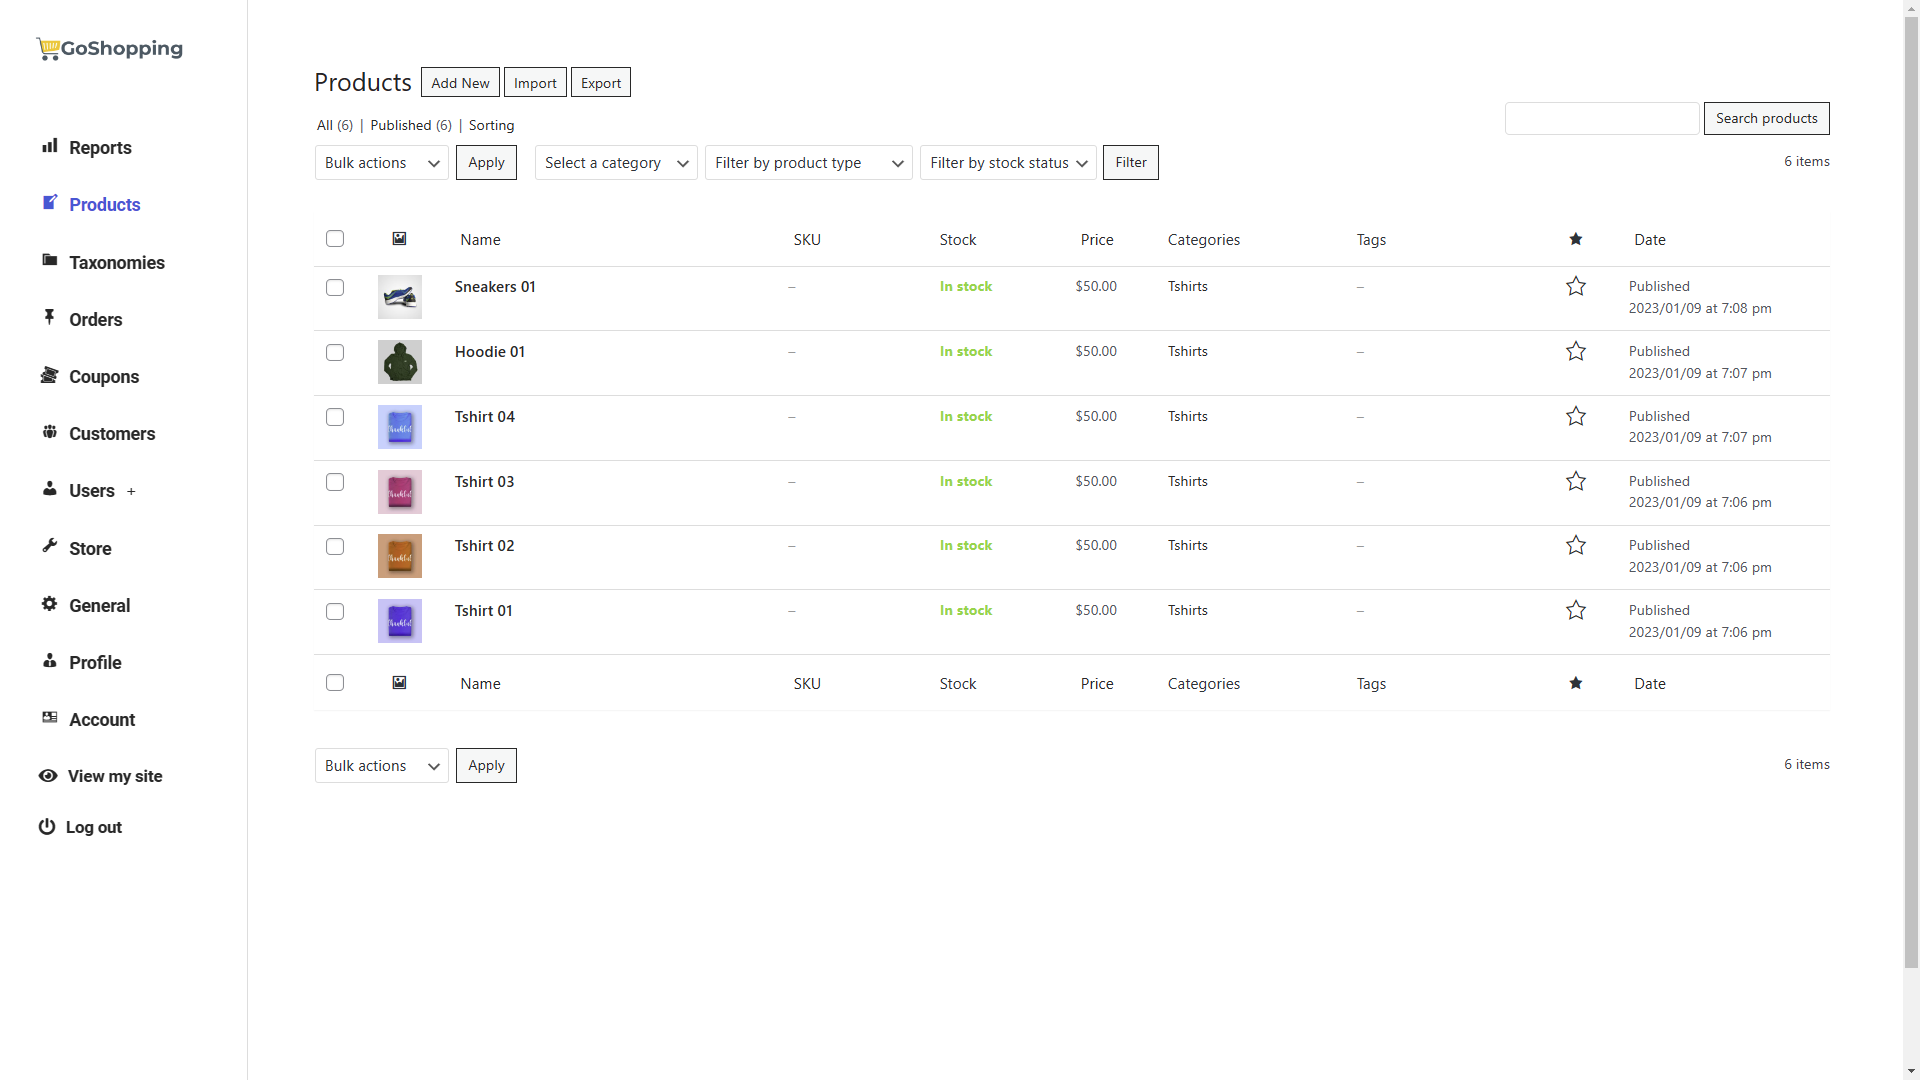
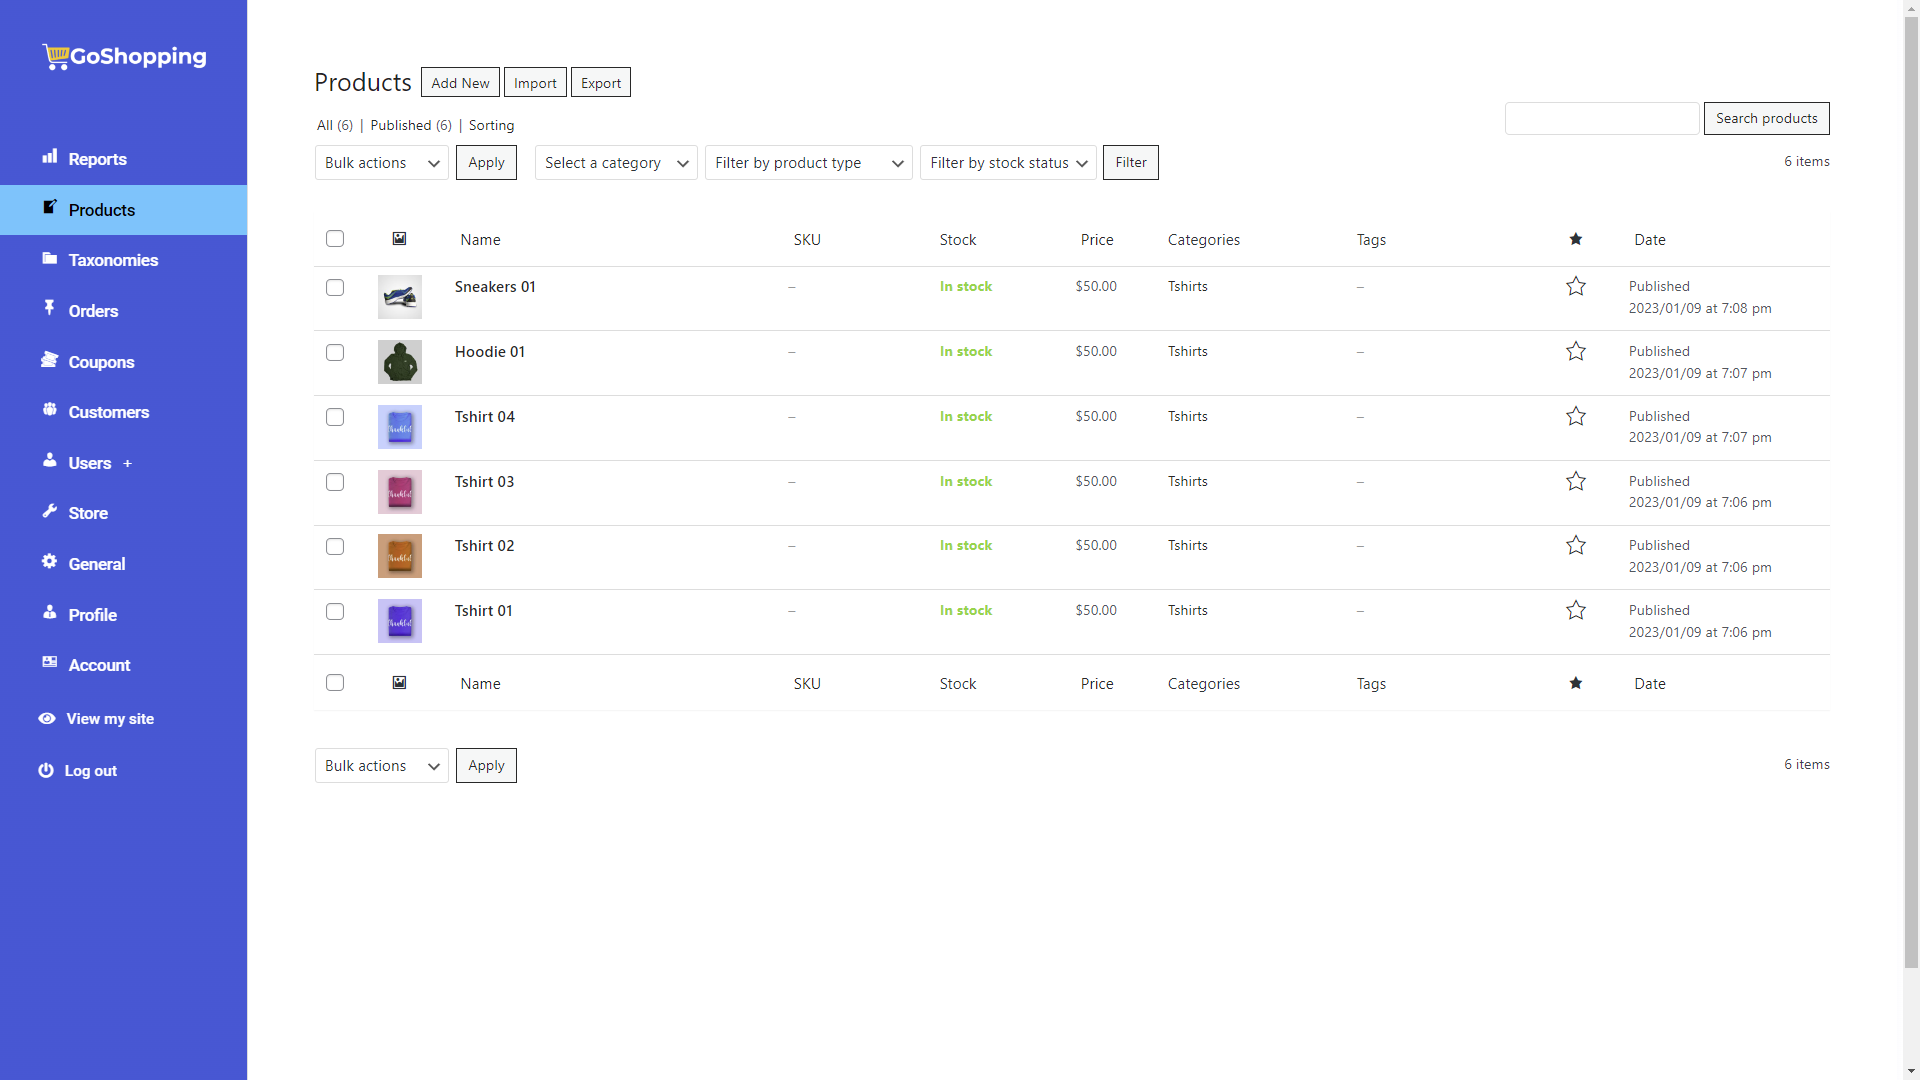
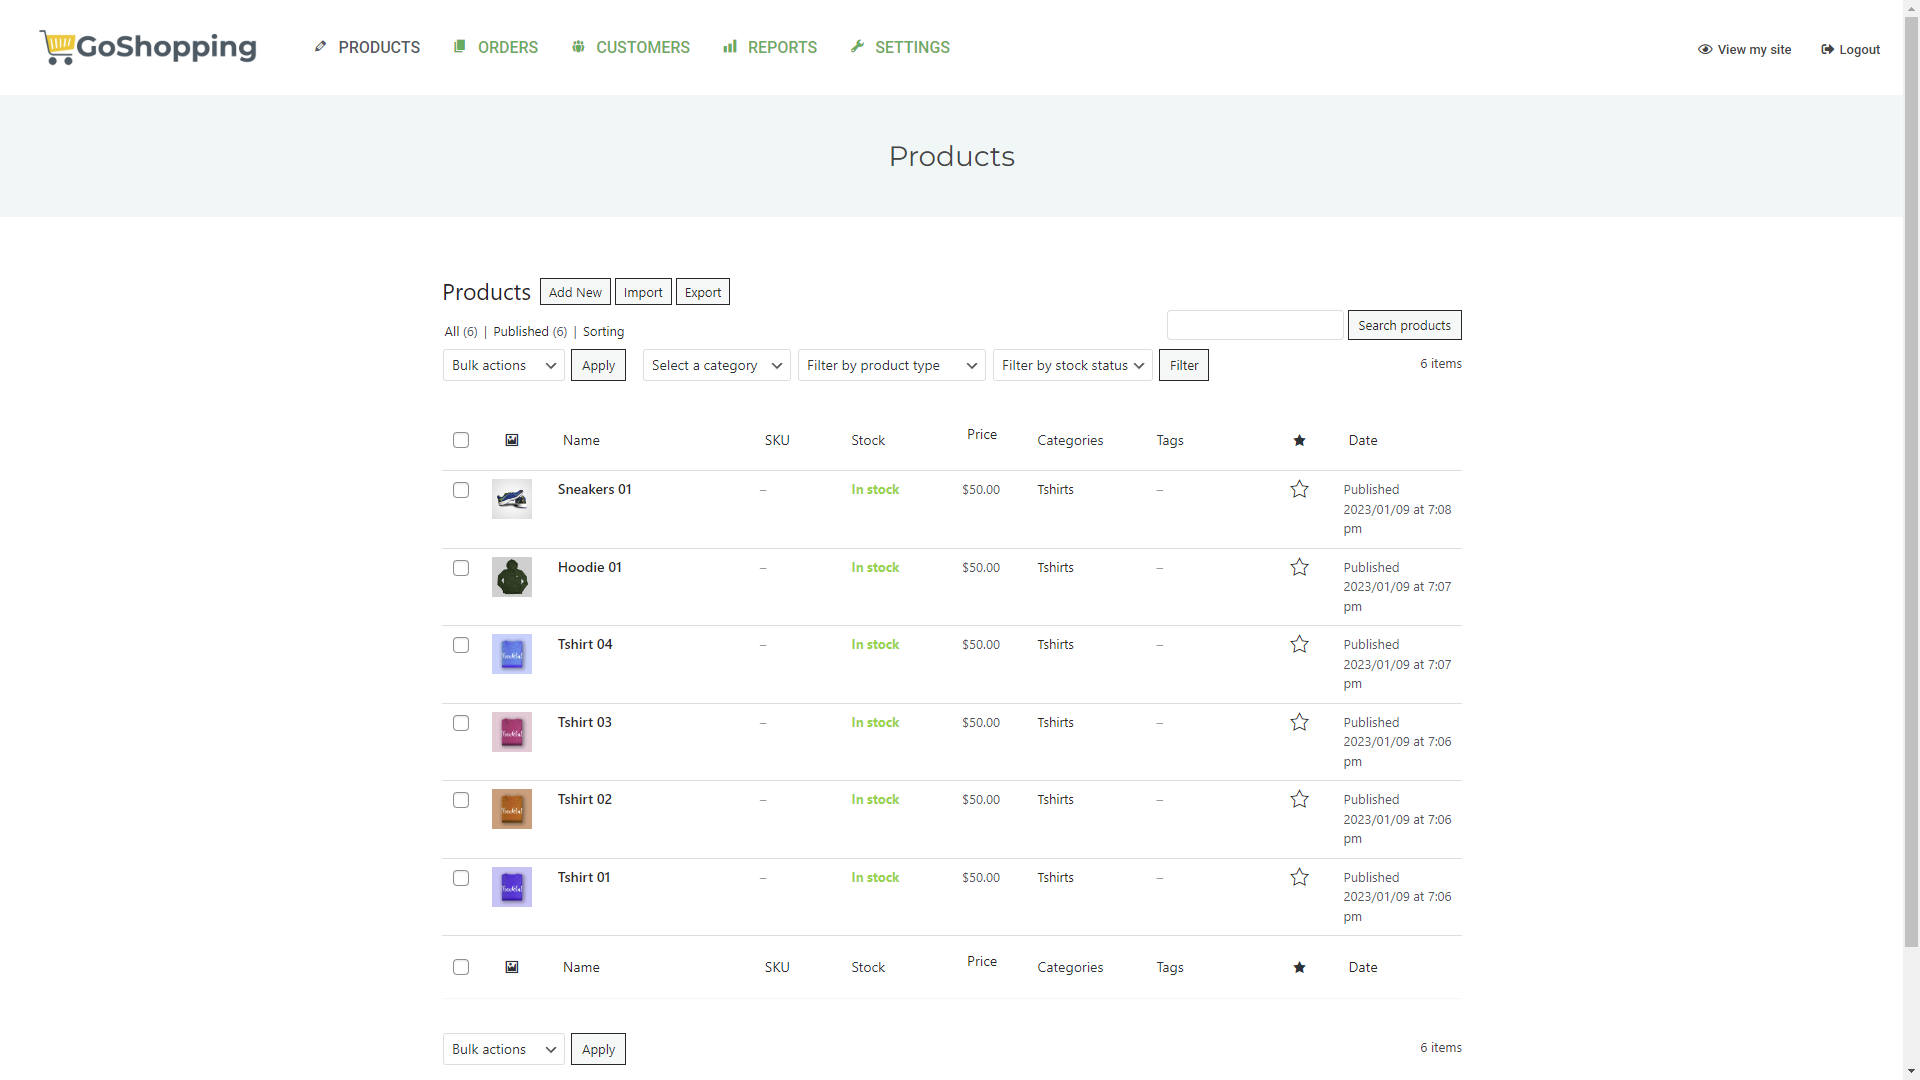
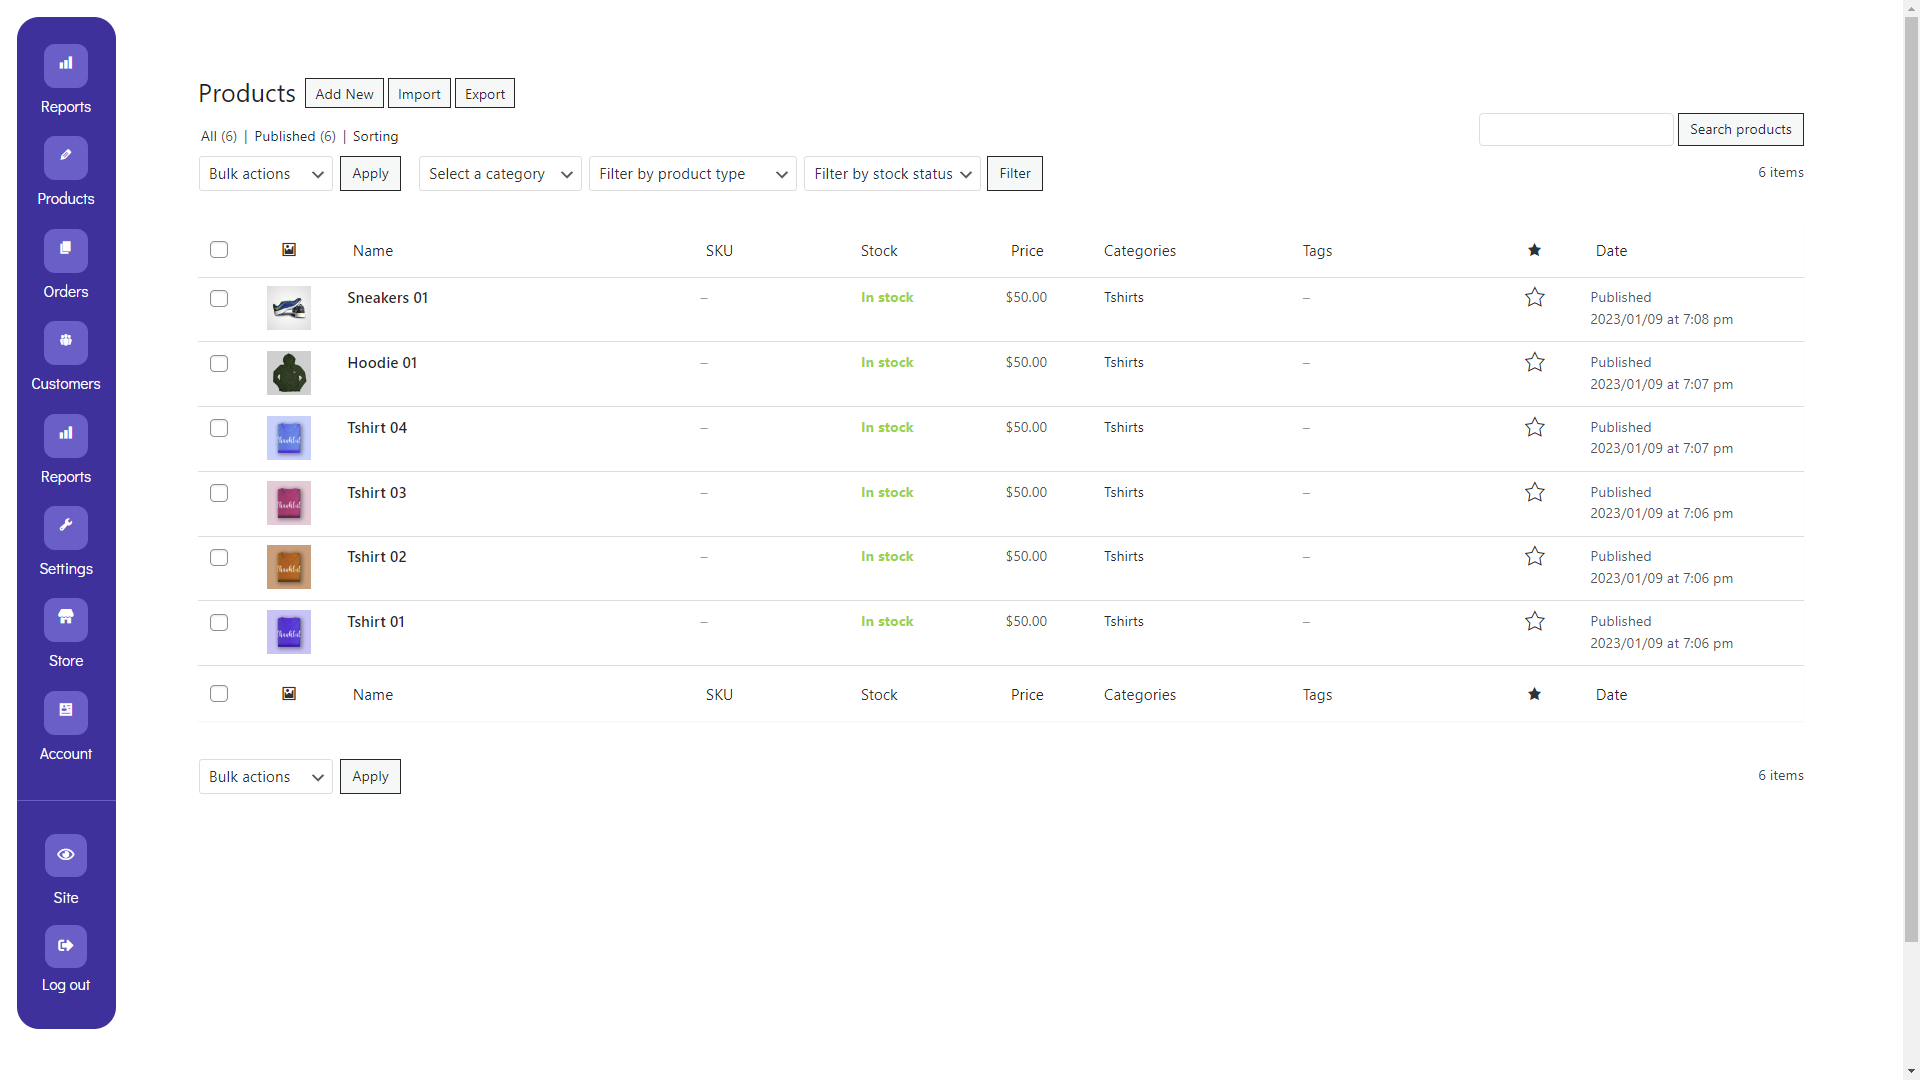
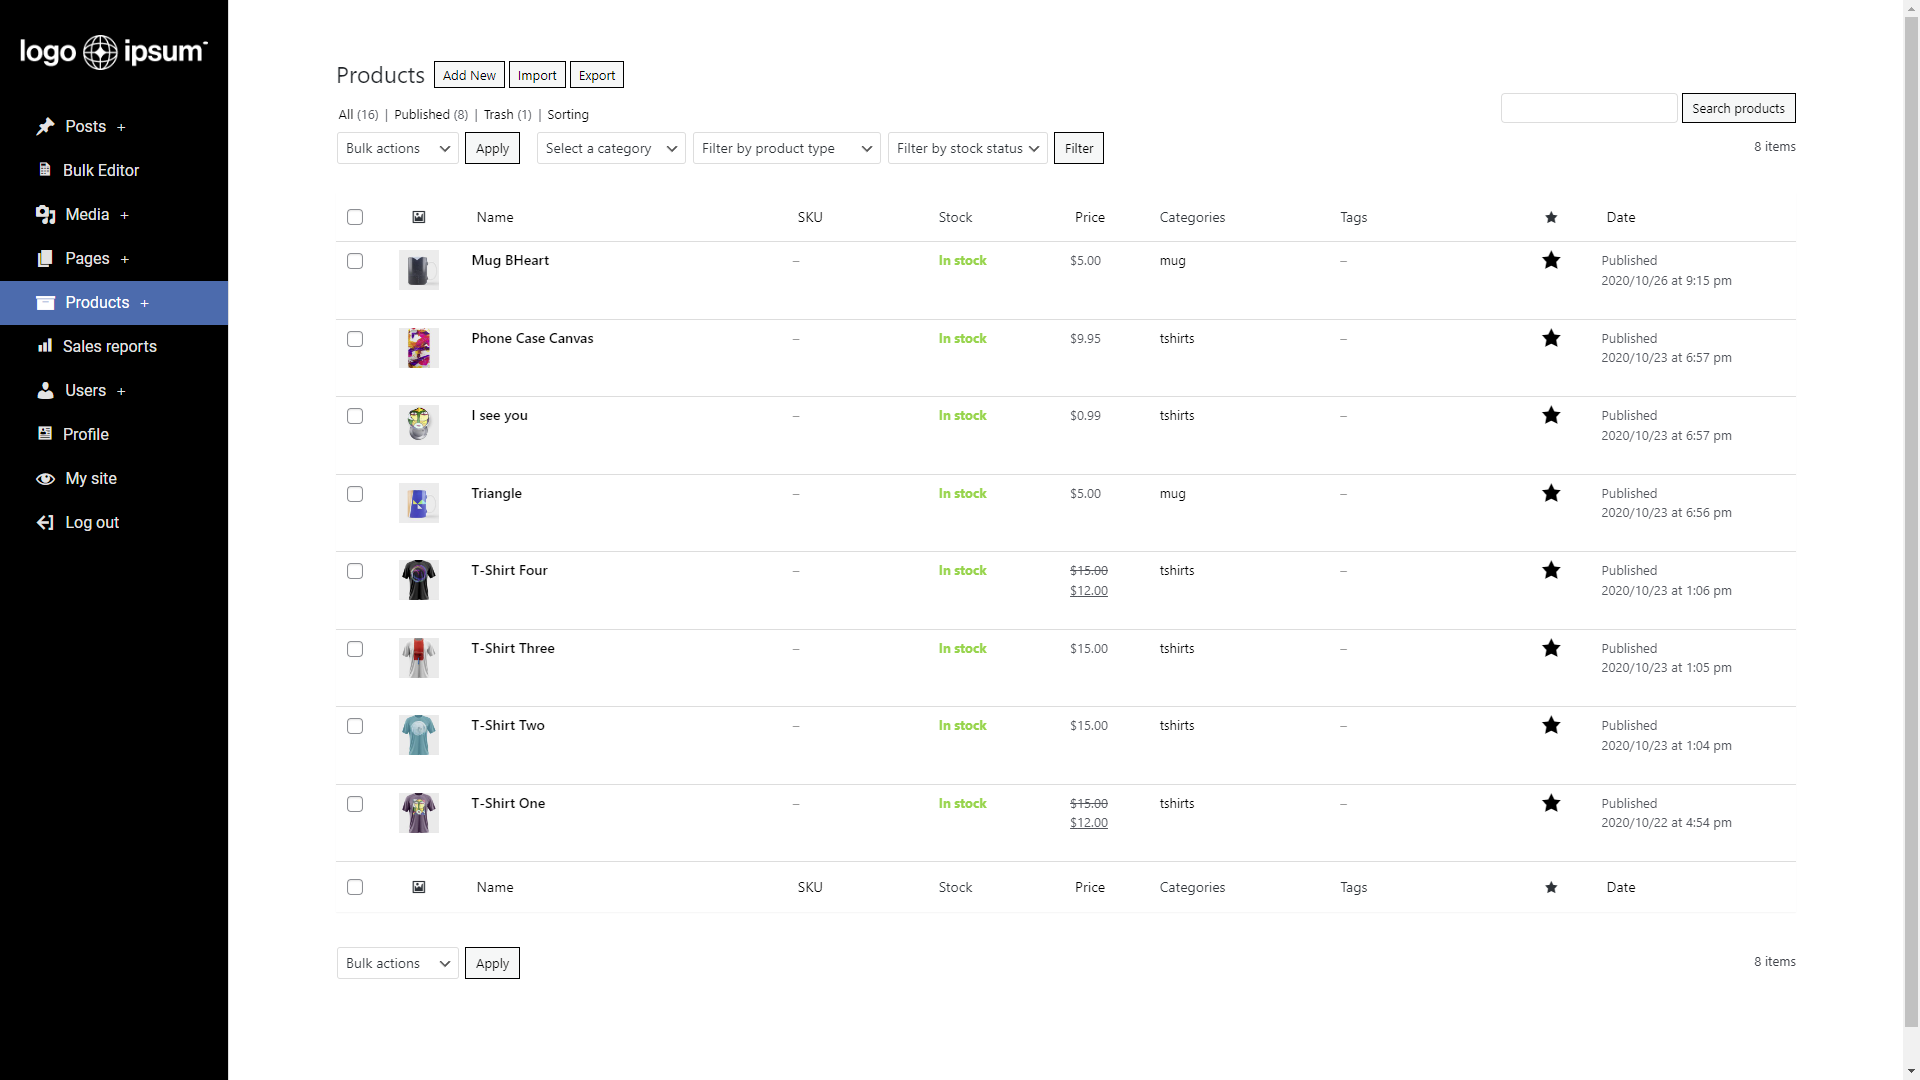
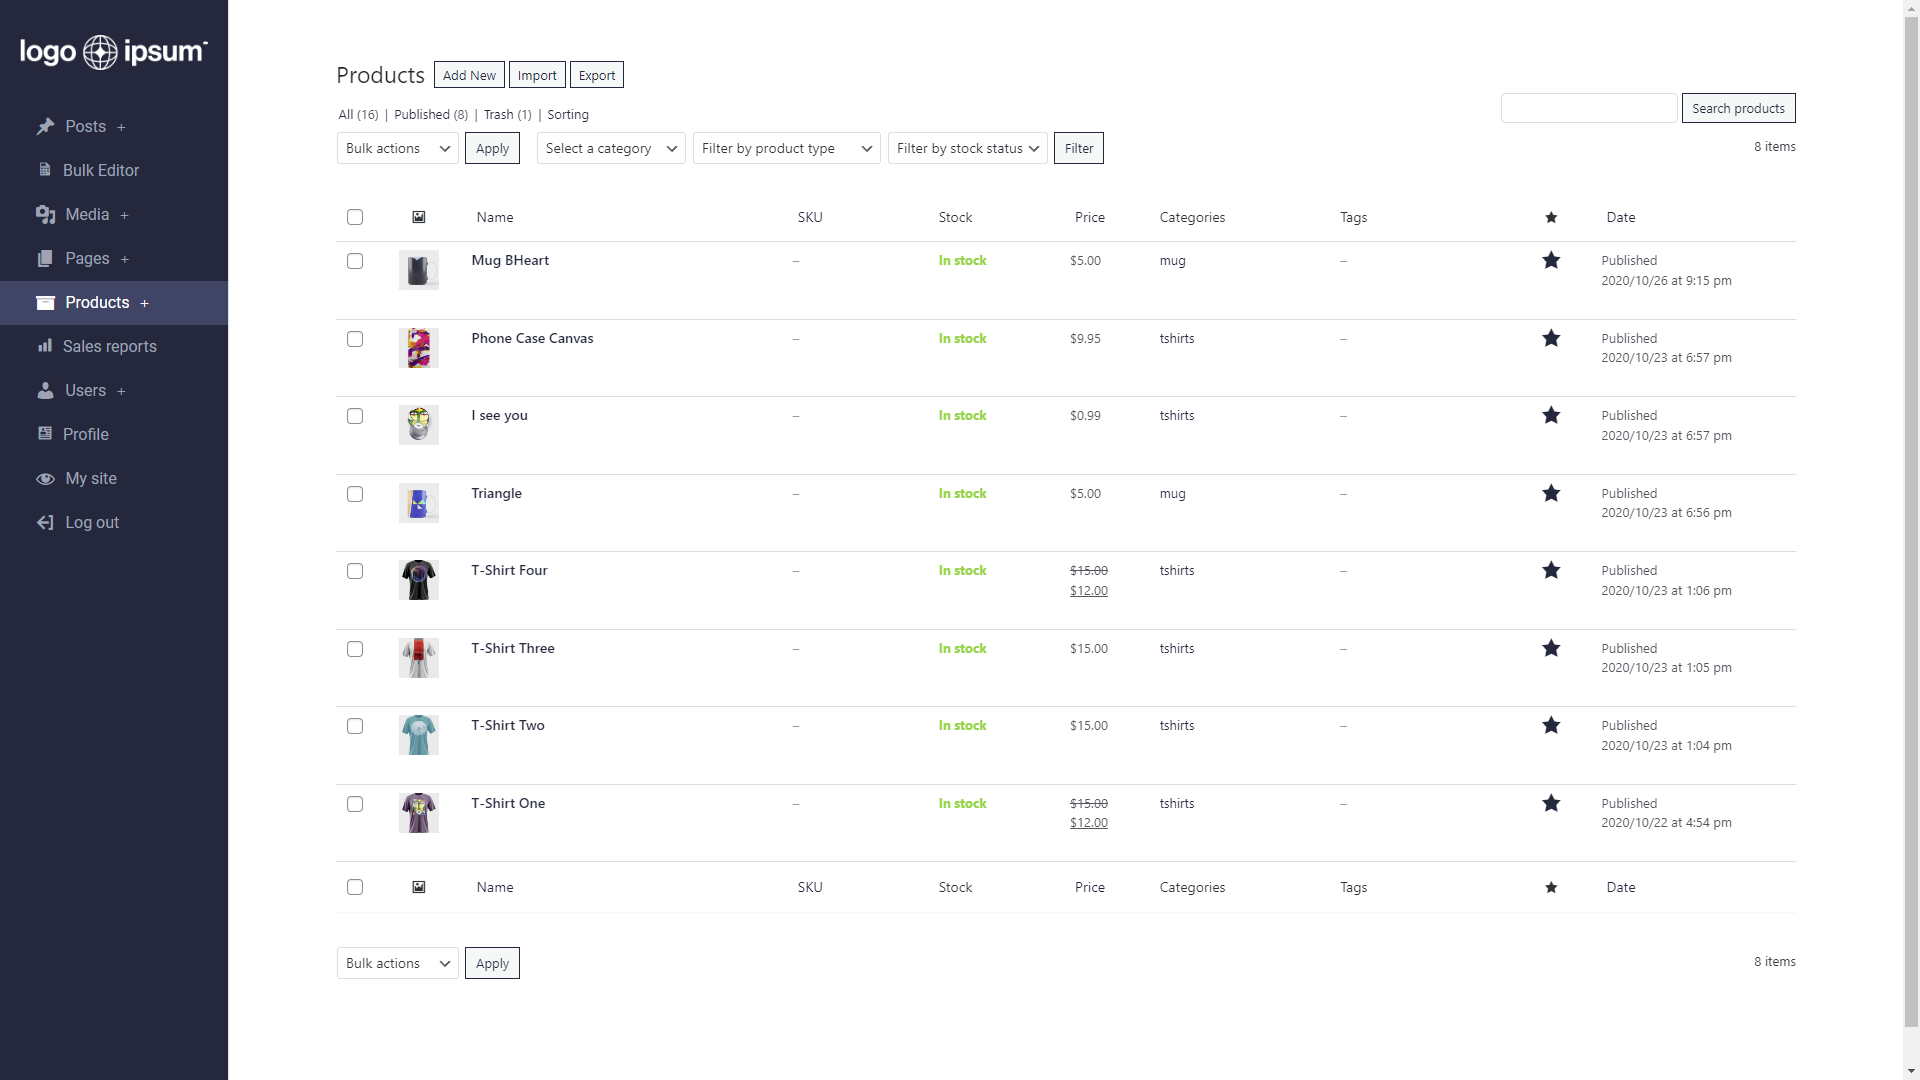
By default, this is what your WooCommerce shop managers see when they log in to their accounts on your site:

That’s an ugly, complex, boring, and tedious dashboard. It has pages your shop managers don’t actually need to manage products, orders, reports, etc.
That’s why we’ll show you how to display the pages that WooCommerce shop managers use in the WordPress front-end and thus create a beautiful front-end dashboard for shop managers with a few clicks. You won’t need to be an experienced programmer or developer. You don’t need to write a single line of code. We will do everything easily and guide you step by step.
By the end of this tutorial, you’ll have built a frontend dashboard using any of the designs below or using any your own design:
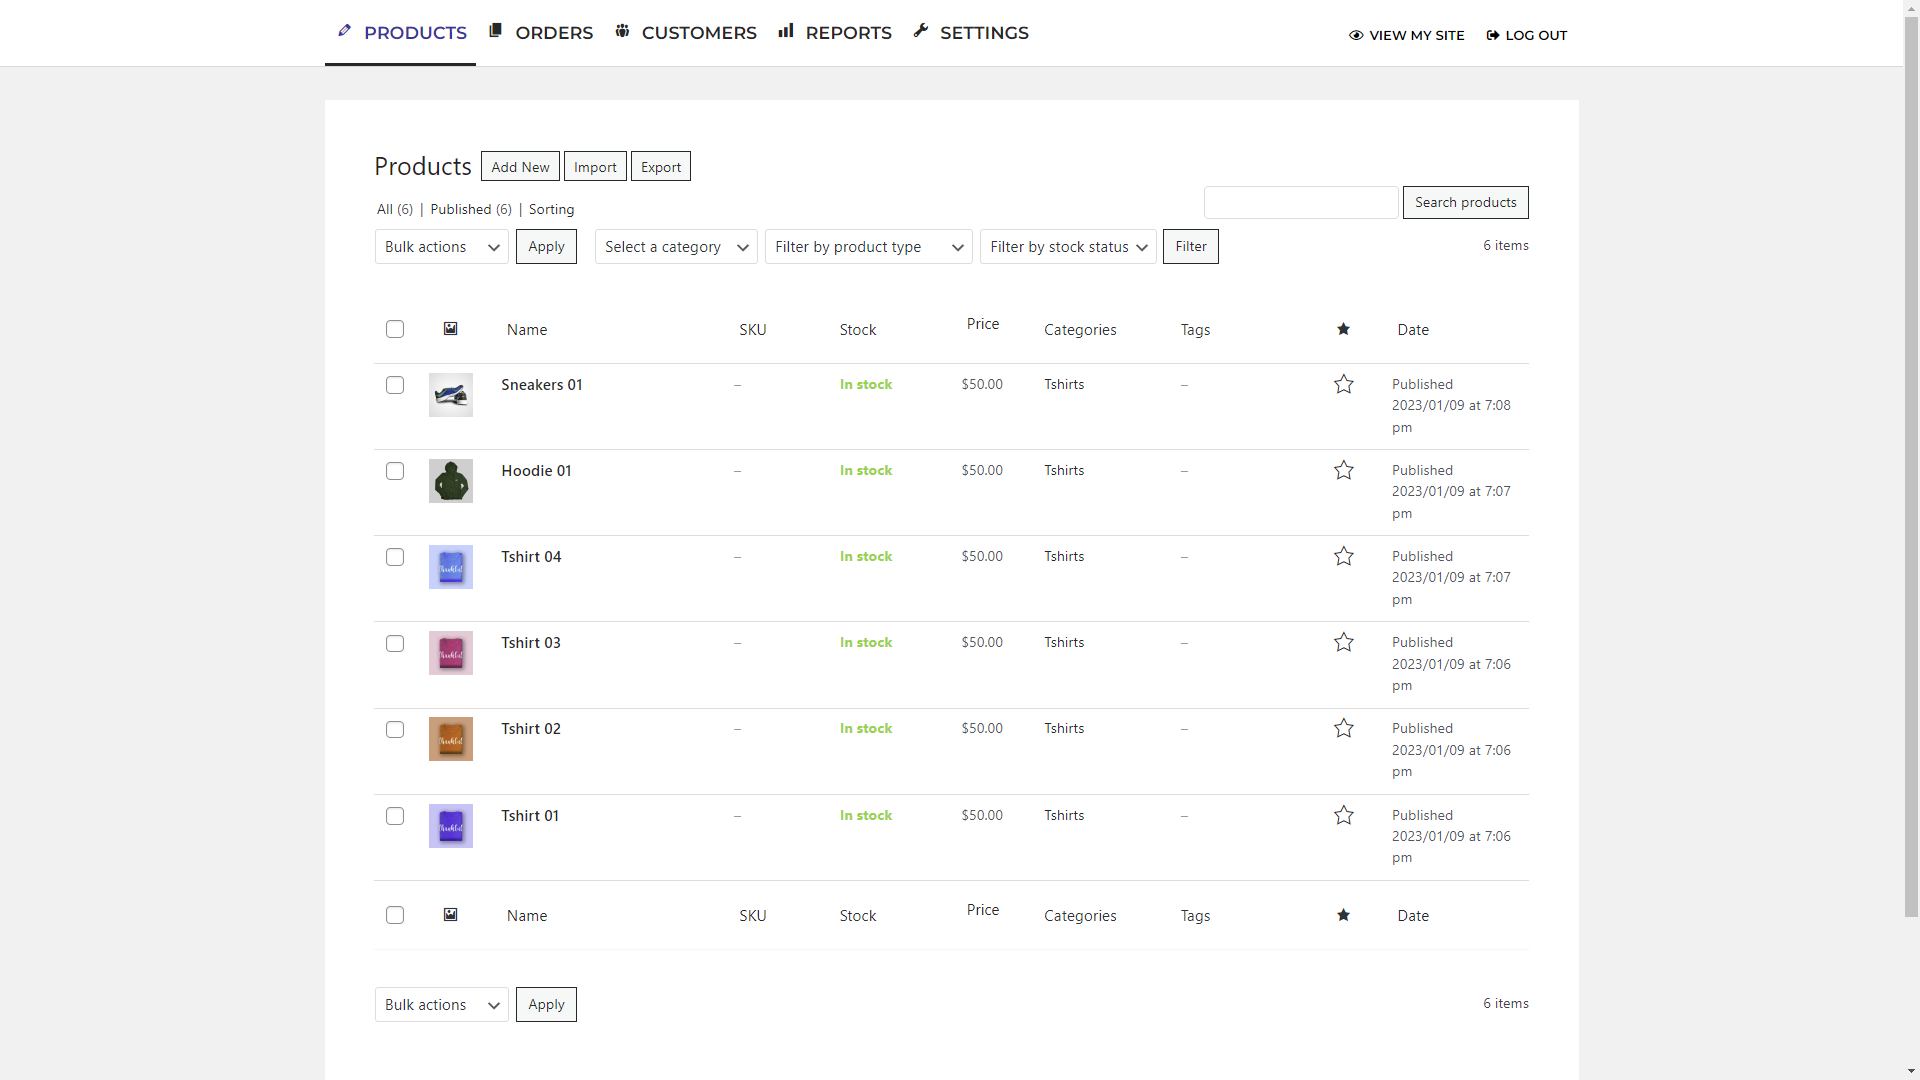
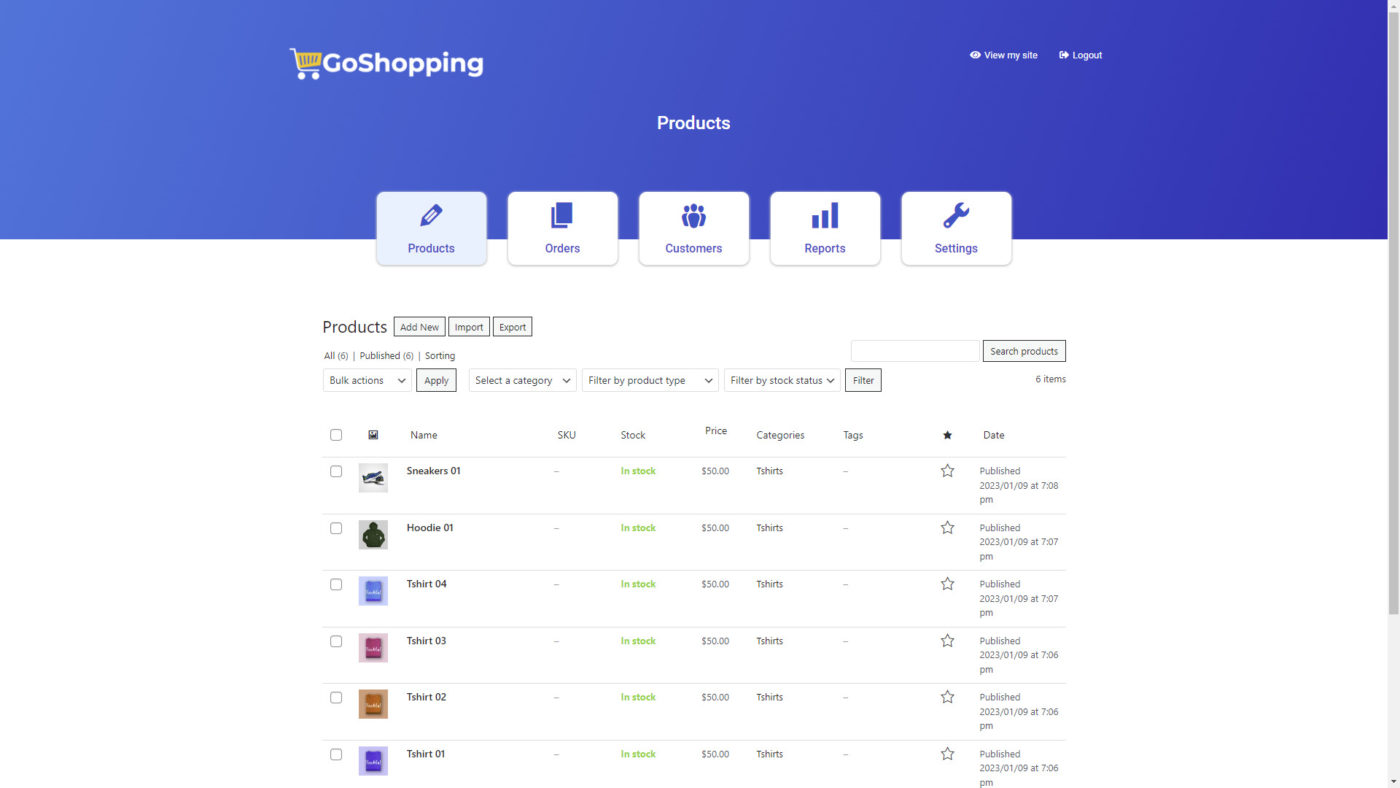

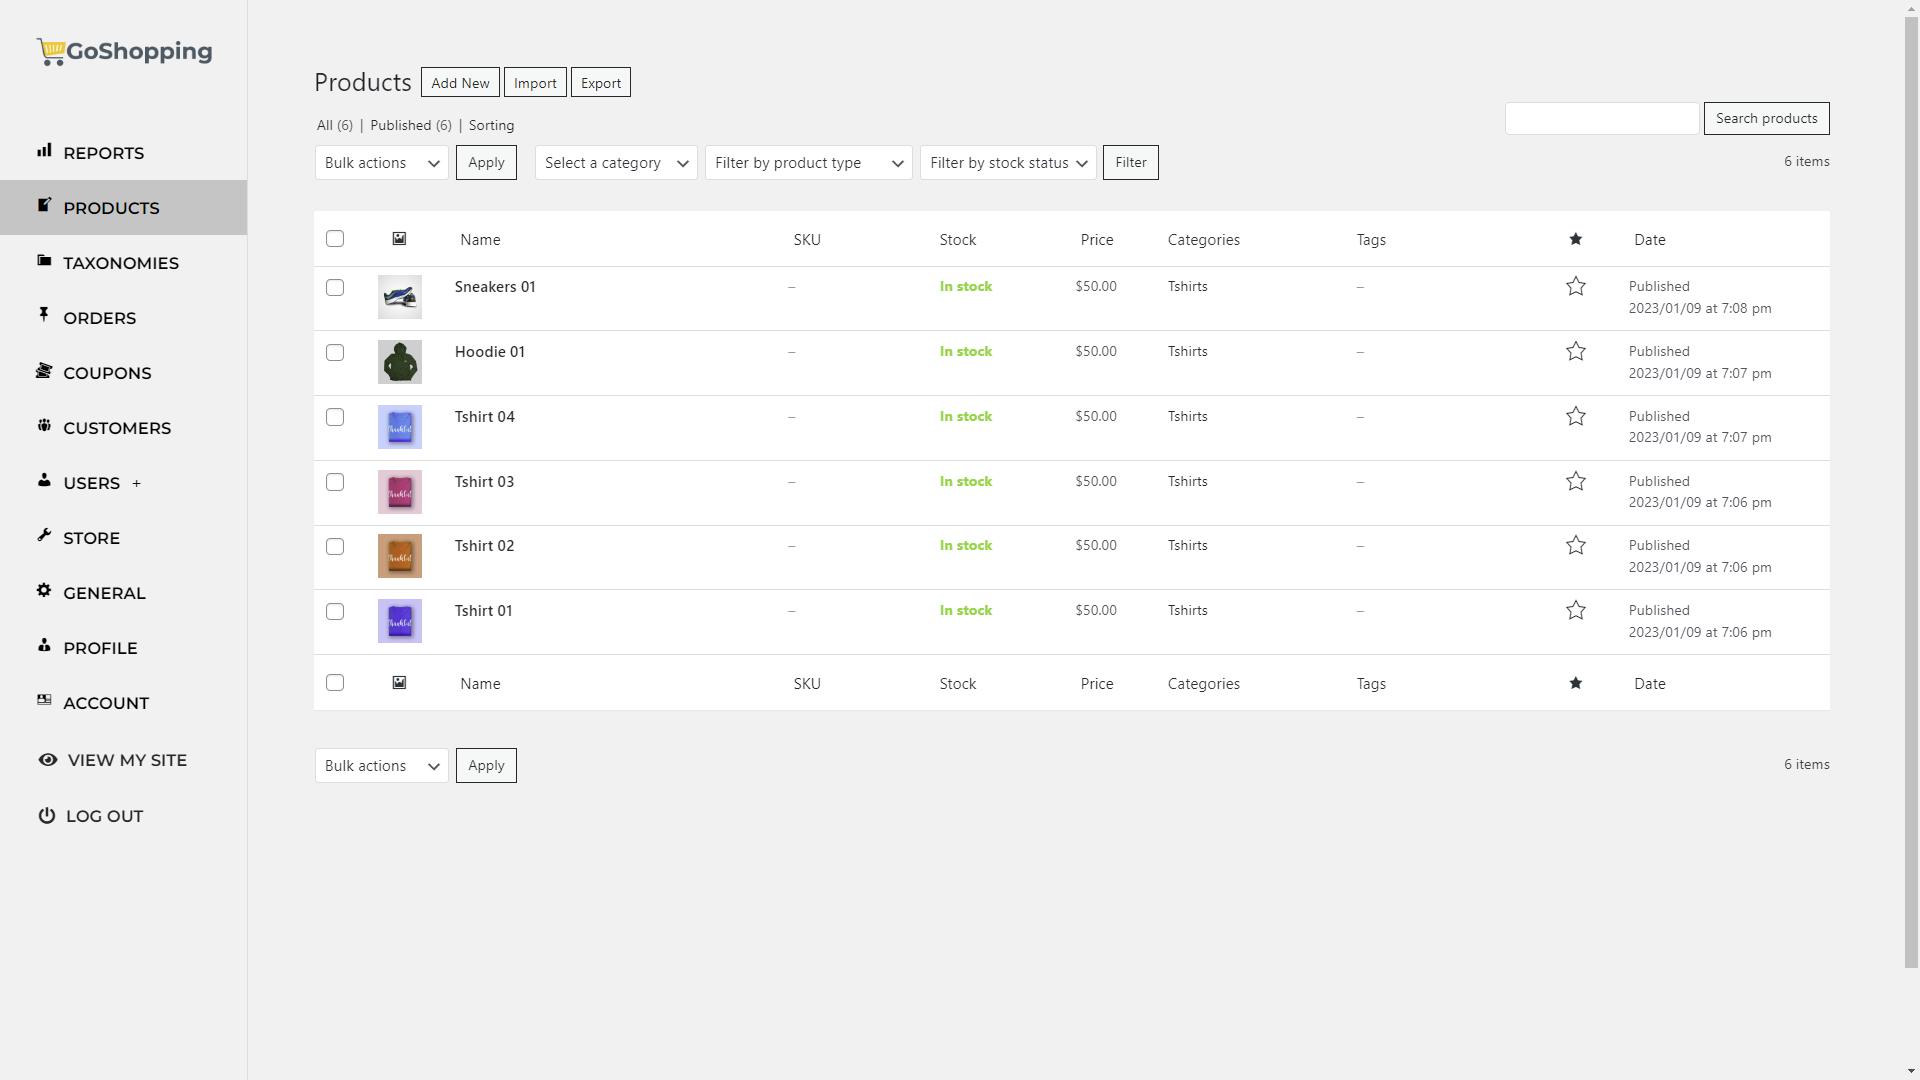
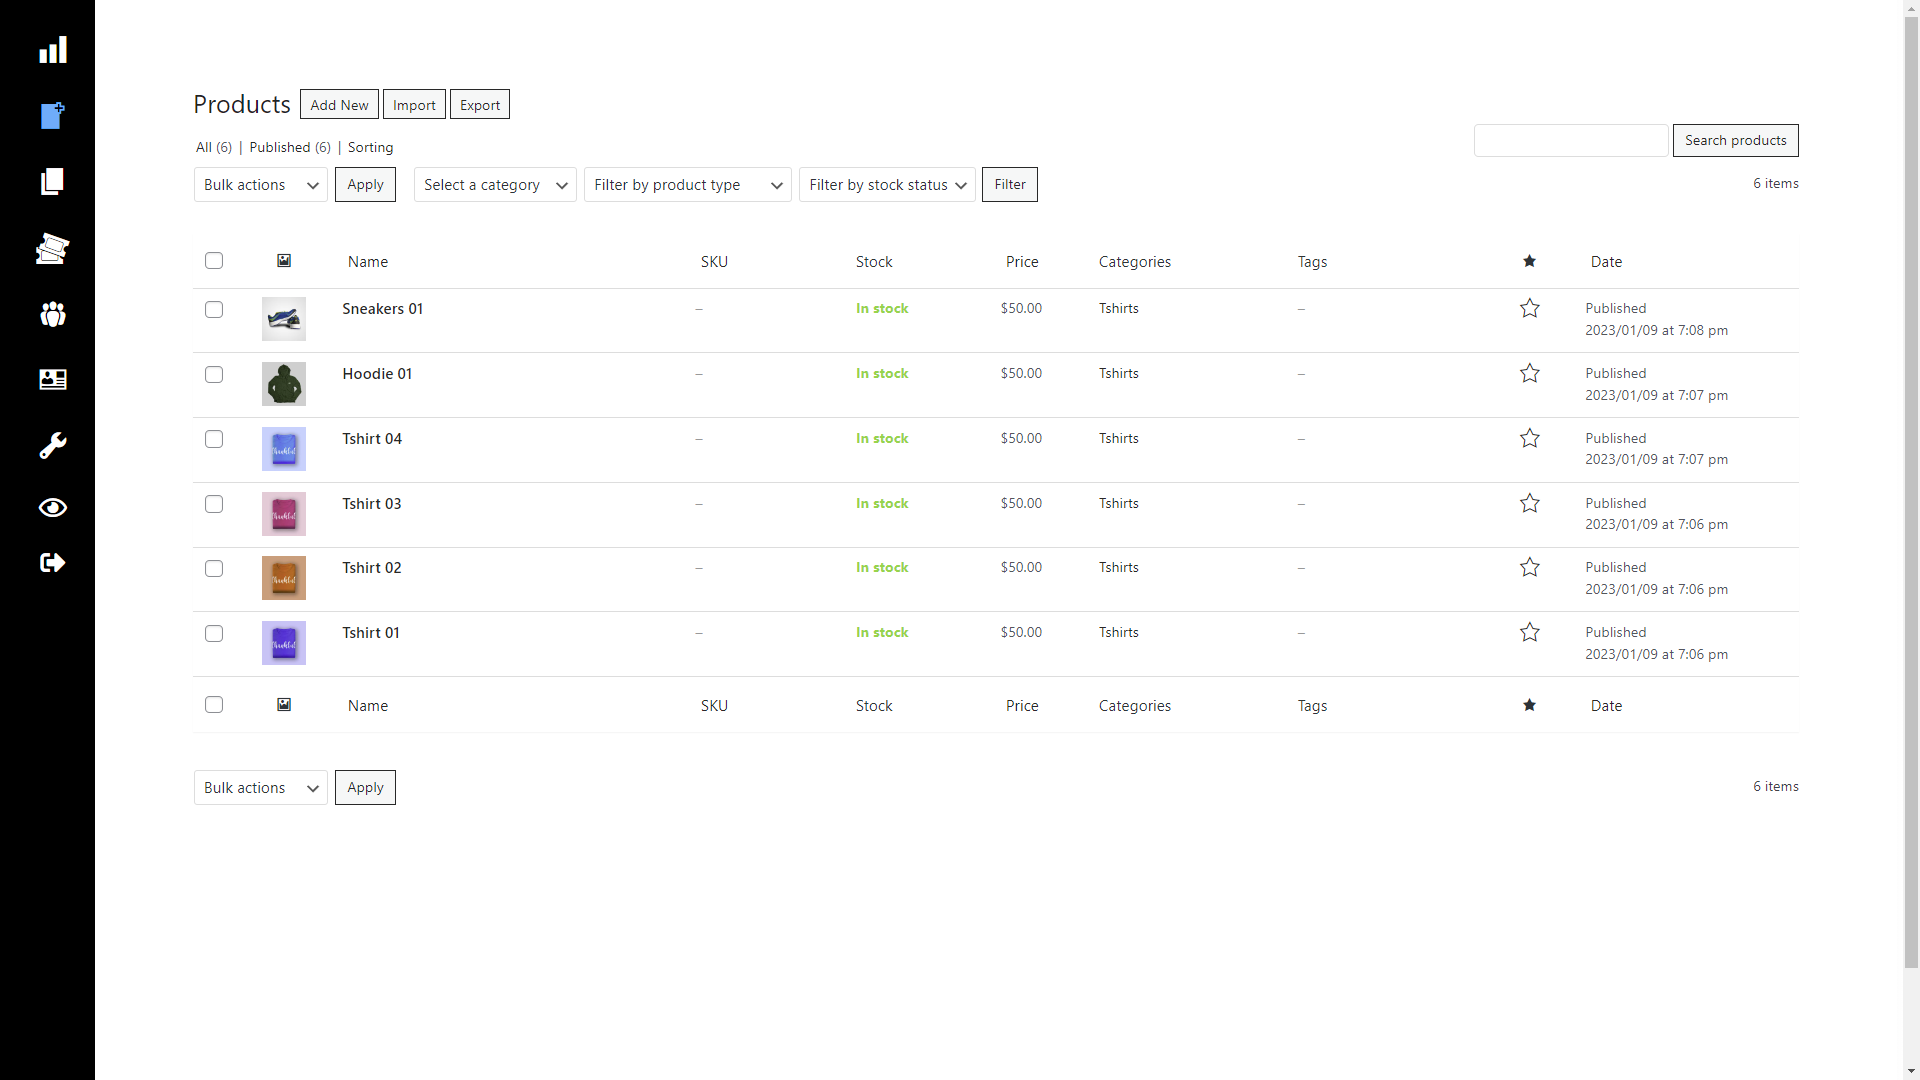
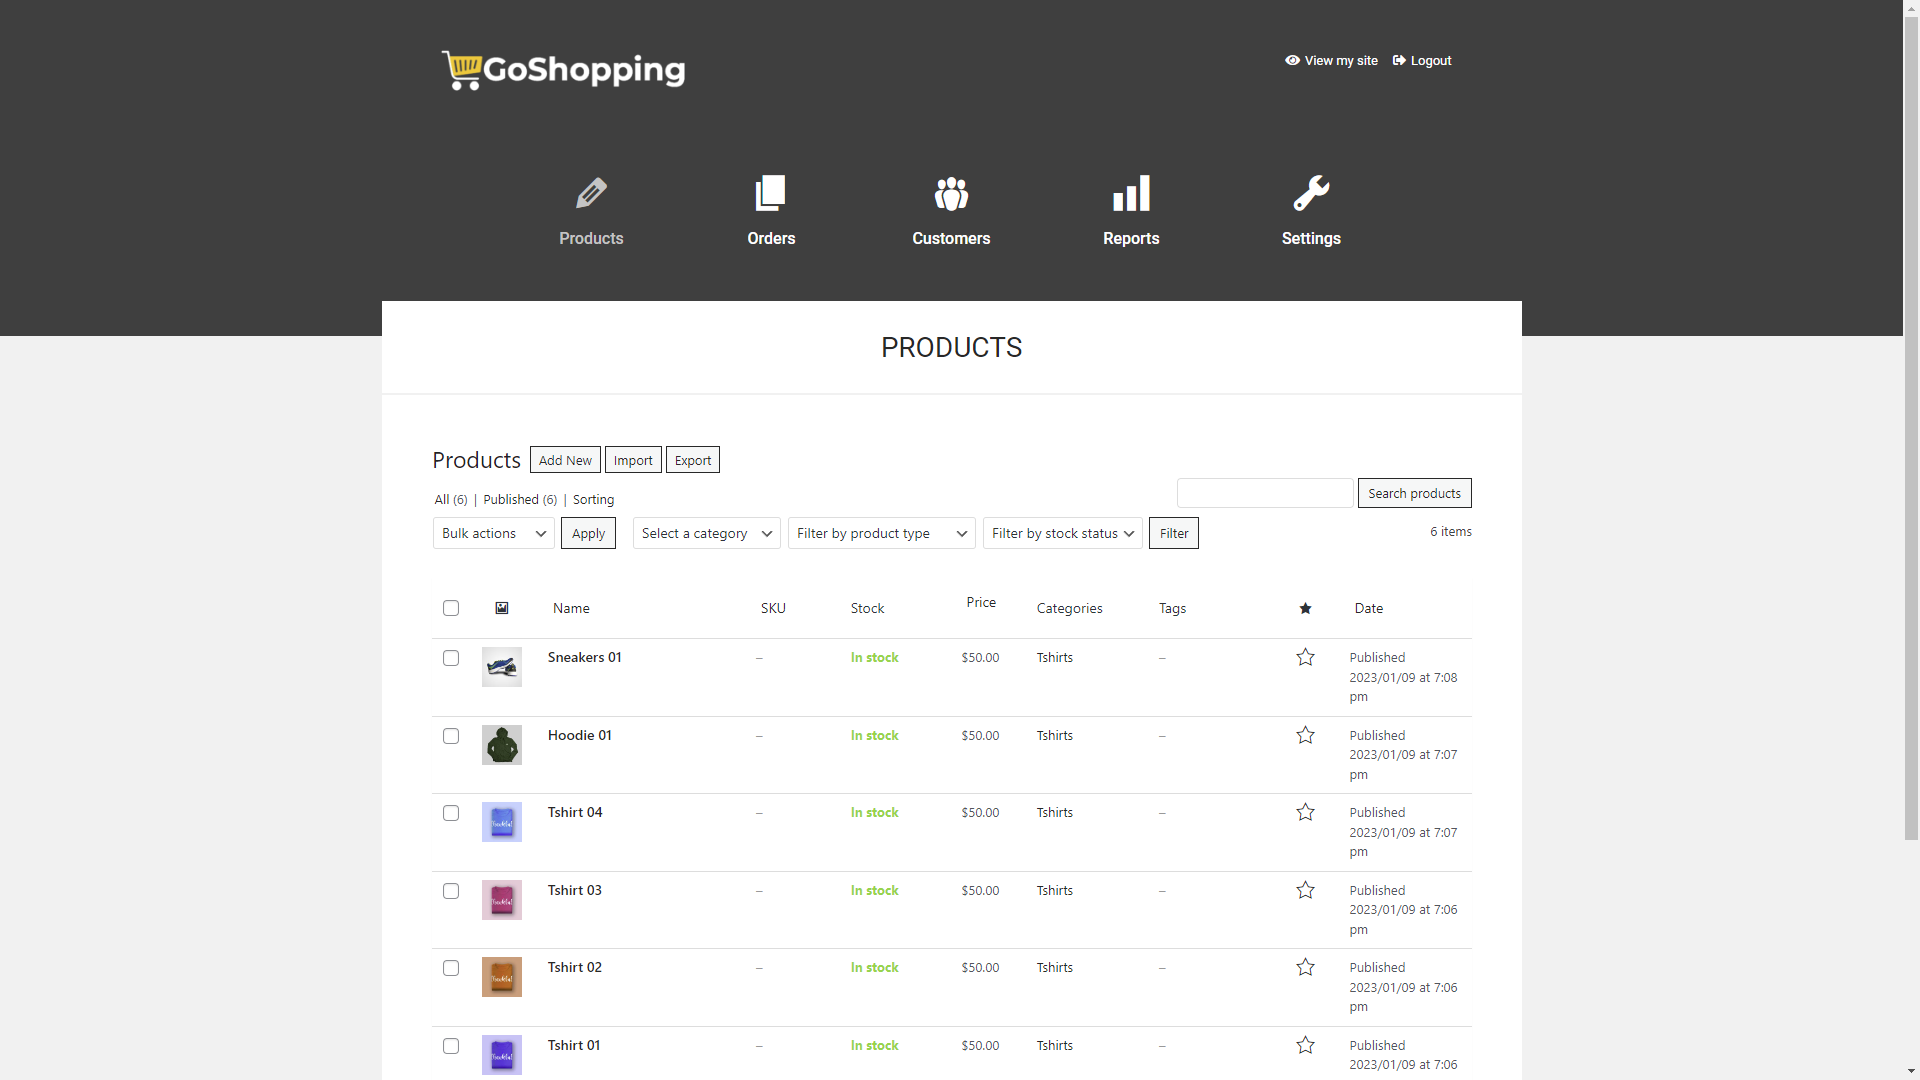


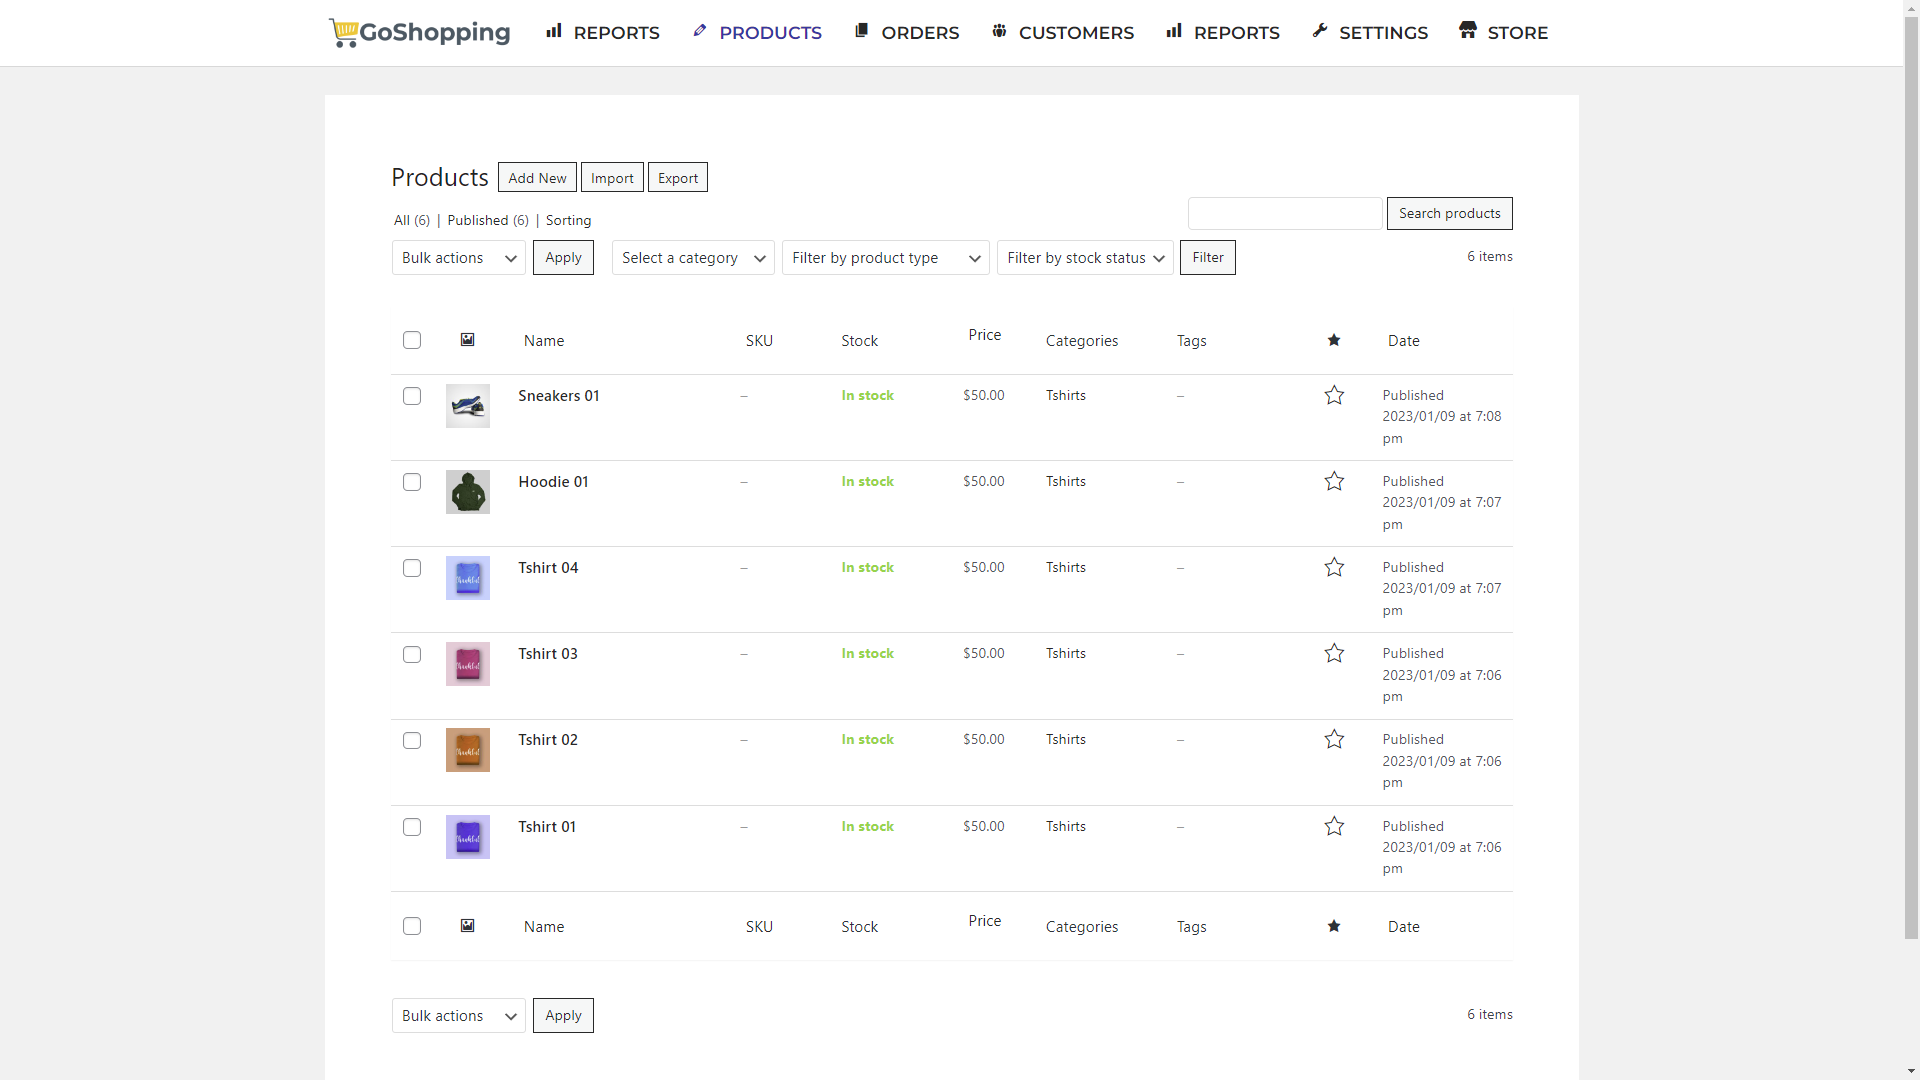
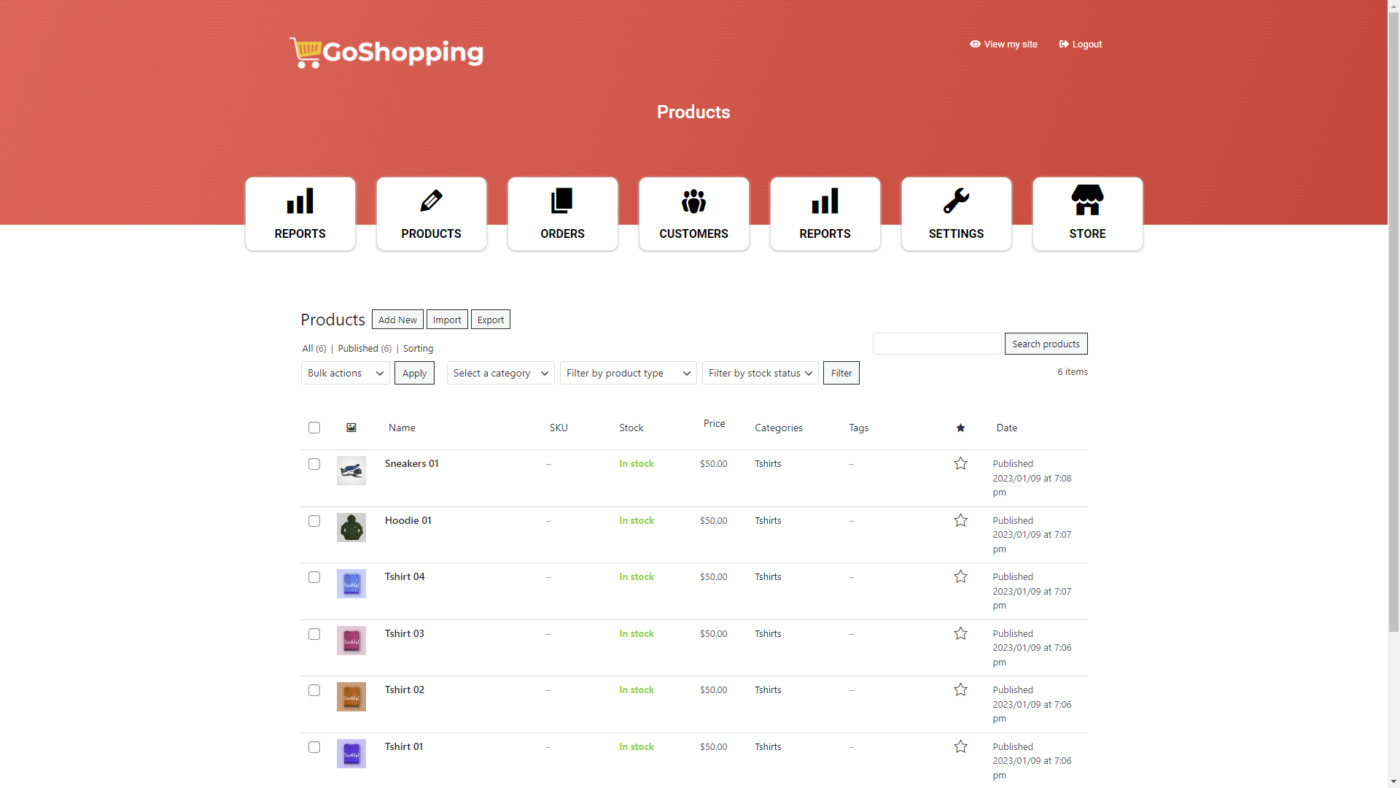
- You can click here to learn more about our frontend dashboard templates.
Why create a dashboard for WooCommerce shop managers
Creating a special dashboard for WooCommerce shop managers can bring you many benefits:
- Create a customized and beautiful interface for WooCommerce shop managers
- Prevent WooCommerce shop managers from having access to other areas of the website that are not their responsibility
- Prevent shop managers from accessing the standard WordPress dashboard (wp-admin)
- Allow shop managers to do their job without distractions from other administration pages.
- Sell your website as an online store service. This is quite special, because you can sell the website as a service to your customers and they will have access only to the administration pages they need to create, edit, publish and delete products, view sales reports, set up payment methods, set up shipping zones, view and ship orders, etc. And all this will be done in the frontend of the WordPress site!
Plugins for building a front-end dashboard for WooCommerce shop managers
In addition to WooCommerce, you need to install and activate the WP Frontend Admin plugin on your WordPress site.
This plugin allows you to display any wp-admin page on the front-end of your site.
You can create front-end dashboards for web platforms and applications, create web apps based on WordPress plugins, and build any kind of custom WordPress interface.
You can try the premium plugin on your website for free for 7 days.
Note. Besides these two plugins, you’ll need these free plugins:
- Elementor
- Elementor Header & Footer Builder
- JetSticky for Elementor
- Shortcode in Menus
- WP Menu Icons or Menu Icons by ThemeIsle
But you’ll be able to install and activate them all with one click using the Frontend Dashboard Template Wizard that comes with WP Frontend Admin.
In this tutorial, we will show you two ways to build your front-end dashboard: Manually and automatically.
Build a frontend dashboard for shop managers manually
If you want to create the frontend dashboard using your own design, you will need to create the frontend pages one by one.
You have two options for this:
Option 1: Display any wp-admin page on the front-end with one click
This option is useful if you want to create the front-end dashboard pages using your website design. It works with any WordPress theme.
- Go to any wp-admin page (Products > Add New, for example)
- Click on View on the frontend.

Now you’ll see the admin page on the frontend, and you need to use the Quick settings panel to set up your frontend page.

This panel allows you to:
- Add a page title and URL slug
- Assign a page template
- Add the page to a nav menu
- Hide any unnecessary elements
- Edit texts on this page
- And more
To keep in mind: You will need to follow the same steps for every custom dashboard page you want to create.
Option 2: Display any wp-admin page on the frontend, using a shortcode
This option is perfect if you’re using any page builder (Elementor, Beaver Builder, Brizy, SiteOrigin, Zion, Oxygen, etc.) and want to create a custom design to display your WooCommerce admin pages on the frontend.
You need to follow these steps:
- Create a page using your preferred page builder
- Add the following shortcode where you want to display the admin page:
[vg_display_admin_page page_url="wp-admin URL"]
- Make sure you replace the text between the quotations wieh the URL of the wp-admin page you want to display on the front-end. You can add full URLs or relative URLs. For example, you can replace the text between the quotations this way to display the WooCommerce Products page on the frontend:
[vg_display_admin_page page_url="edit.php?post_type=product"]
- Click on Preview to display the page on the front-end, and then you can use the Quick Settings panel to set up your page.
Build a frontend dashboard for store owners easily
Let’s see how to create a front-end dashboard for WooCommerce shop managers with a few clicks using our front-end dashboard templates.
Our frontend dashboard template wizard is the easiest way to build a frontend dashboard for WordPress.
It saves you hours of work since it allows you to:
- Install and activate all the plugins you need with one click
- Select the frontend dashboard template you want with one click
- Select and create all the frontend dashboard pages with one click
- Add a special navigation menu for your front-end dashboard with one click
- Add menu icons to make the front-end dashboard more intuitive
- Add buttons for users to log out and view their site automatically
Step 1. Open the template wizard
Go to WP Frontend Admin > Template wizard.
You’ll see welcome step that will let you know what the template wizard can do.
If you click on Next, you can go on to the next step.

Step 2. Install the plugins
In this step, you will see all the plugins you will need to use our frontend dashboard templates.
You can install and activate them all at once by clicking on Install all plugins. This will take you to the next step.
Optionally, you can install and activate them one at a time by clicking on Install and activate for each plugin.

Step 3. Select the dashboard template you want to use
In this step, you need to select the dashboard template you want to use for your custom dashboard for WooCommerce store managers.
In this example, we will use the Template 1 design. Clicking on Select template will take us to the next step.

Step 4. Select the pages you’ll add to the front-end dashboard
The wizard will display a list of each page that is available in your wp-admin dashboard. If you only have WooCommerce installed, it will show you all the standard WordPress admin pages plus all the WooCommerce admin pages. But if you have other plugins installed, it will also show you the admin pages of those plugins in the list. The wizard will show as many pages as are available in your backend dashboard.
In this case, however, we are interested in adding the WooCommerce pages to our custom dashboard for shop managers.
So we will mark the WooCommerce pages that we want to be accessible from the frontend for users who have the shop manager role.
In this case, we will select these pages:
- Orders
- Customers
- Coupons
- Reports
- Settings
- Products
- Categories
- Tags
- Attributes
- Reviews
- Pages from the WooCommerce analytics section
- Pages from the WooCommerce marketing section
Once you’ve selected all the pages you want to add to your frontend dashboard, you can click on Next to start creating the pages.

This process will take some seconds/minutes depending on how many pages you have selected and your server’s speed. Normally it takes some seconds only.
During this process of automatic creation and configuration of the front-end dashboard pages, the plugin will perform the following steps:
- Import the selected template from our API.
- Create each front-end page you have selected, and assign parent pages and child pages as they are organized in the normal WordPress dashboard.
- Create a special navigation menu for the frontend dashboard.
- Arrange the navigation menu by adding the parent pages as main items and the child pages as sub items.
- Add icons to the main menu items.
- Add “View site” and “Logout” buttons to the navigation menu (if the template design requires it) so that shop managers don’t even have to use the top bar of wp-admin for these things.
Once the process has finished, you’ll be able to view the dashboard pages by clicking on Go to pages.

TIP: You can use a plugin for adding categories to WordPress pages and create a category called “Dashboard” and add this category to all the dashboard pages to distinguish the pages of the dashboard from the other site pages. This will help you get more organized. For example, you can use the Pages with category and tag plugin.
Step 5. Customize the front-end dashboard
Now that the front-end dashboard pages have been created, you can customize the dashboard as you want. Here are some additional, optional steps you can take to customize the dashboard as you want.
1- Reorder the pages in the navigation menu. By default, we create the dashboard pages and assign them to a navigation menu that we automatically create called “Dashboard”. The order of the pages is the same order they have in the normal WordPress menu. The main pages will be parent pages and the child pages will be child pages. If you don’t like how we have automatically ordered the navigation menu, you can arrange it however you like. Go to Appearance > Menus and rearrange the items to your liking.
2. Change the navigation menu icons. By default, we assign menu icons automatically, taking into account the icon they have in the normal wp-admin dashboard. But if you don’t like the icons and want to change them, you can do it in Appearance > Menus.
3. Hide unnecessary elements and edit the texts of each page. WP Frontend Admin allows you to customize your front-end admin pages by hiding unnecessary elements and changing texts to rename buttons, fields and metaboxes. You can do this using the Quick Settings panel.
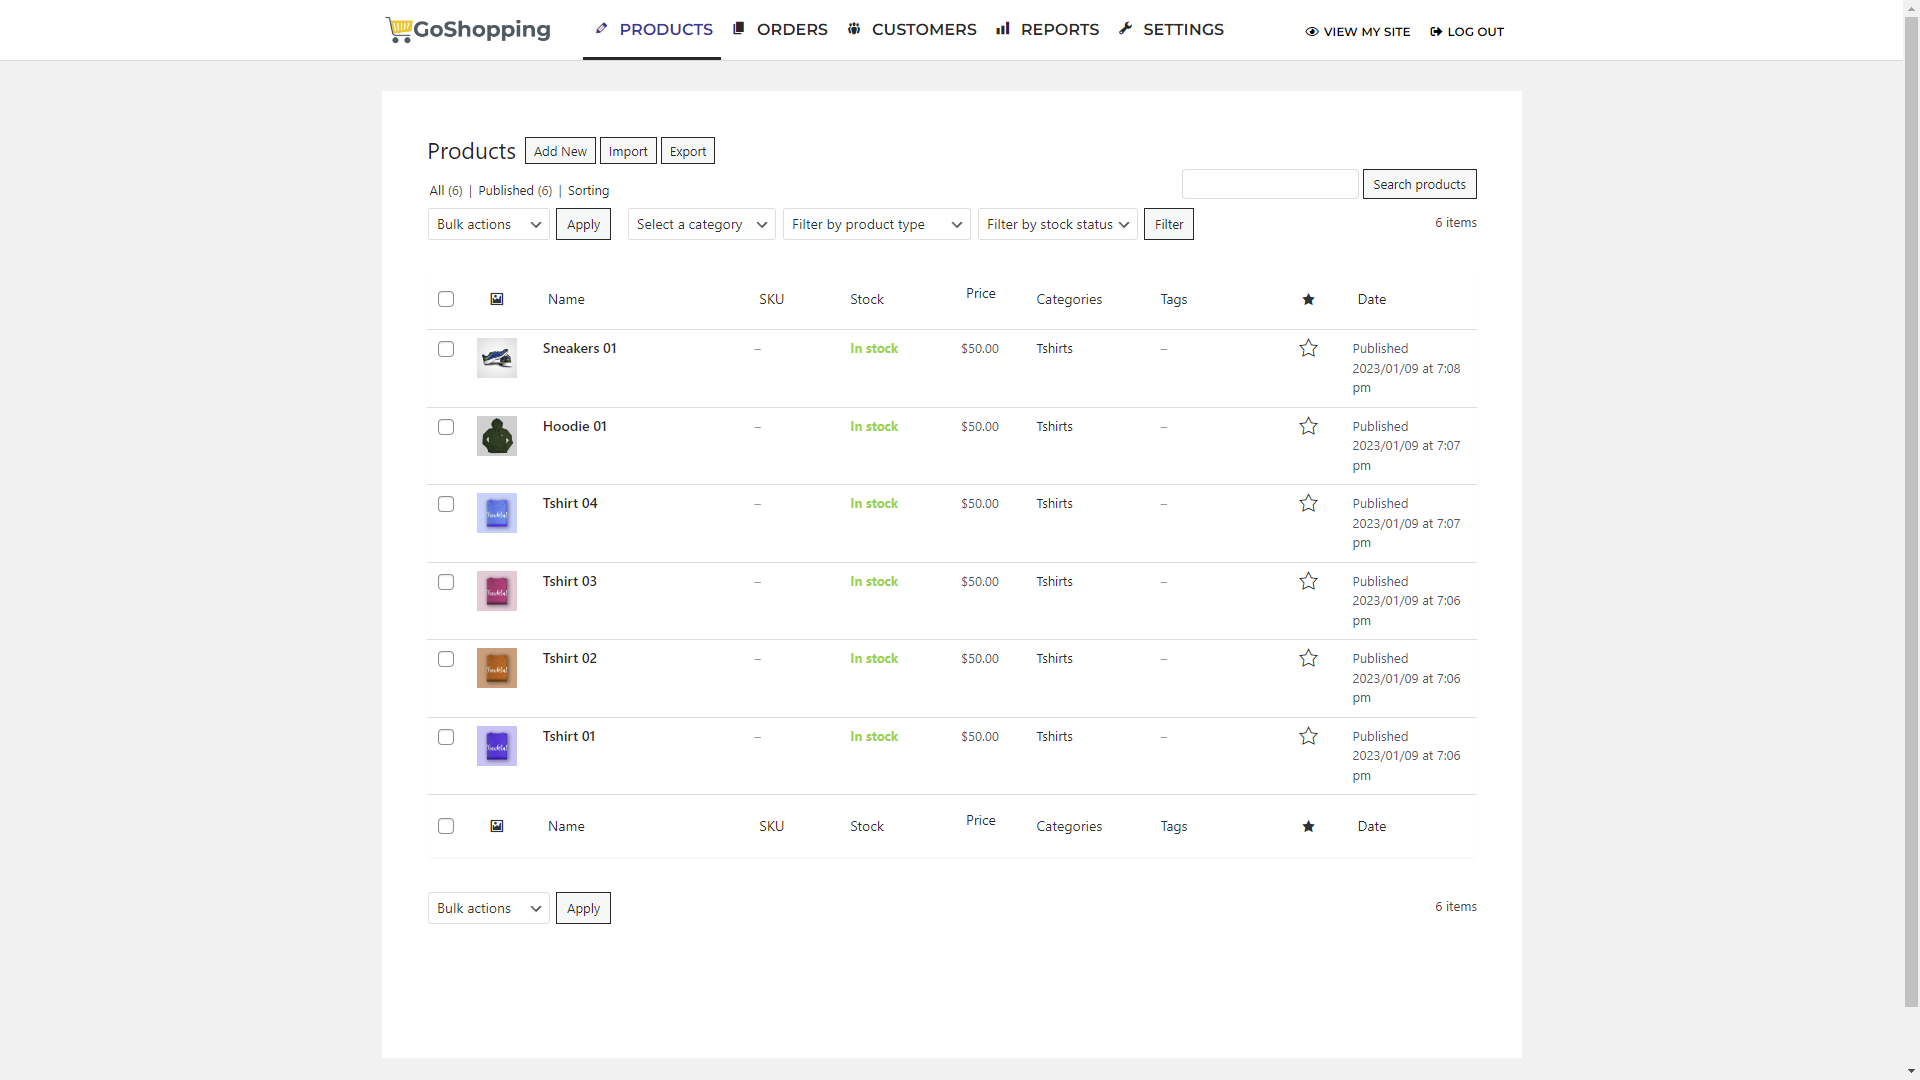
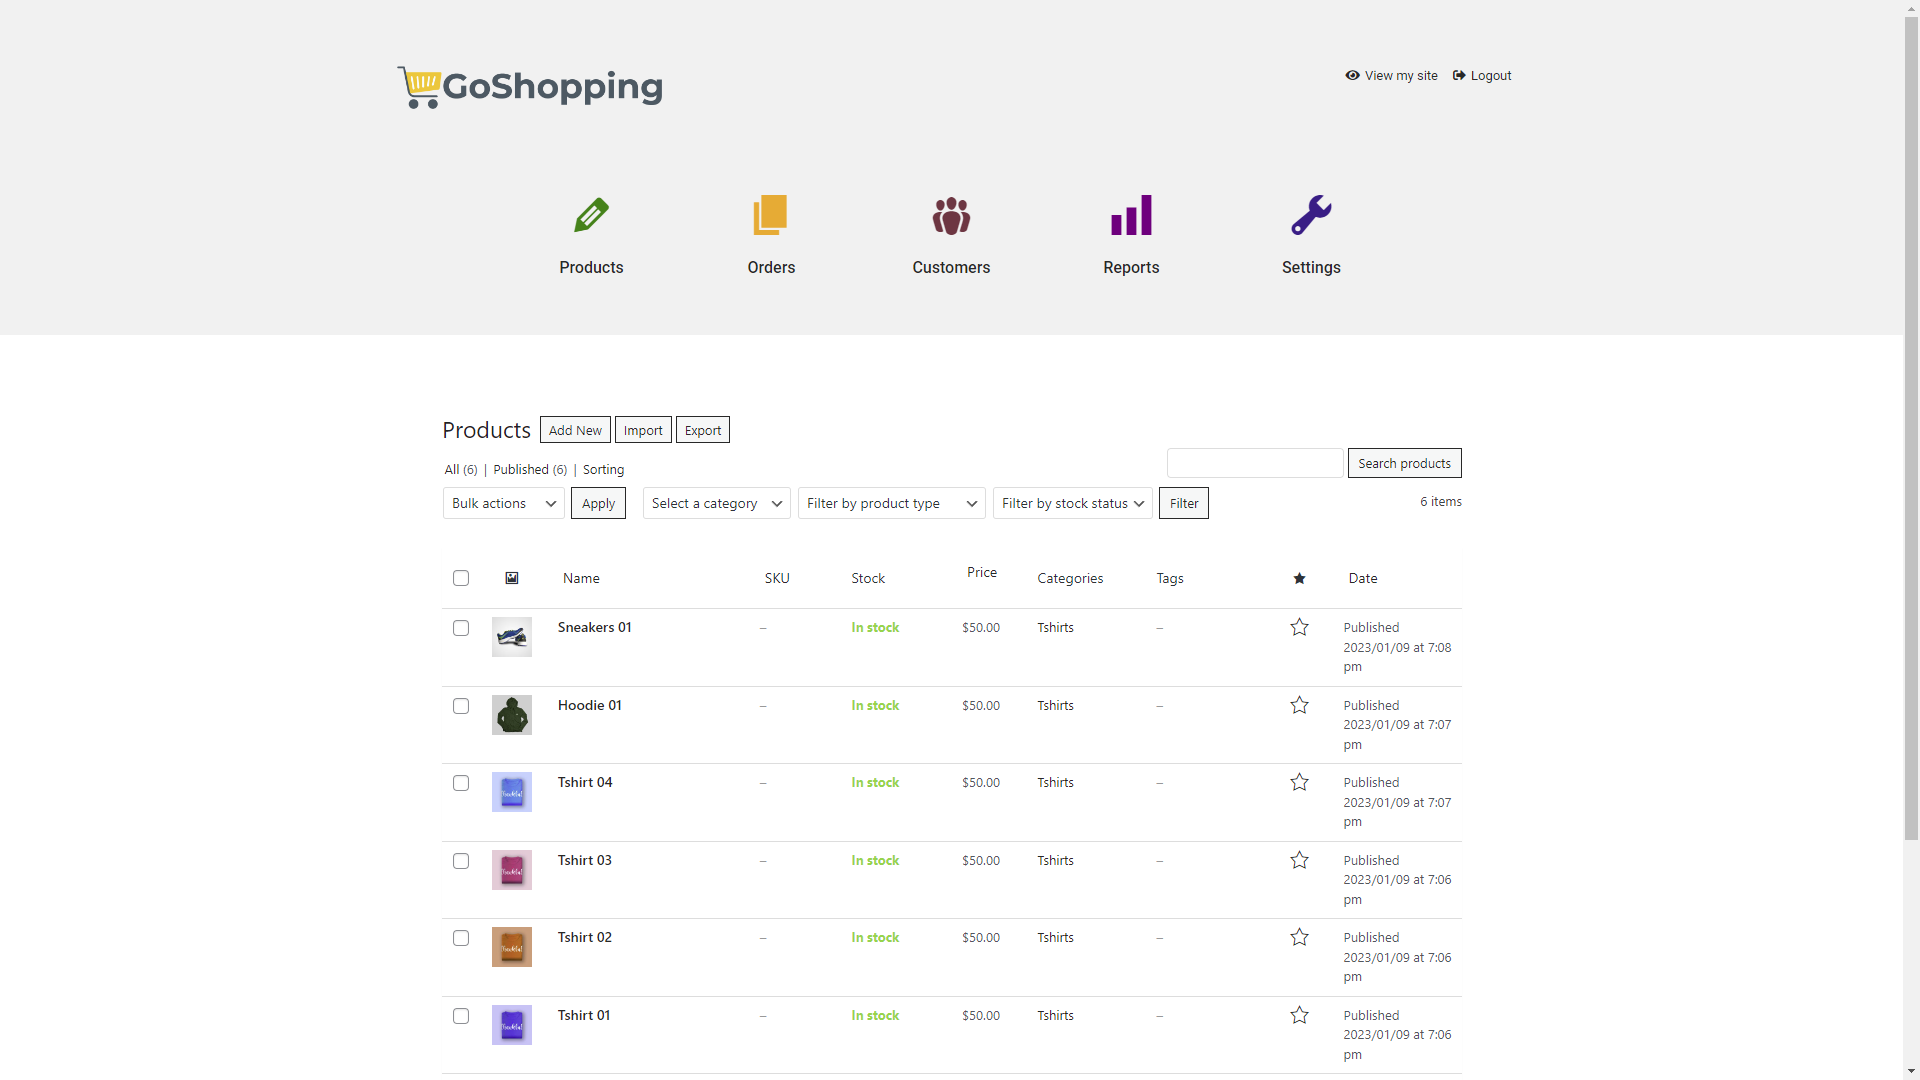
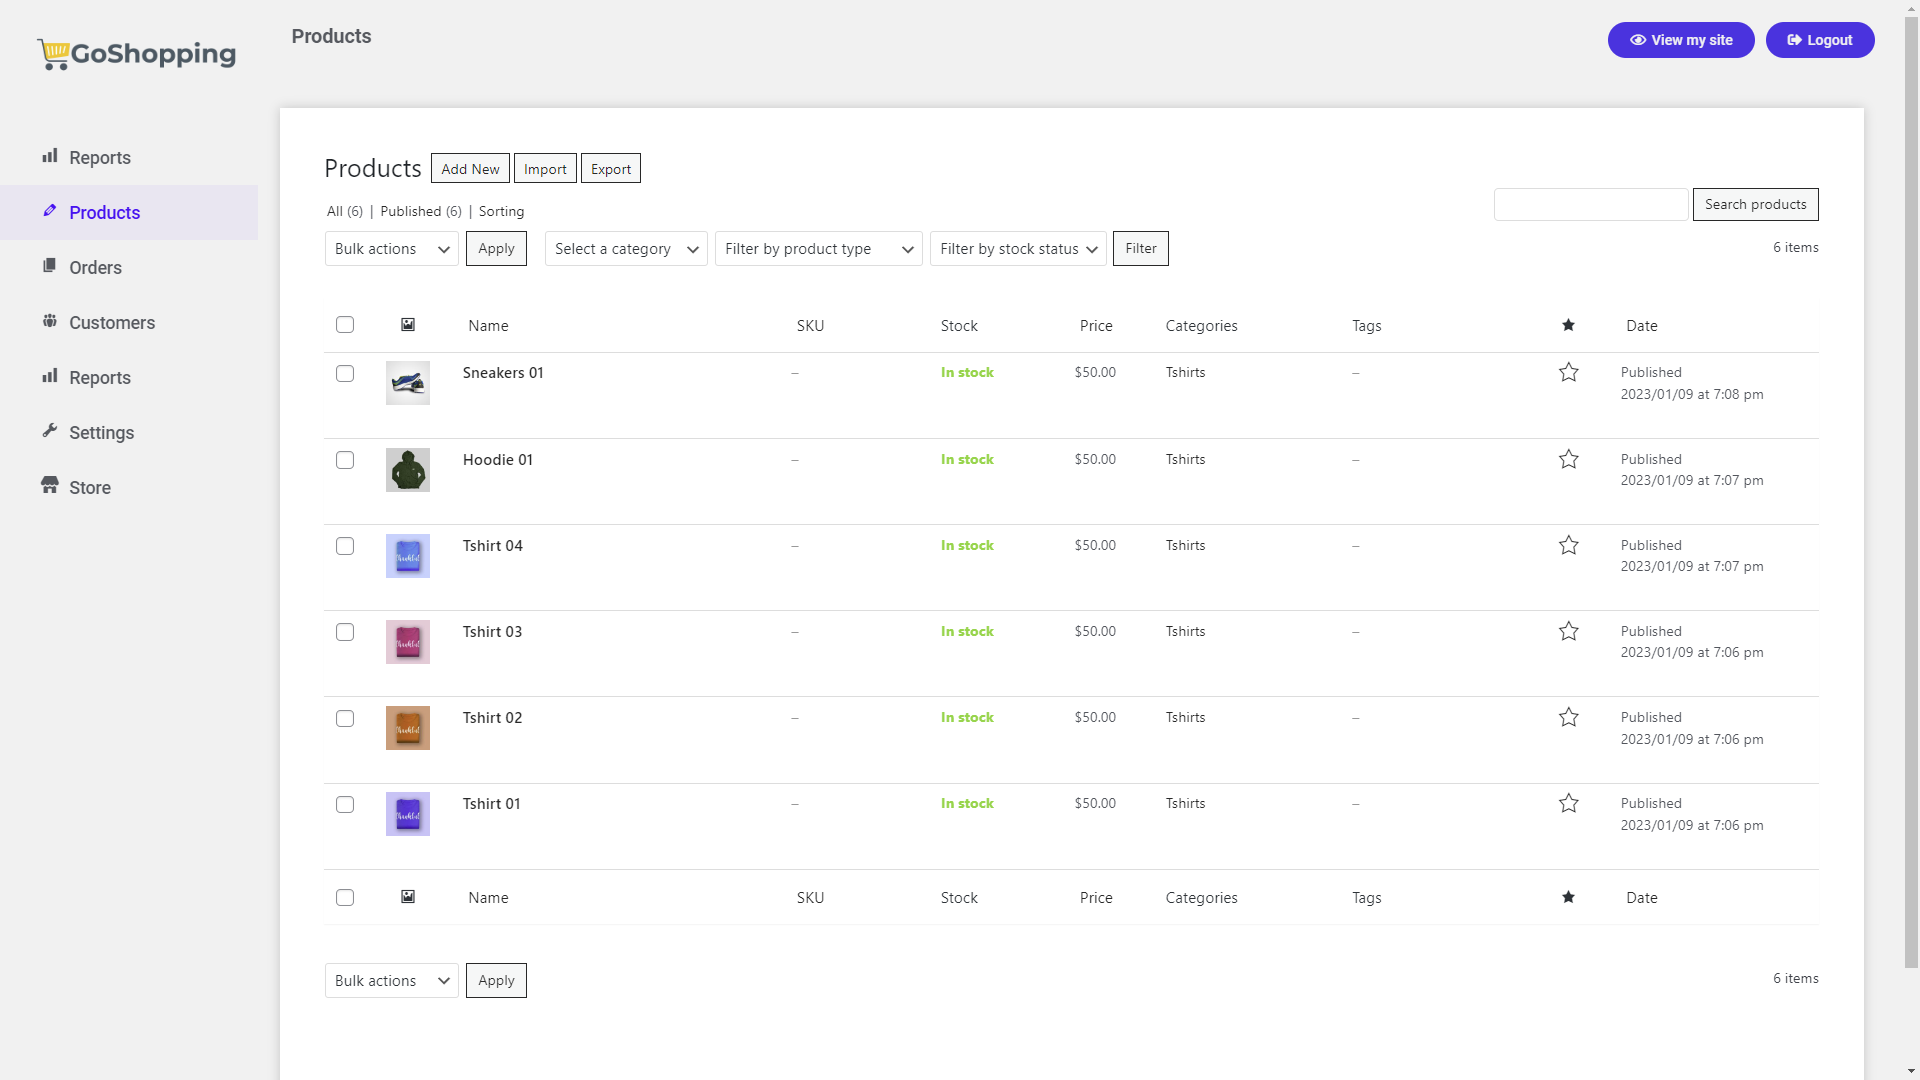
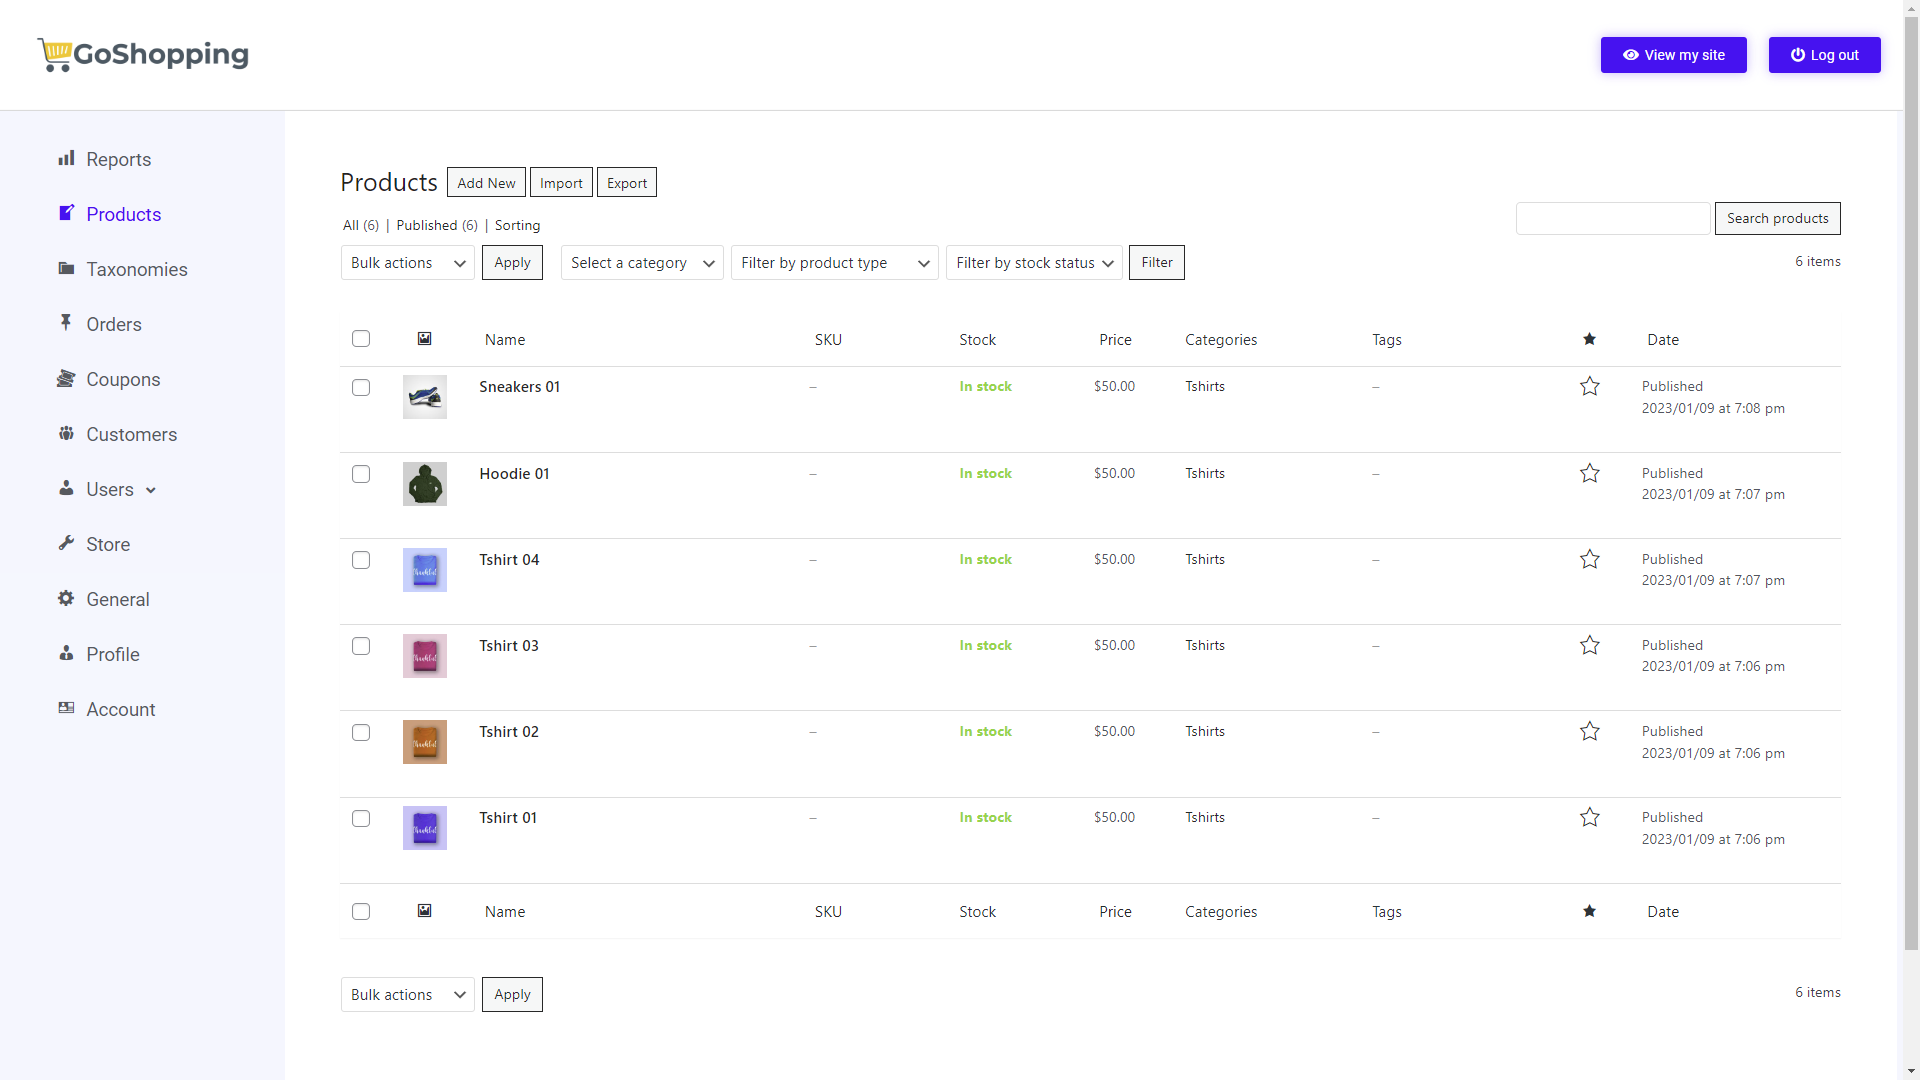
As you can see below, we have applied some of these additional steps, and this is what our front-end WooCommerce dashboard looks like:

Step 6. Set up the “WP Frontend Admin” settings
Now that we have created a frontend dashboard for WooCommerce shop managers, users with the “Shop manager” role will not need access to the normal WordPress dashboard. From now on, we want them to use the frontend dashboard.
Therefore, we are going to block access to wp-admin for shop managers by following these steps:
- Go to Frontend Admin > Settings > Access restrictions
- Tick the Enable access restrictions checkbox
- Access restriction: What wp-admin pages can be viewed on the frontend: Make sure the URLs of the wp-admin pages you’ve added to the frontend dashboard are in this field.
- Access restriction: Who can access the wp-admin dashboard: You can use this field to ensure that administrators will have access to the normal wp-admin dashboard. For this, you need to select the “manage_options” capability.
- Access restriction: Frontend dashboard URL: When the store managers log into your WordPress site, they will be redirected to the frontend dashboard URL instead of going to wp-admin. You can enter the URL of the frontend page you want the dashboard managers to be redirected to in this field.

Now scroll down and add “shop_manager” in the “These user roles will use the frontend dashboard” field.

Once you’re done, you need to save the changes.
Step 7. Optional: Create a custom login page
If you want to further customize your shop managers’ experience, you can create a custom login page for your WordPress site.
For this you need to create a new page and add this shortcode to the page:
[wp_frontend_admin_login_form]
This shortcode will display the login form.
Once you have published the page, you can go to Frontend Admin > Settings > Login and paste the URL of the page in the Login Page URL field.

Once you’re done, you can save the changes.
Step 8. Optional: Add a link to the frontend dashboard to your primary menu
One last step we suggest to complete your frontend dashbard for WooCommerce shop managers is to add a link to your frontend dashboard homepage to your site.
For this you can use the User Menus plugin, which allows you to add conditional visibility to your WordPress navigation menu items.
You need to edit the main menu of your website and add a link to the main page of the frontend dashboard.
In this case, we are going to add the Products page to the primary menu of our website and rename it to “Dashboard”.
We will enable conditional visibility so that only shop managers can see this link on the site:
- Who can see this link: Select Logged in users.
- Select the Choose which roles can see this link option.
- Tick the Shop manager user role.
- Save the changes when you’re done.

This is what our link to the frontend dashboard looks on our site. It’s visible to shop managers only:

Build front-end dashboard and web apps!
Just as you have built a front-end dashboard for your WooCommerce shop managers, WP Frontend Admin allows you to build frontend dashboards and web apps with a few clicks.
You can use it to build web apps based on WordPress plugins, sell your website as a service, and start making money online.
You can try the premium plugin on your website for free for 7 days.


