In this lesson, we will show you how to create a home page for your platform. You’ll be able to show the info you need to encourage them to purchase a membership plan, and they will also see the purchase button to sign up.
One cool thing is that, instead of showing you how to create the page from scratch, we will show you how to use our importable homepage template. Once imported, you can edit the colors, fonts, graphic elements, texts, and add your own touch to the look of your page.
Just follow these simple steps:
1- Open your network’s main site
This page must be created on your network’s main site.
- Go to Network Admin > Sites.
- Open the dashboard of your main site.

2- Import the Elementor homepage template
Now you need to import our homepage template using the Elementor templates system.
After downloading the template:
- Go to Templates > Saved Templates
- Hit Import templates.
- Choose the template from your computer.
- Hit Import Now.

3- Add the template to the homepage
- Go to Pages > Add New.
- Enter the page title and hit Edit with Elementor.

Once you’re in the Elementor page builder:
- Go to Page Settings, and select Elementor Canvas as the page template. Note – If you’ve configured your heme’s settings to show header and footer from the theme, you can select Elementor Full Width instead.

Now you need to hit the Add Template button to import the homepage template to this page.

Once you’re in the Elementor Library, you need to go to My Templates and hit Insert on the Homepage Template.

4- Customize the page with Elementor
Once the template has been imported into the page, you can change colors, fonts, upload your own images, select different icons, add texts, etc.
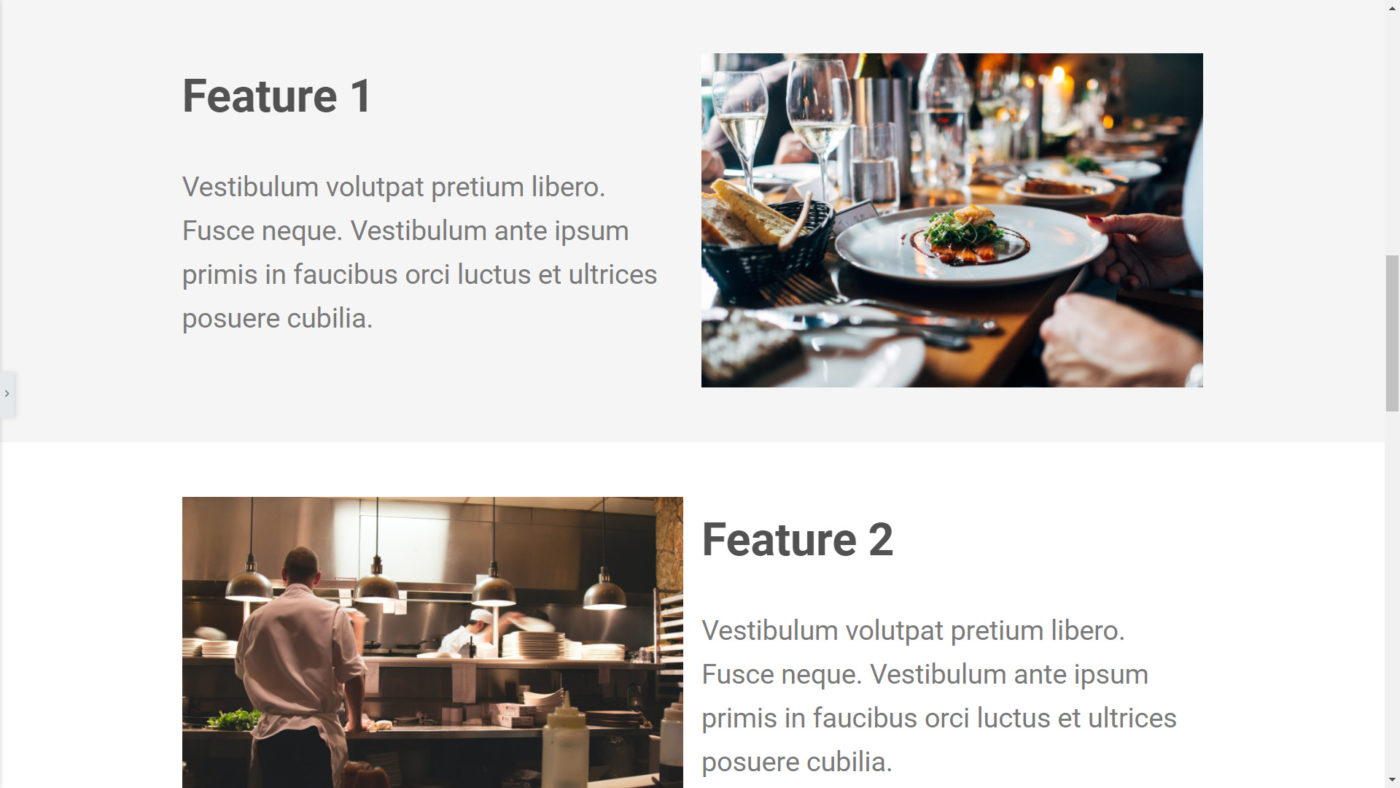
With this template, your users will be able to know the most important features of your restaurant management platform. It includes “Register” and “Log-in” buttons, and space for you to place your logo or a video.

The template contains a section with icons and text where you can add some main settings and benefits you offer to clients.

Besides, the page contains a two-column section where you can explain features in a deeper way by adding images and texts.
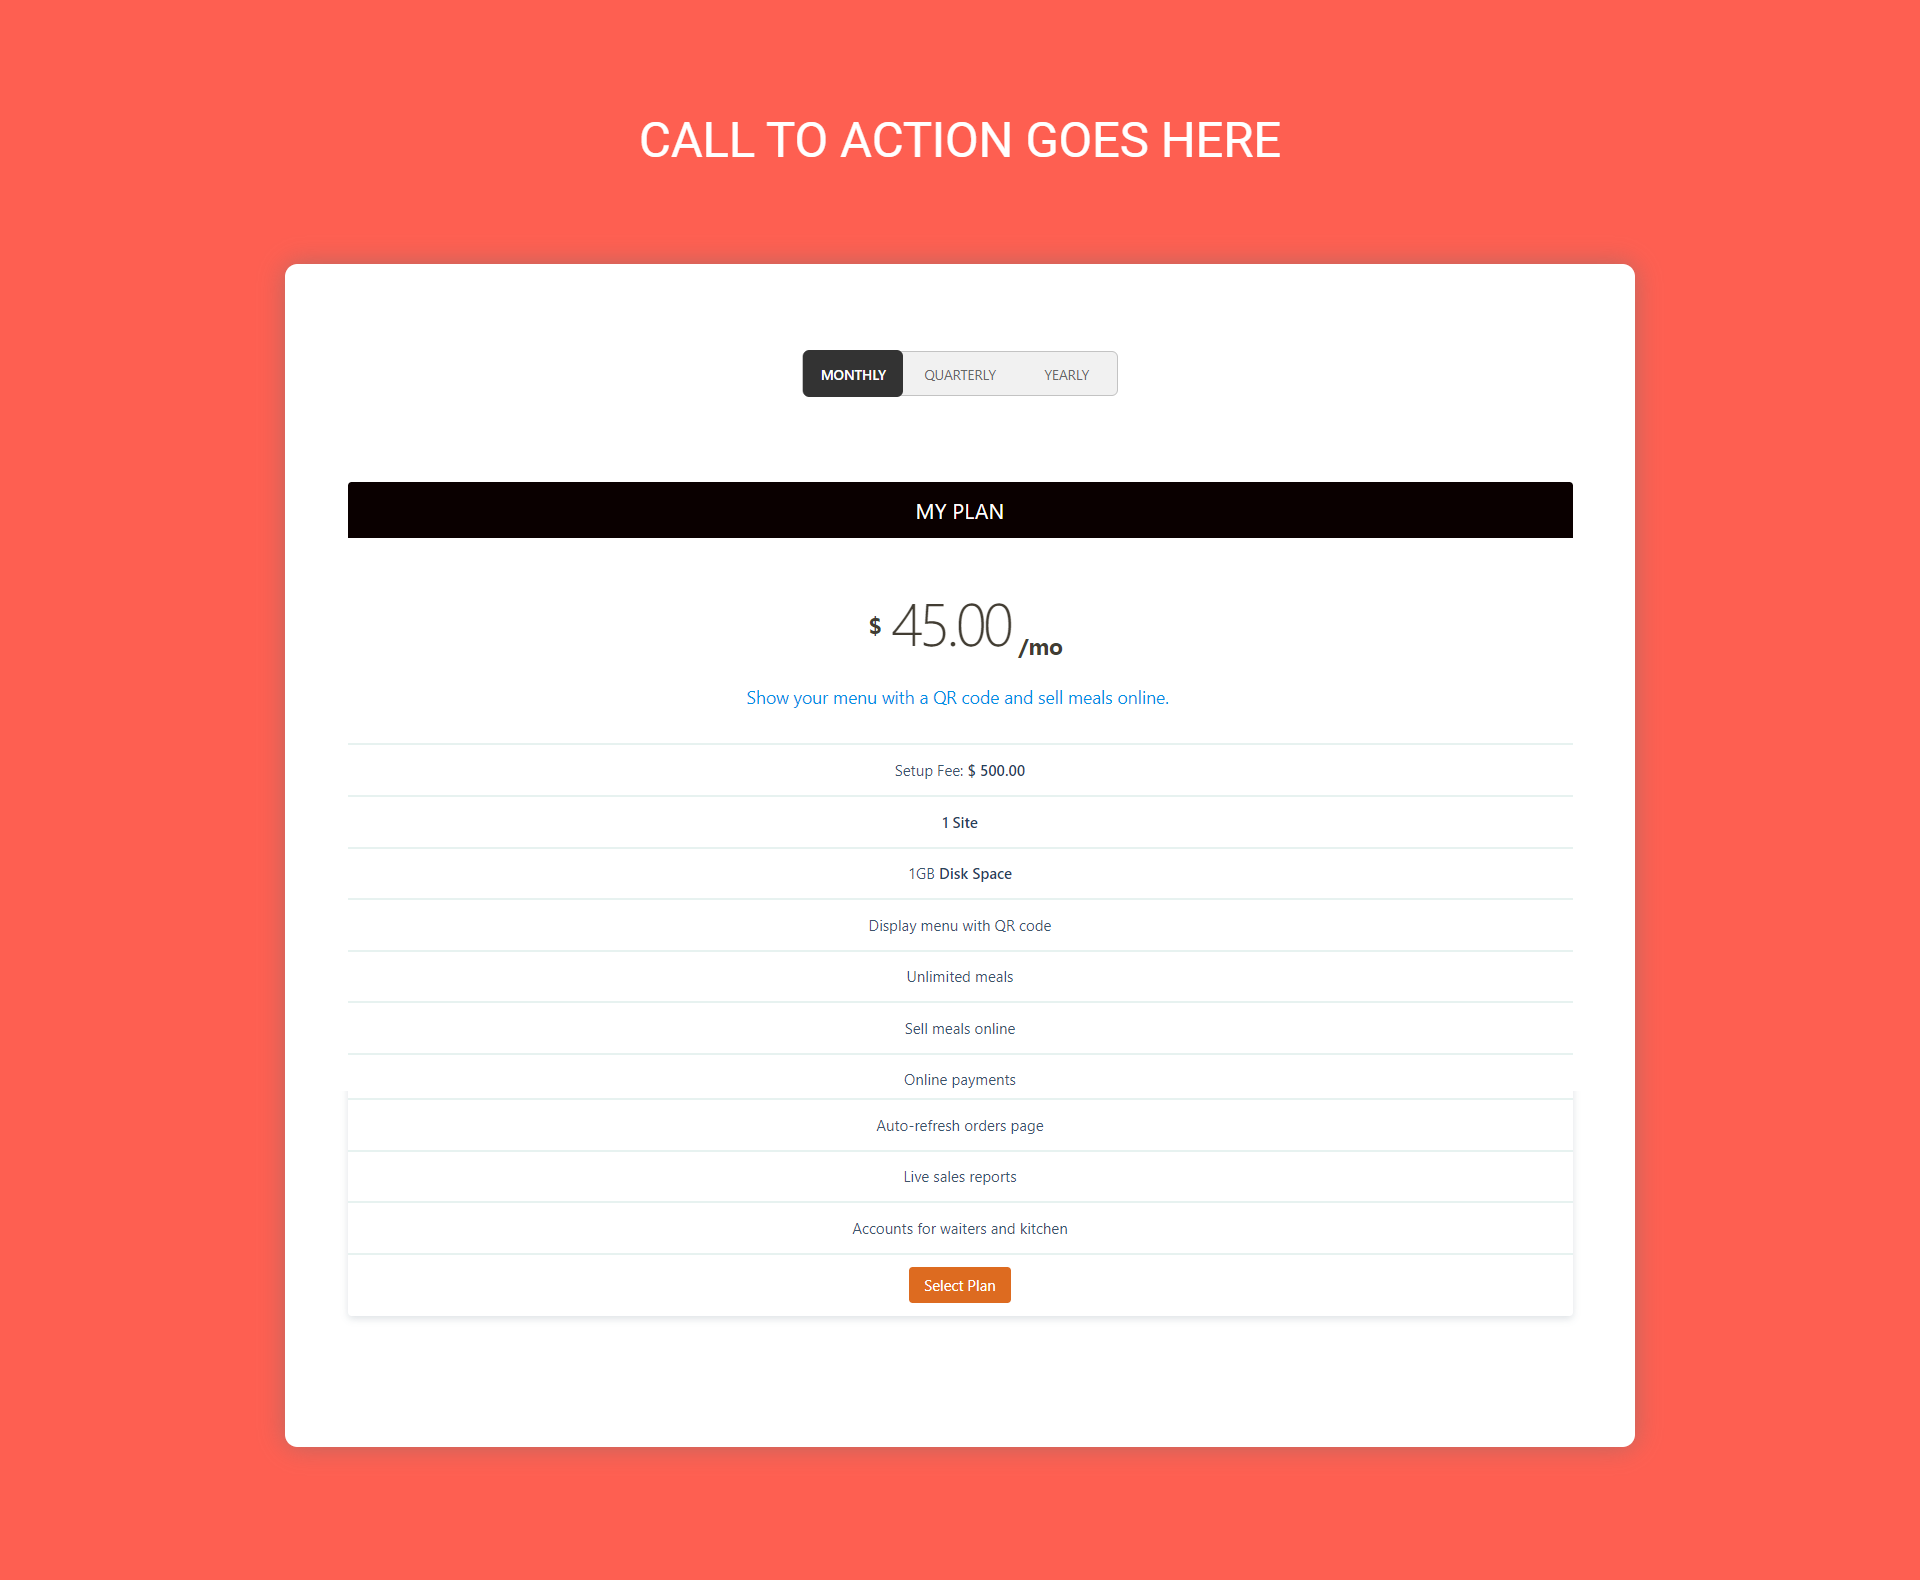
At the bottom of the page, you will automatically find displayed the WP Ultimo membership plans we created in the first lessons of this course. Users will be able to choose their plan and payment frequency, view the plan features, and click on the sign-up button to create their site on your platform.
Note – If you’re using WP Ultimo 2, you can place the shortcode of your checkout form.
Here’s a tutorial where you can learn how to create a custom checkout form in WP Ultimo 2.
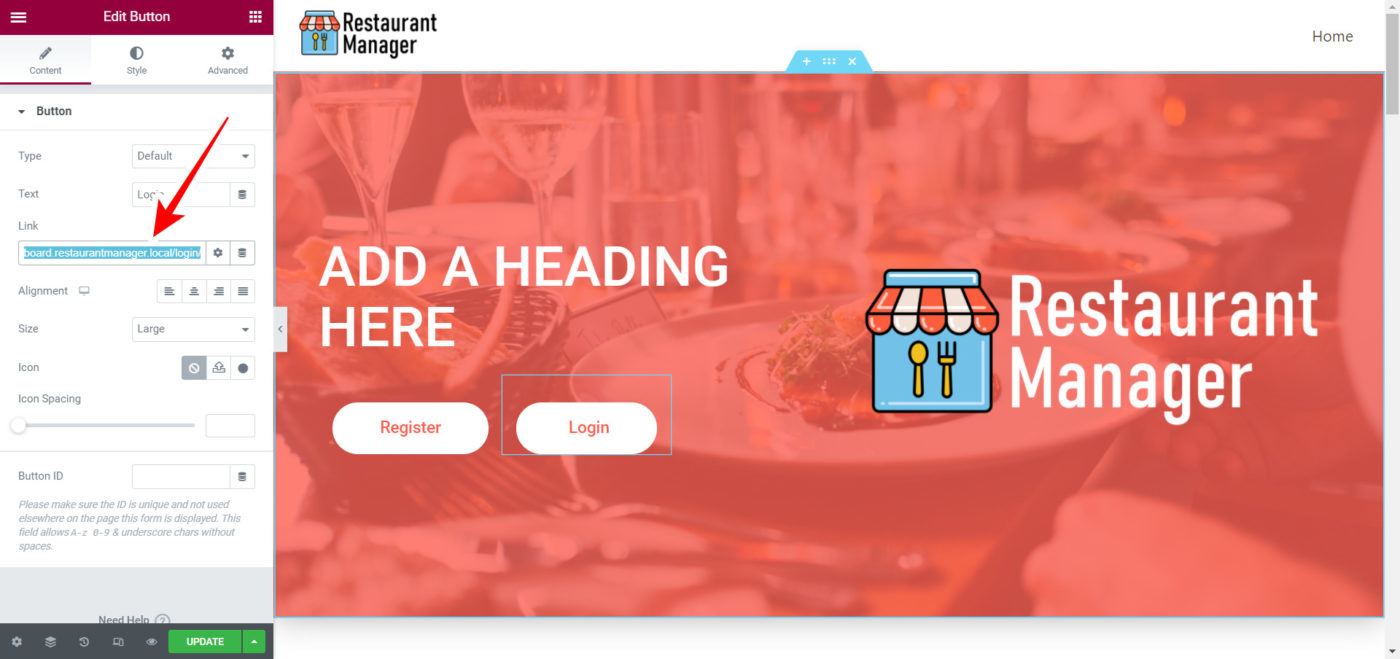
5- Set up the login button
Once you’ve made all the appearance and content changes to your platform’s homepage, you need to set up the login button. For this, just open the button’s settings, and add the dashboard’s login page URL as the button link.
Note – We’re talking about the login page we created in Lesson 11 of this course.
6- Select this page as the front page of your network’s main site
Once your page is ready, you need to select it as the home page of your platform’s main site.
- On your network’s main site, go to Settings > Readings.
- Tick the A static page option.
- Select the page you just created as Homepage.
- Hit Save Changes.
