In this lesson, we’ll show you how to display the WooCommerce products page on the frontend to allow users to view and manage meals on the frontend.
The best part is that the fields displayed on the create/edit product form won’t be the normal WooCommerce products. Instead, we will use WooCommerce Food so that the form contains fields that are suitable for creating meals and adding nutritional information, food options to go with the current dish, etc.
1- Open the global frontend dashboard site
WP Ultimo 1.x
If you’re using WP Ultimo 1.x, go to Network Admin > Sites > All Sites, and open the admin panel of the frontend dashboard’s site.

WP Ultimo 2.x
If you’re using WP Ultimo 2.x, go to Network Admin > WP Ultimo > Sites, and open the admin panel of the frontend dashboard’s site.

2- Create a new page for the food/meal creator
Go to Pages > Add New.
Enter the page title and hit Edit with Elementor.

3- Set up the frontend dashboard template on this new page
Go to Page Settings and select Elementor Canvas in the Page Layout field.

Now hit the Add Template button to insert the frontend dashboard template we’re using in this course to build our restaurant management user interface.

Head to My Templates and hit Insert to add the Elementor template to the new page.

4- Set up the food/meal creator page
Remove the page content section because you don’t need a text element.

Instead of a text element, we’ll add a Tabs element. We’ll use two tabs: one for the products and one for the categories.

Once you’ve added the Tabs element, change the colors:
Go to Style in the Tabs element, and select these recommended colors:
- Color: #000000
- Active Color: #E53F31
Note. These are suggested colors, but you can choose the colors you want for your dashboard.

Now it’s time to change the tab titles and add the following content:
Meals:
[vg_display_admin_page page_url="edit.php?post_type=product"]

Categories:
[vg_display_admin_page page_url="edit-tags.php?taxonomy=product_cat&post_type=product"]
Now you need to hit Preview Changes to view the content of the tabs on the frontend.

5- Set up the frontend pages
Once you’re on the frontend, start setting up your frontend page using the Quick Settings panel from WP Frontend Admin.
You can start by selecting the following information:
- Page title: Enter something like “Meals” here.
- URL Slug: We can enter “meals” as the URL slug.
- Page template: Elementor Canvas
- Add to this menu: Dashboard Menu

WP Frontend Admin allows you to simplify your frontend pages to give users a better user experience.
To simplify your frontend pages, you can hide any unnecessary elements from your frontend pages. It’s important to keep the essential fields, metaboxes, etc.
- Click Hide Element.
- Click the element you want to hide.
- Repeat these two steps with every element you want to hide from your frontend page.

Besides hiding any unnecessary elements from your frontend pages, you can edit any text to make them clearer for your users:
- Click Edit texts.
- Edit all the texts you want.
- Click Stop editing texts.
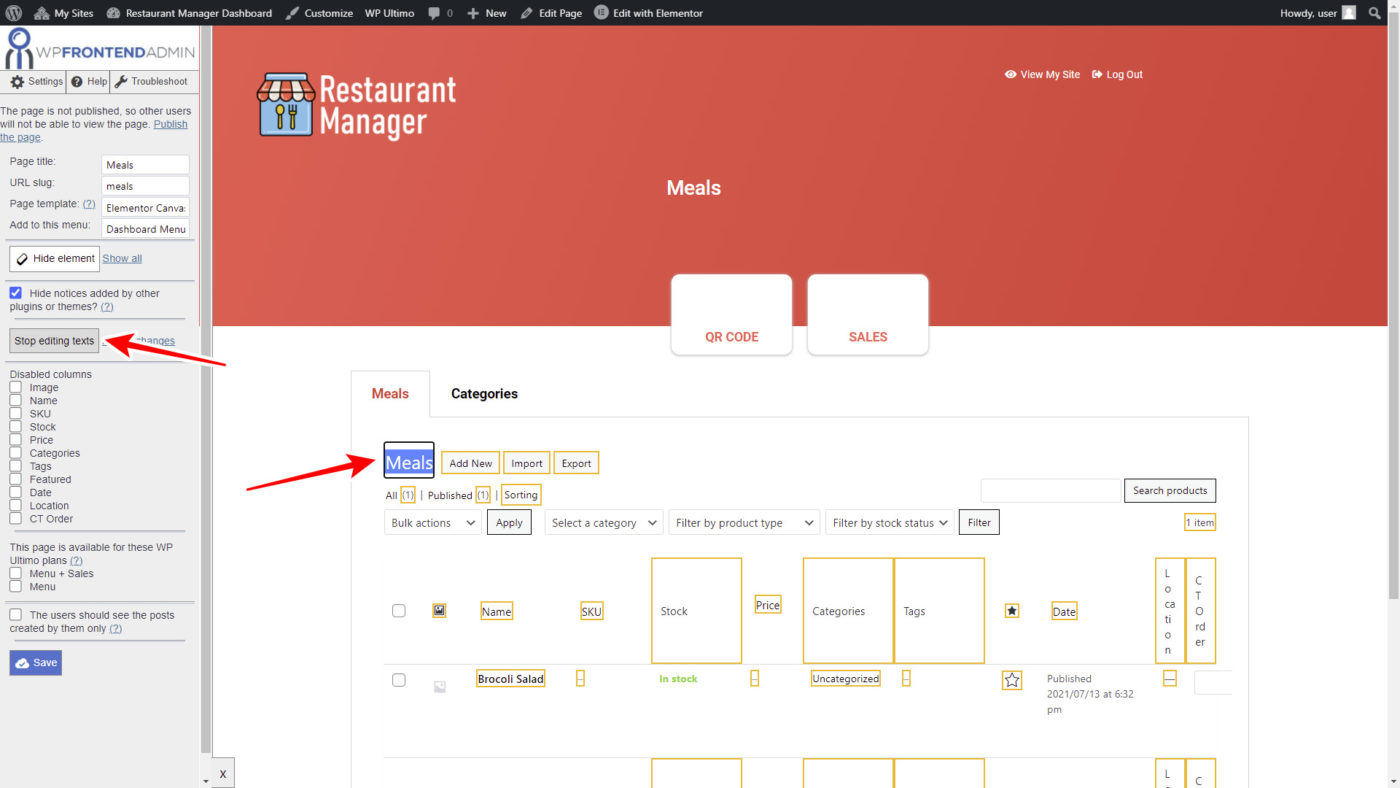
When your frontend pages display a list of products, posts, pages, or any other post type, you can disable some unnecessary columns so that the table is cleaner.
You can tick the columns you want to hide in the Disabled columns section.
You can restrict frontend dashboard pages based on the WP Ultimo plan purchased by the user. You can tick the WP Ultimo plan for which this page will be available. We won’t mark any plan because we’re using one plan only. The screenshot is just an example.
Finally, hit Save to apply the changes to the Meals page.

Once you’ve edited the meals list, you can open the add/edit meal form to hide any unnecessary elements from it and edit texts.
This form will show the normal WooCommerce fields, as well as the fields added by WooCommerce Food.
That’s why we need to hide any unnecessary fields and metaboxes from the add/edit meal form.
For example, we can hide the following fields and metaboxes:
- Product information format buttons
- From the Publish metabox:
- Status
- Visibility
- Catalog visibility
- Copy to a new draft
- Product tags metabox
- Kaya QR generator fields
- All the fields and checkboxes from the Product Data section, keeping the Regular Price and Sale Price fields.
- Product Short Description
- And any field you consider your users won’t need
Don’t forget to hit Save on the Quick Settings panel once you’ve hidden all the unnecessary elements.
Note. You can also edit any texts to rename fields.

After editing the products page, go to the Categories tab and follow the same steps to hide any unnecessary elements or edit texts.

This is the frontend restaurant meals page
When the meals and categories creation pages are published in the frontend dashboard, your customers will be able to create unlimited meals to sell in their restaurants.
This is the page that displays the list of products/meals on the frontend.

This is what users will see when creating or editing meals in the frontend. As you’ll notice, WooCommerce Food modifies the product creation and editing form so that you can add information relevant to meals.

In addition, users will be able to add food categories such as beverages, entrées, national foods, etc. For this, we have displayed the product categories page in the frontend dashboard.

When users want to edit product categories, this is what they will see in the frontend form.

In the next lesson, we will show you how to display the restaurant team page, where administrators will be able to add and edit users to the restaurant site.