In this lesson, we are going to start building the global frontend dashboard from which your platform users will manage their restaurant sites.
Instead of logging into the normal wp-admin dashboard, users will be able to access a user interface that you can design as you prefer.
With WP Frontend Admin you can display any wp-admin page in the frontend, using WordPress any theme or page builder. You can create beautiful frontend dashboards without programming anything.
1- Set up WP Frontend Admin’s global appearance settings
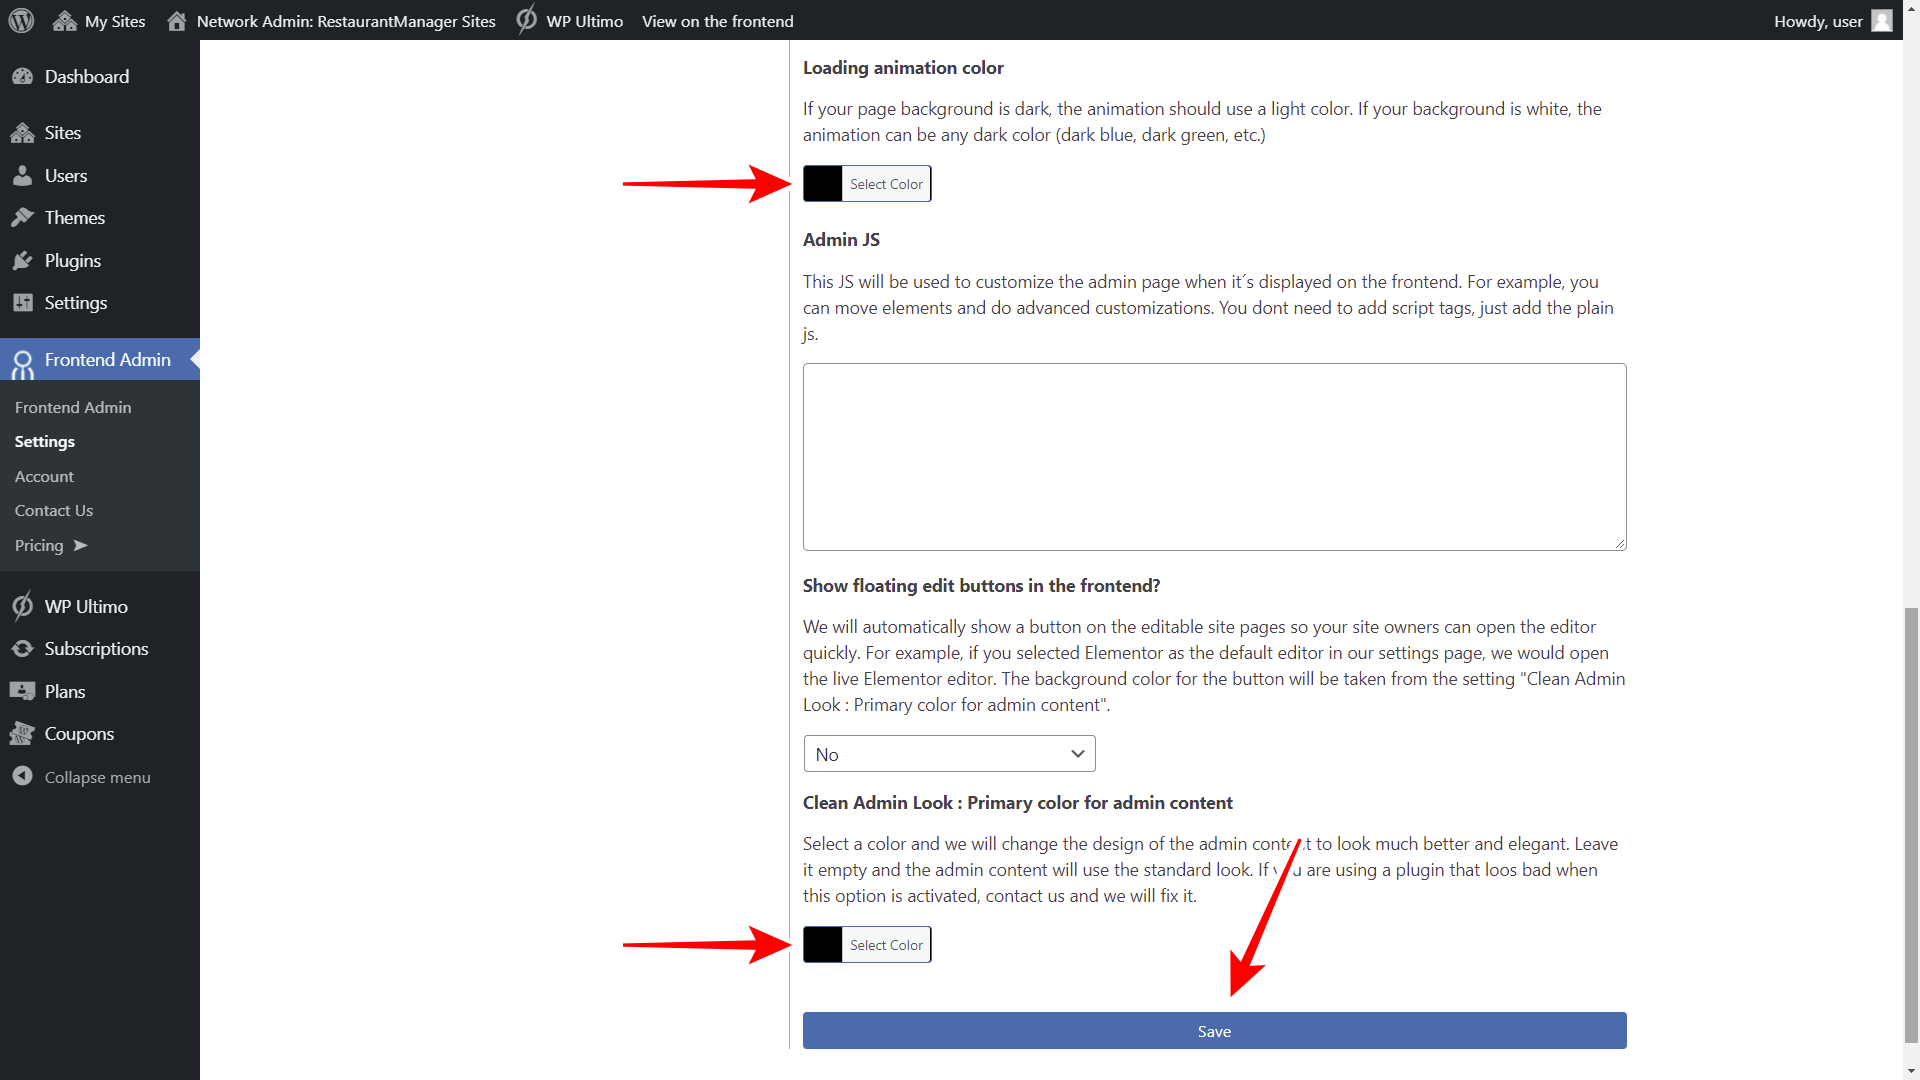
WP Frontend Admin allows you to select some general aspects of the appearance of your frontend pages. For example, you can select the loading animation of the pages and assign a specific color to it.
You can also select a color scheme that will make the wp-admin content look cleaner and more elegant on the frontend.
Go to Network Admin > Frontend Admin > Settings > Appearance.
Select the following values:
- Hide admin bar on the frontend: Yes. This option will hide the wp-admin top bar when users view the pages on the frontend.
- Loading animation style: Select the one you want. We’ll use Chase.

- Loading animation color: Choose the color you want. We’ll select Black.
- Clean Admin Look: primary color for admin content: Choose the color you want. We’ll select Black.
- Hit Save.
2- Set up the frontend dashboard’s Elementor template
Although you can build your frontend dashboard using any theme or page builder, we will use an Elementor template that will make your dashboard look beautiful.
We have a gallery of beautiful frontend dashboard templates that you can download and import using the Elementor page builder.
In this couse, we’ll be using the Template 18 from our gallery.
We designed these templates using these plugins:
- Elementor
- Elementor Header & Footer Builder
Both plugins must be active for the whole network for everything to work correctly.
Some of our templates require some elements to be configured in advance.
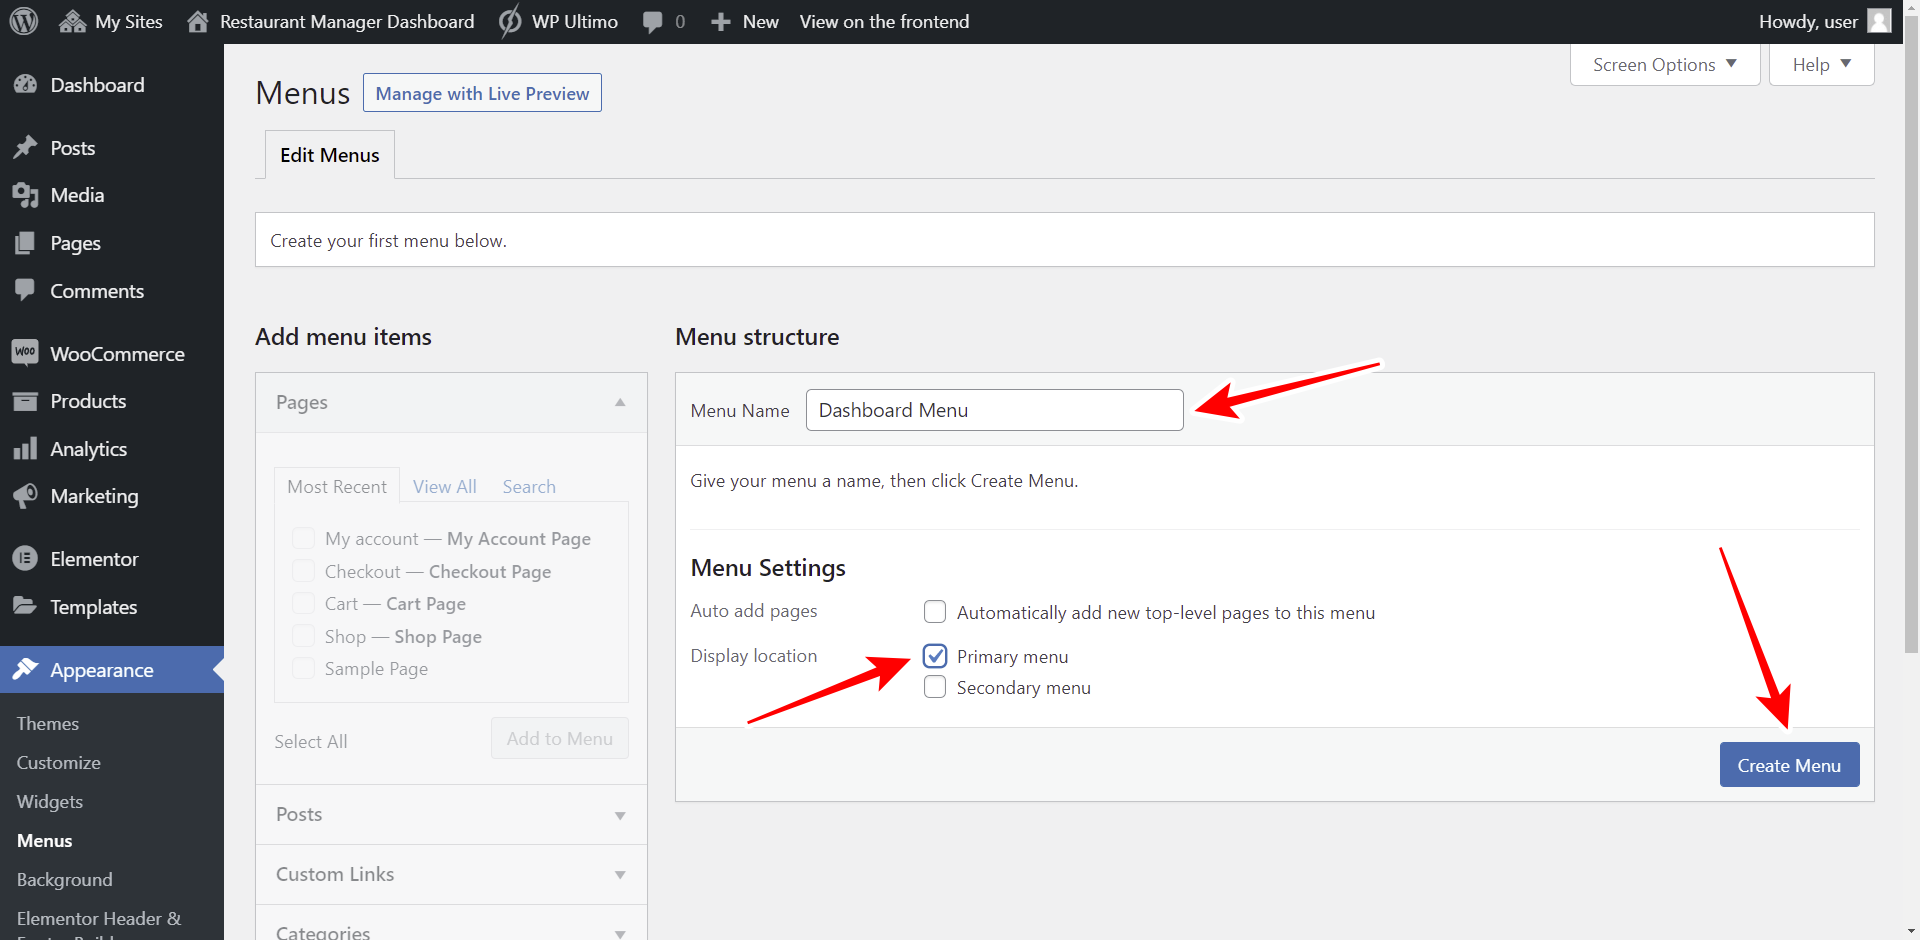
For example, the dashboard’s navigation menu needs to be created beforehand for the template to recognize that there are navigation menus that you can select from in Elementor.
Start by creating a new navigation menu, to which the dashboard pages will be added as they are created.
WP Ultimo 1.x
If you’re using WP Ultimo 1.x, go to Network Admin > Sites > All Sites, and open the admin panel of the frontend dashboard’s site.

WP Ultimo 2.x
If you’re using WP Ultimo 2.x, go to Network Admin > WP Ultimo > Sites, and open the admin panel of the frontend dashboard’s site.

Now go to Appearance > Menus and create a new menu.
You’re ready to start building your frontend dashboard for managing restaurants.
You can follow these steps to import and set up the Elementor template:
Step 1 – Go to Templates and hit Import templates.
Step 2 – Choose the template from your computer and hit Import Now.
Step 3 – Hit Edit with Elementor to open the template with the Elementor Editor.
Step 4 – Once the template opens with Elementor, select the dashboard logo, you can upload it as a Custom Image.

Step 5 – Open the Menu element’s settings and choose the menu you created above.
Step 6 – Hit Update to save the changes on this template.

Now that you have set up the basics of the global appearance and the template you will use to create your dashboard, you are ready to just import the template into each dashboard page you will create.