We are in the last stage of building our frontend dashboard for restaurants. We have already set up these pages in our dashboard:
- QR Code
- Sales
- Meals
- Team
And now we will show you how to add the necessary pages for users to manage their restaurant site settings from the frontend dashboard. More specifically, we’ll set up the following sections on the frontend “Settings” page:
- Payment gateways
- Menu style selector
- Logo and Colors selector for the user site
- Membership page
- WooCommerce taxes page
- Email invoices designer
- Autorefresh system for the orders page
For this, you need to follow these steps:
1- Create a new page and set up the frontend dashboard template
This new page must be created on the frontend dashboard’s site.
WP Ultimo 1.x
If you’re using WP Ultimo 1.x, go to Network Admin > Sites > All Sites, and open the admin panel of the frontend dashboard’s site.

WP Ultimo 2.x
If you’re using WP Ultimo 2.x, go to Network Admin > WP Ultimo > Sites, and open the admin panel of the frontend dashboard’s site.

Now go to Pages > Add New to create a new page.
Enter the page title and hit Edit with Elementor.

Once you’re in the Elementor editor, head to Page Settings and select Elementor Canvas in the Page Layout dropdown.

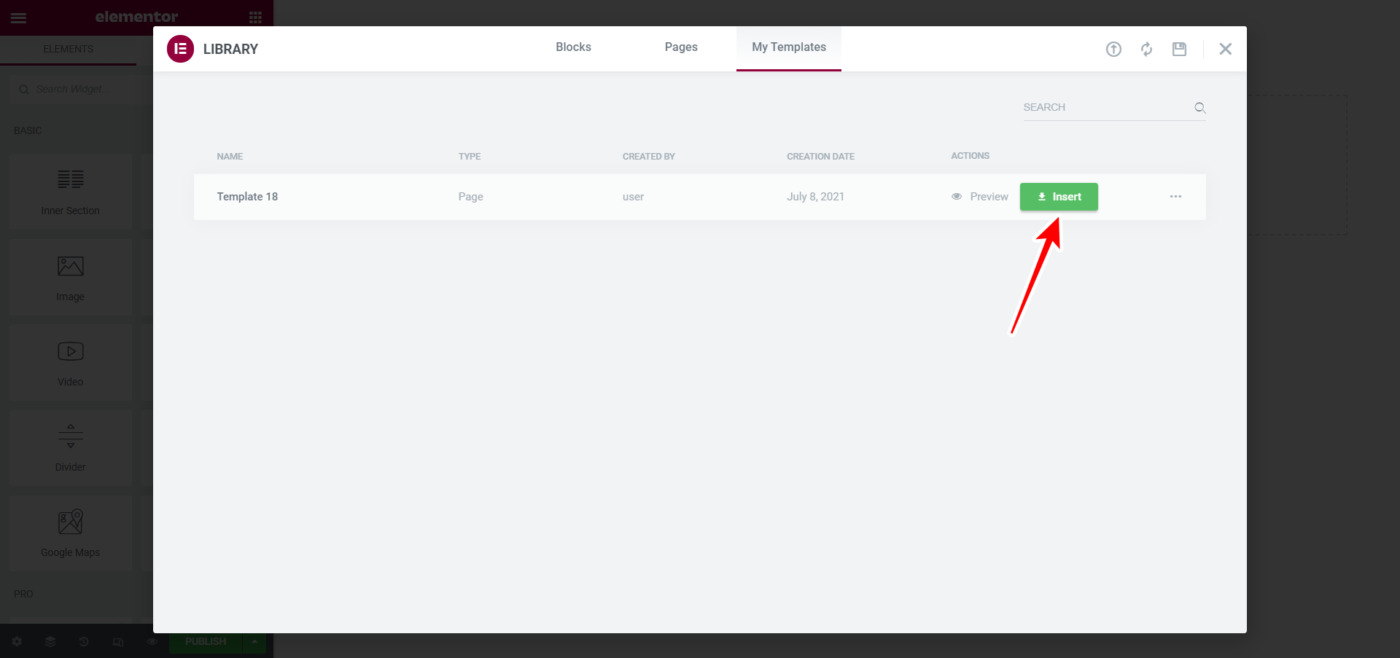
Now you need to hit the Add Template button to import the frontend dashboard template for restaurants.

In the Elementor library, you need to go to My Templates and hit Insert on the template you’re using to build this dashboard for restaurants.
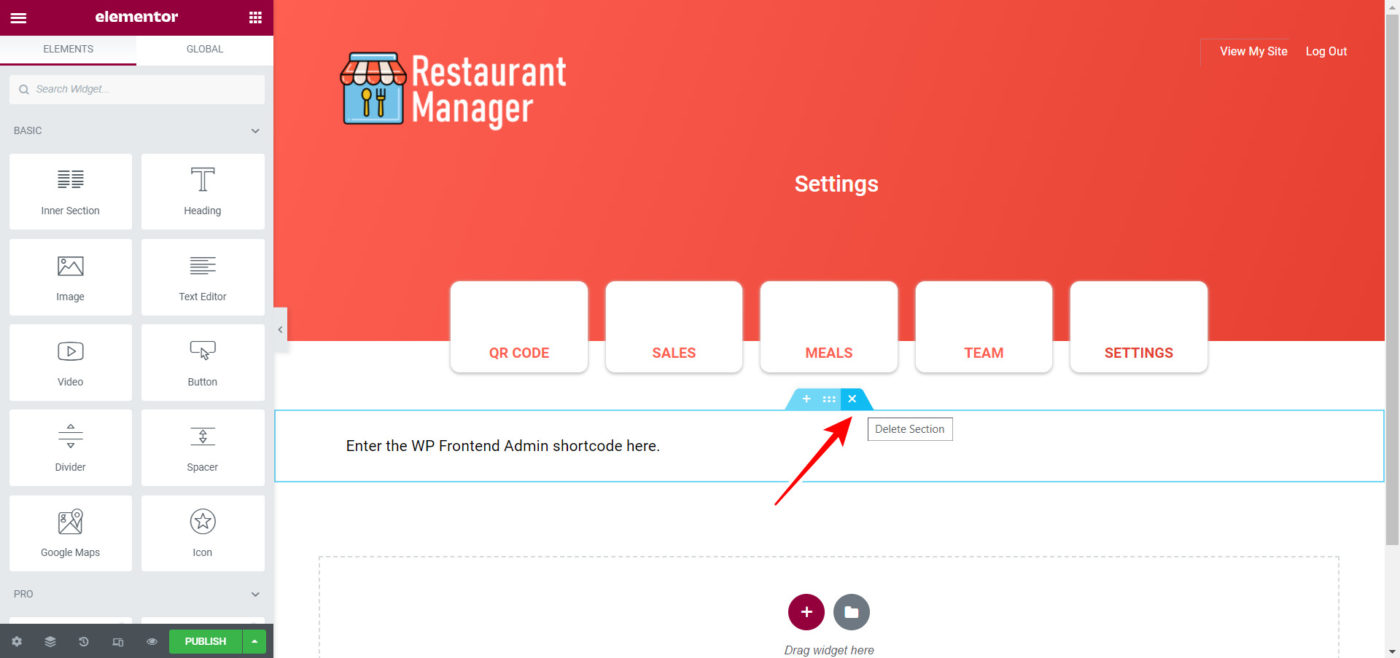
Now we need to remove the page content section because we’ll not use a text editor on this section. Instead, we’ll use a Tabs element to display several wp-admin pages on the same page.
Just hit the Delete Section button to remove the section from the page.
After that, you need to add a Tabs element in a new section.
For this just go to Elements, search for tabs and drag the Tabs element to the page content.

For this page, we’ll need at least seven tabs, so you can add new tabs by hitting the Add Item button on the Content tab of the Tabs element.

Now it’s time to change the tab colors. For this, go to Style in the Tabs element, and select:
- Color: #000000
- Active Color: #E53F31
Note. These are suggested colors, but you can choose the colors you want for your dashboard.

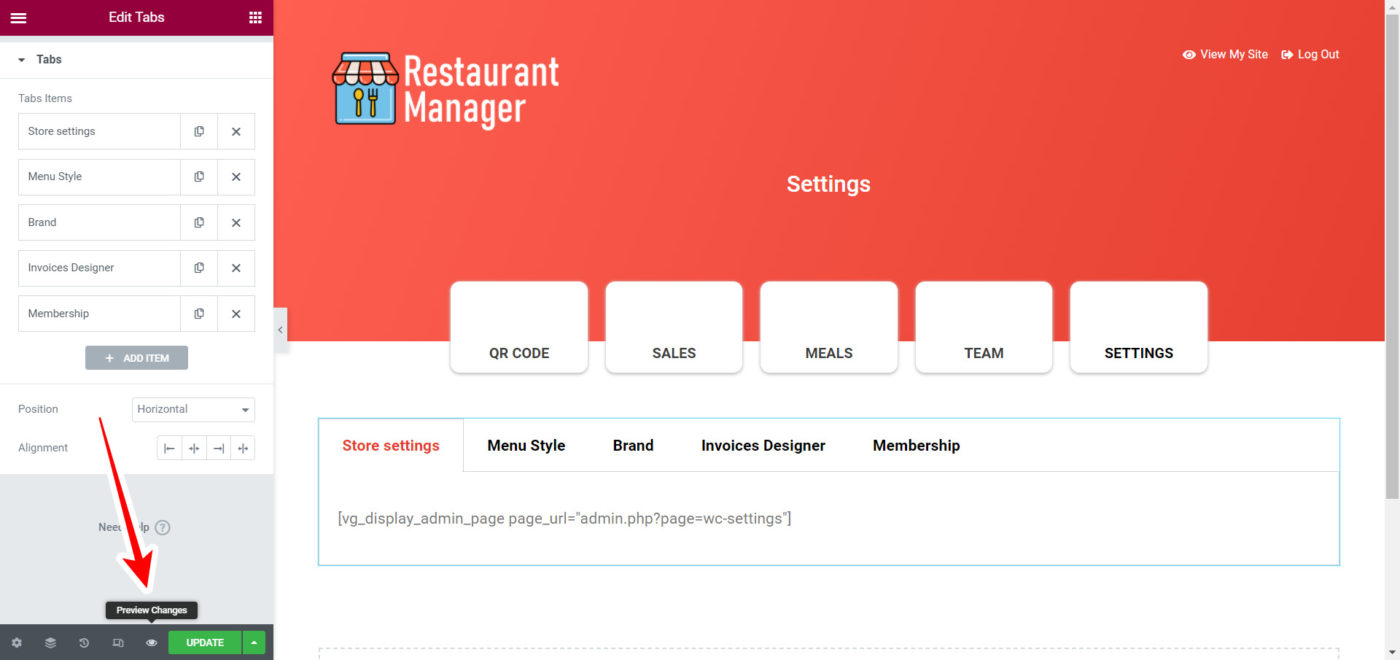
Now that you have set up the frontend dashboard template, you can proceed to add some content to the tabs.
3- Display the “Settings” sections on the frontend
After configuring the template to add the necessary tabs, you need to add the content of the tabs.
You need to add the titles and the content of the tabs as we will explain below:
Store settings:
[vg_display_admin_page page_url="admin.php?page=wc-settings"]

Menu Style:
You can add something like, “Select your menu style below” right above the shortcode.
[vg_display_admin_page page_url="options-reading.php"]
Brand:
You can add something like, “Select your logo and colors” right above the shortcode.
[vg_display_admin_page page_url="customize.php"]
Membership:
If you use WP Ultimo 2.X, use this shortcode:
[vg_display_admin_page page_url="admin.php?page=account"]
If you use WP Ultimo 1.X, use this shortcode:
[vg_display_admin_page page_url="admin.php?page=wu-my-account"]
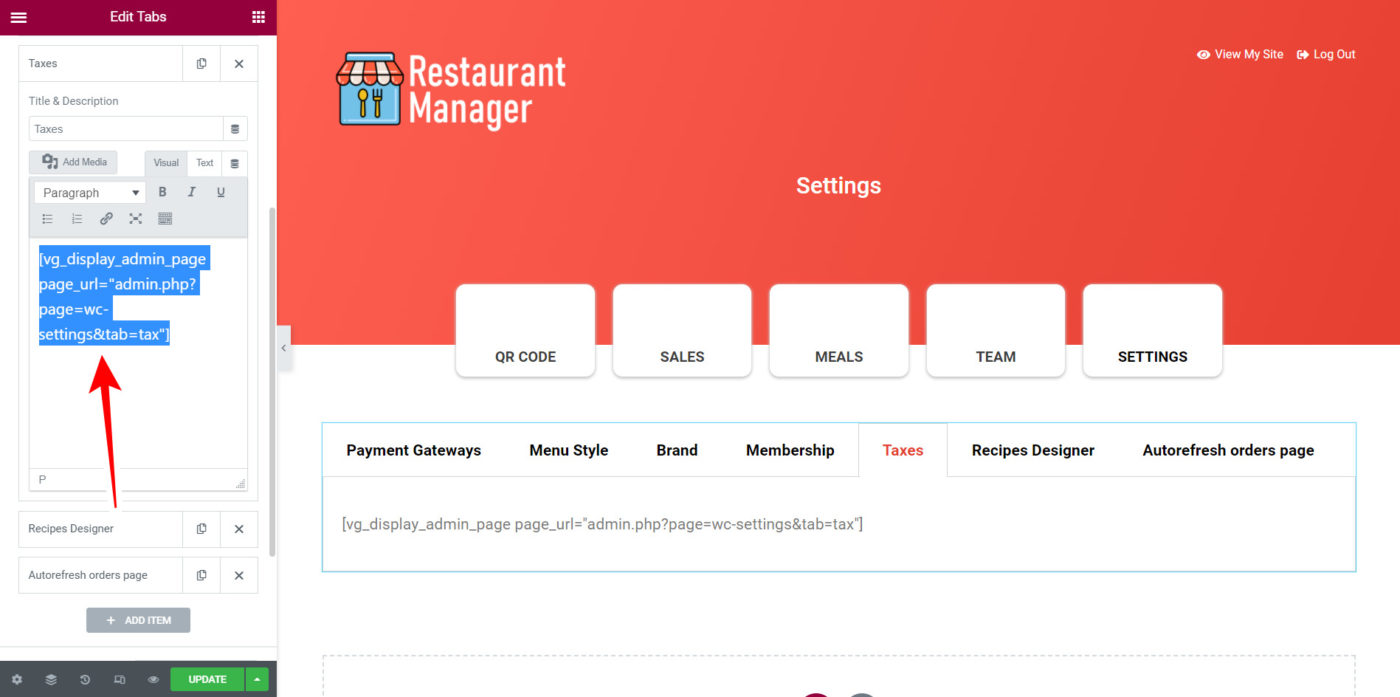
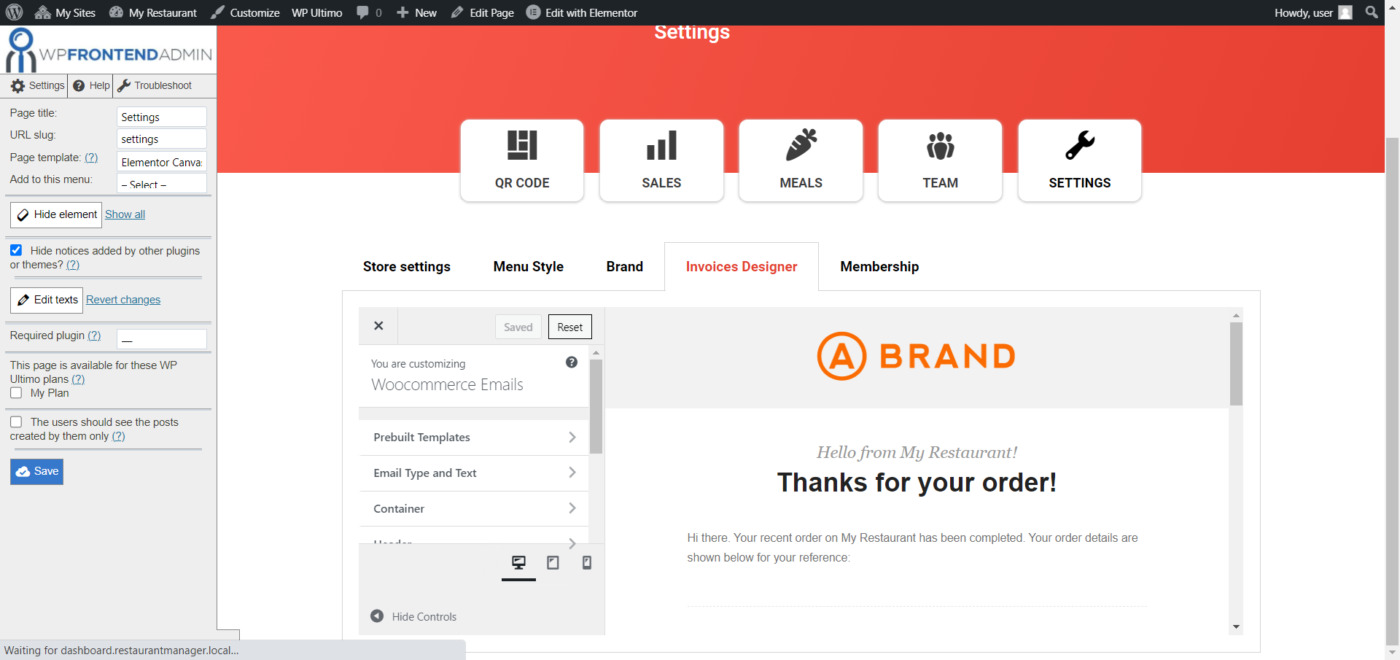
Invoices Designer:
[vg_display_admin_page page_url="Email Customizer URL here"]
How do you know the URL of the Email Customizer page?
Go to WooCommerce > Email Customizer.
Now copy the URL of the Email Customizer page and paste it between the quotations in the shortcode:

4- Set up the “Settings” page on the frontend
Once you have set the content for all the tabs, you need to hit Preview changes in Elementor to view the admin content displayed on the frontend and set up the “Settings” page.
You’ll see the Quick Settings panel displayed on the left side of the screen.
You can start setting up your page by selecting the following basic information:
- Page title: Settings
- URL slug: settings
- Page template: Elementor Canvas
- Add to this menu: Select the navigation menu you’ve created for the frontend dashboard.

a) Set up the “Store settings” tab on the frontend
You need to hide some elements from the Store settings tab. For example, you need to hide the following tabs from the WooCommerce settings page:
- Products
- Shipping
- Accounts & Privacy
- Emails
- Integration
- Advanced
Just hit the Hide Element button and hit the element you want to hide.
Therefore, the only tabs that will be kept on this page are these:
- General
- Tax
- Payments
- Auto Refresh

Once you remove all the unnecessary tabs from the WooCommerce settings page, you need to save changes by hitting Save on the Quick Settings panel.
Now you need to hide any unnecessary elements from the General tab. We recommend you to keep these fields:
- Store Address
- Address line 1
- Address line 2
- City
- Country / State
- Postcode / ZIP
- General options
- Enable taxes
- Currency options
- Currency
- Currency position
- Thousand separator
- Decimal separator
- Number of decimals
The Tax tab will show all the settings for users to set up the taxes for their restaurant’s food; we won’t hide any field.
On the Payments tab, users will see the different payment gateways they can enable and set up to receive payments online. We won’t hide any field.
The Auto Refresh tab will allow users to set up a specific number of seconds after which the orders page will automatically be refreshed. We won’t hide any field.
You can hit Save to apply the changes to the Store Settings tab.
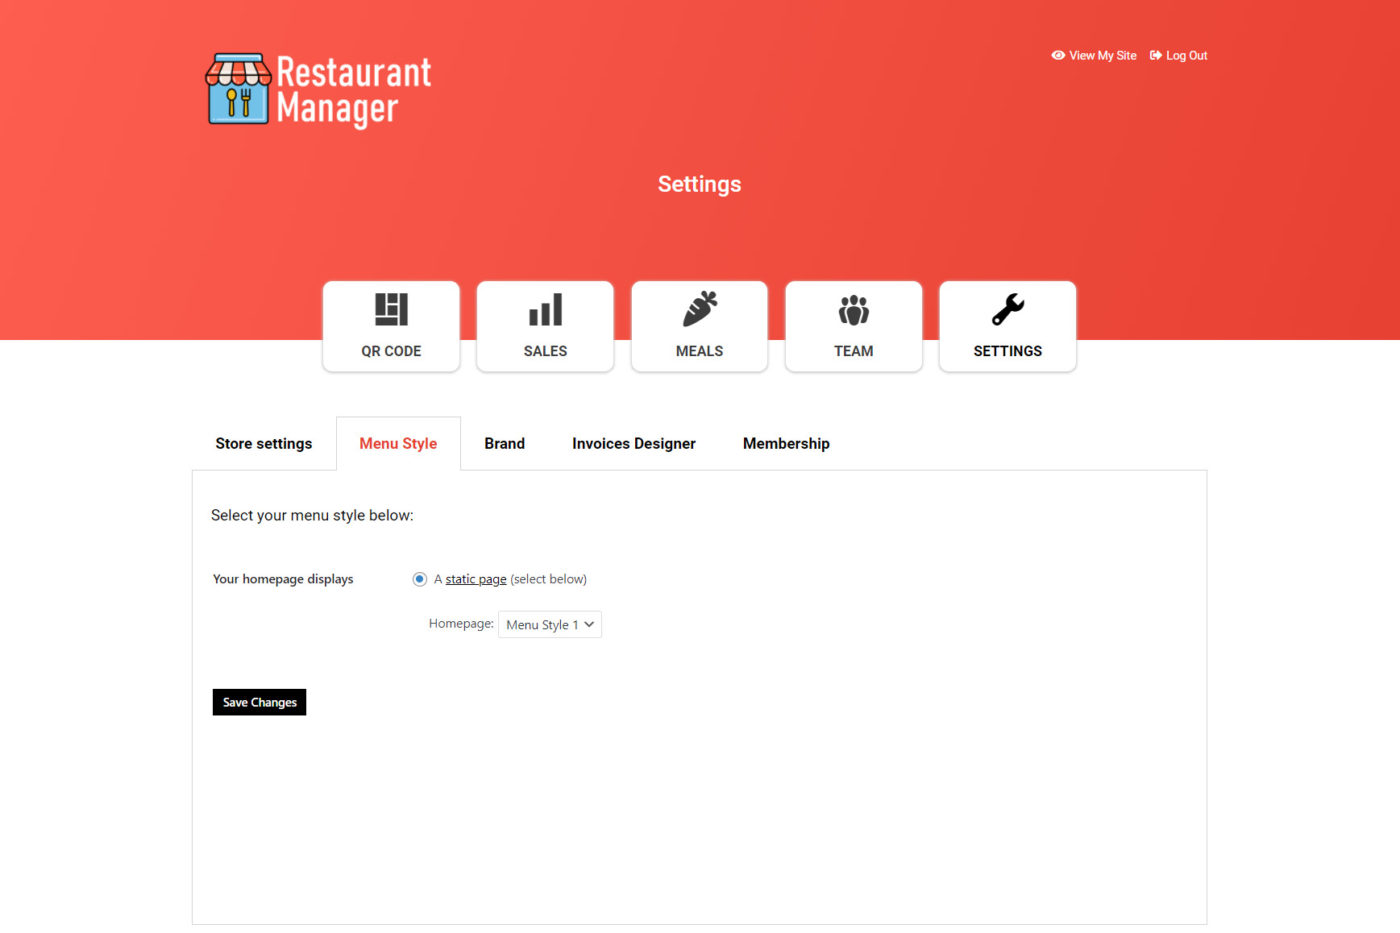
b) Set up the “Menu Style” tab on the frontend
The Menu Style tab will display the WordPress reading settings on the frontend so that users can select their site’s homepage. This will be useful for users to select their restaurant’s menu style.
You need to hide all the following elements from this page:
- Reading Settings
- Your latest posts
- Posts page
- Blog pages show at most X posts
- Syndication feeds show the most recent X times
- For each post in a feed, include
- Search engine visibility

Once you’re done hiding all the unnecessary elements, just hit Save to apply the changes.
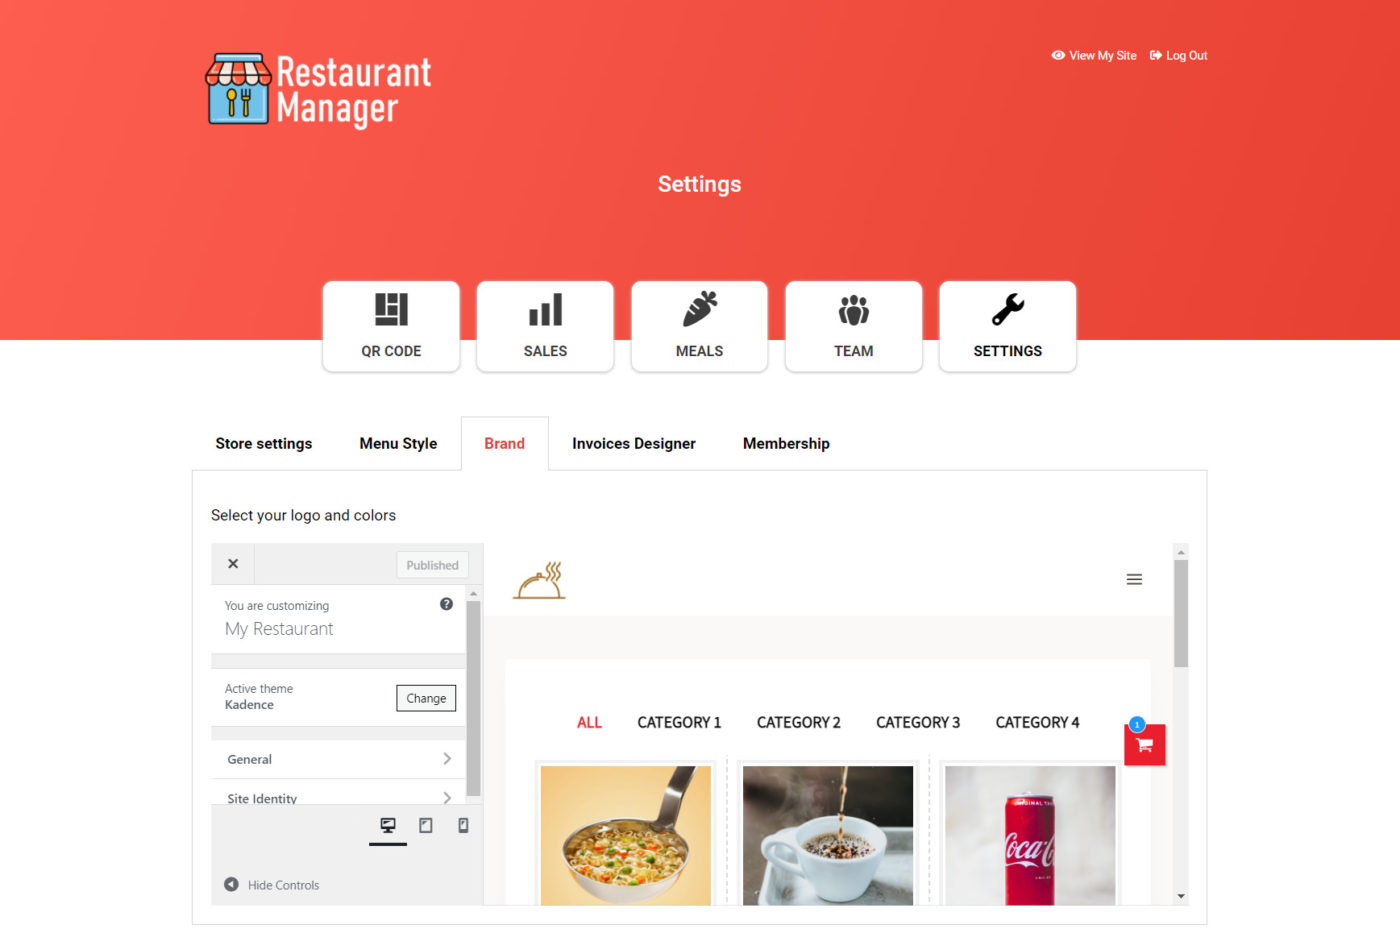
c) Set up the “Brand” tab on the frontend
Now it’s time to set up the page where restaurant managers will be able to set up their own Logo and colors for their site.
For this, they will need to have access to the theme’s customizer on the frontend. Since we’re using the Kadence theme, we’ll need to hide all unnecessary elements and tabs.
For example, you can hide the following tabs:
- Page Layout
- Blog Posts
- Custom Post Types
- Search Results
- Menus
- Widgets
- Homepage settings
- Etc.
The only elements we’ll keep on this page are these:
- Site Identity: Where users will select their site’s logo.
- General: Where users will select their site’s colors and typographies.

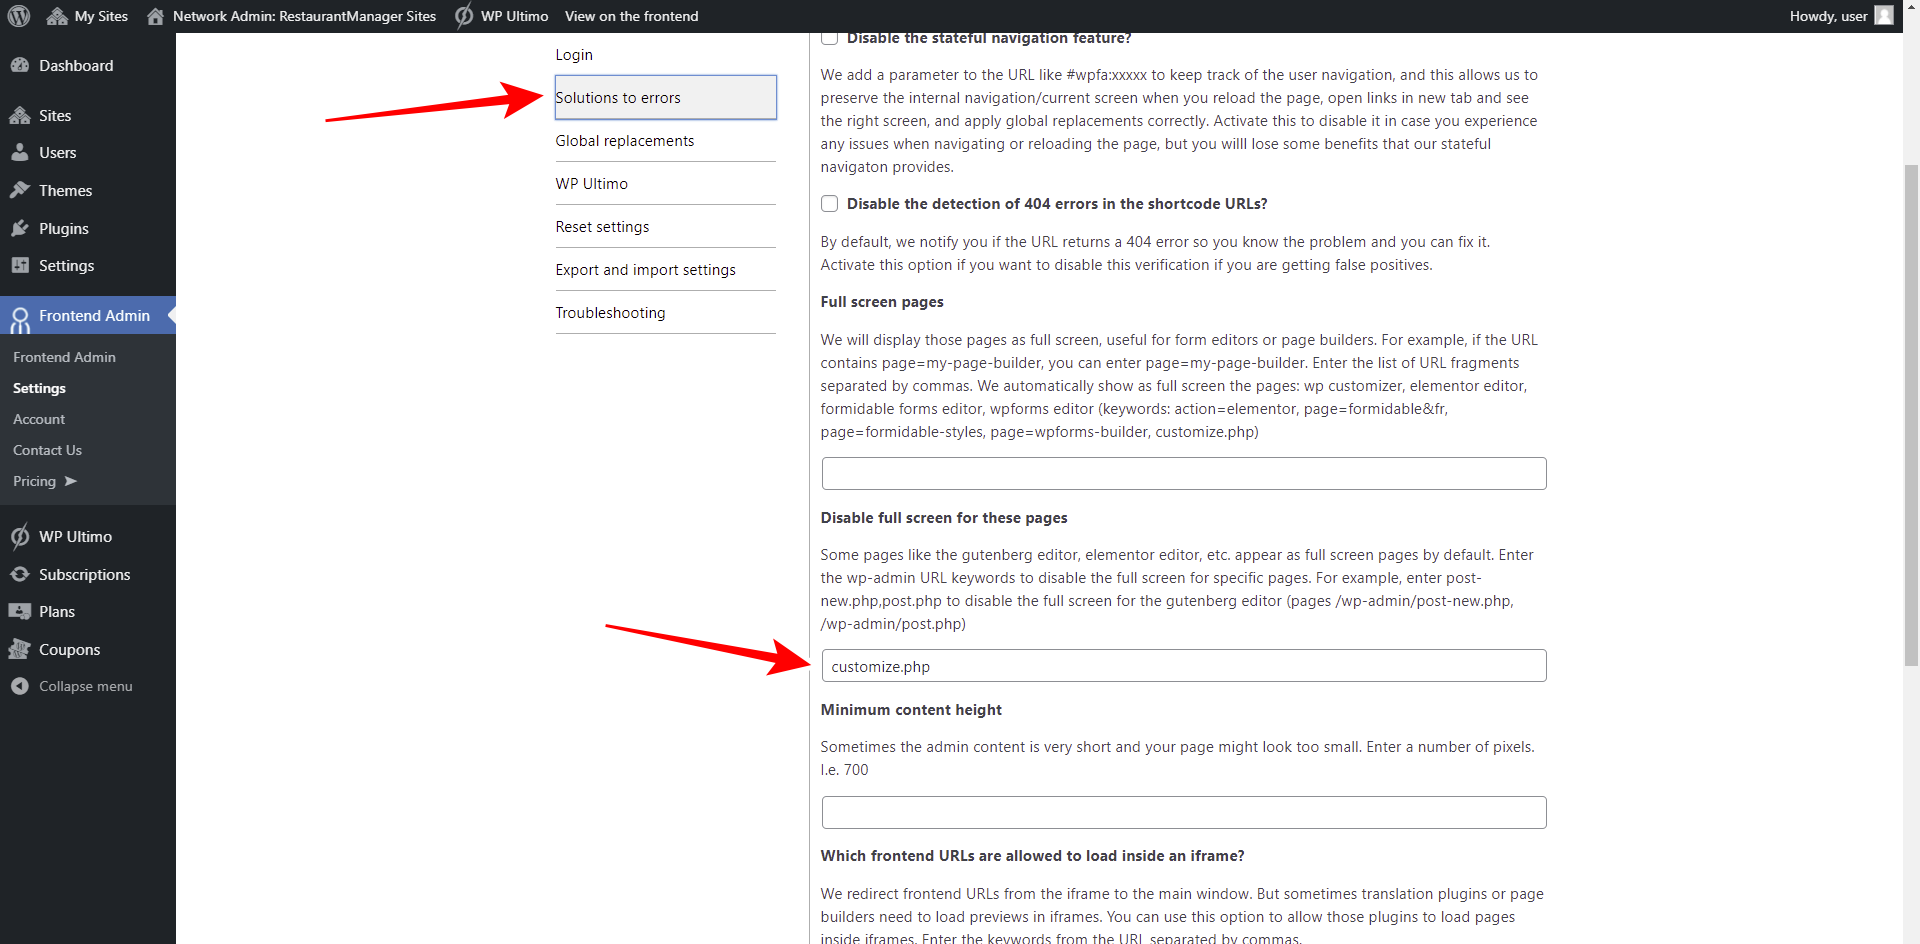
IMPORTANT: By default, WP Frontend Admin shows the customizer page as full width, but you can revert that setting.
Go to your Network Admin panel, and head to WP Frontend Admin > Settings > Solutions to errors.
Now just enter “customize.php” in the Disable full screen for these pages field. Make sure you omit the quotation marks.
Finally, save the changes.
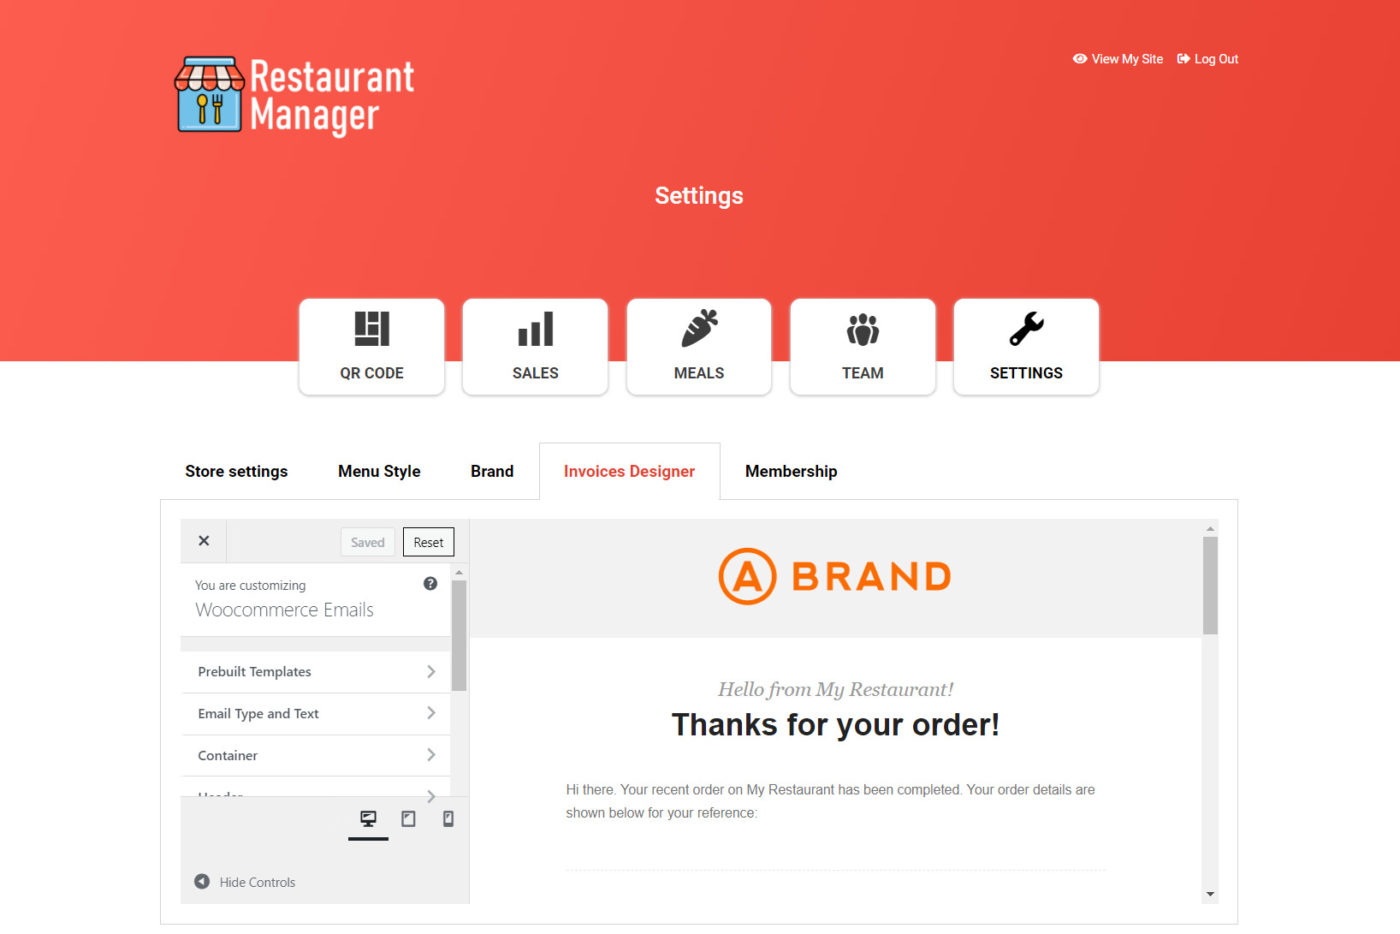
d) Set up the “Invoices designer” tab on the frontend
You can hide any unnecessary elements from the WooCommerce Email Designer page.
Once you’re done, hit Save to apply the changes to this tab.
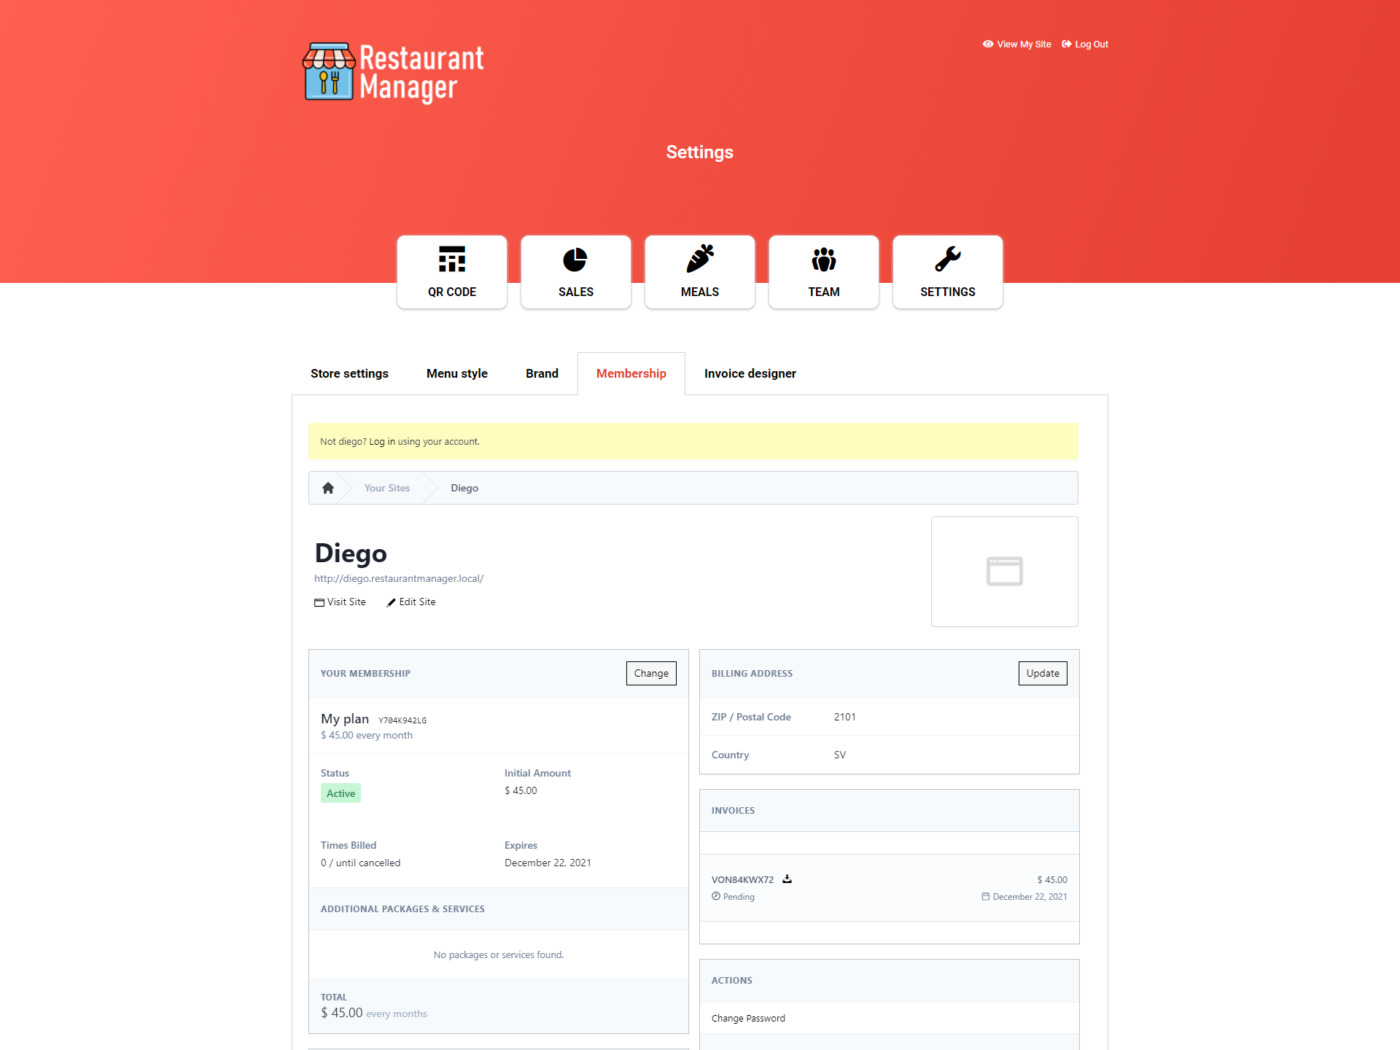
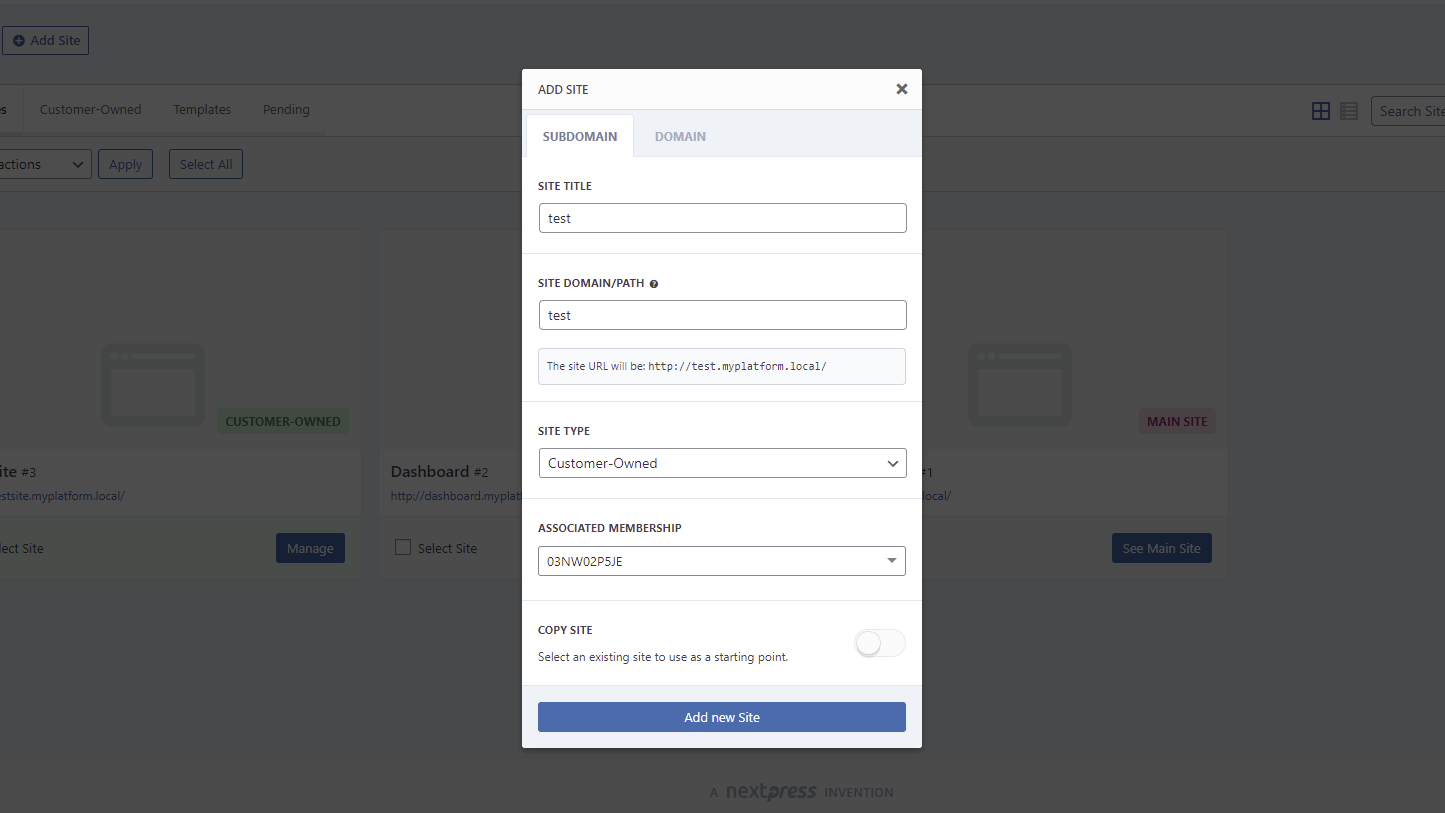
e) Set up the WP Ultimo “Membership” page on the frontend
Since the global frontend dashboard site doesn’t have any membership plan assigned, you won’t be able to view the content of this page. Instead, you’ll see a message telling you to add a new site associated to one of your WP Ultimo plans.

WP Ultimo 1 Users
Go to Network Admin > Sites and add a new site associated with a membership plan.
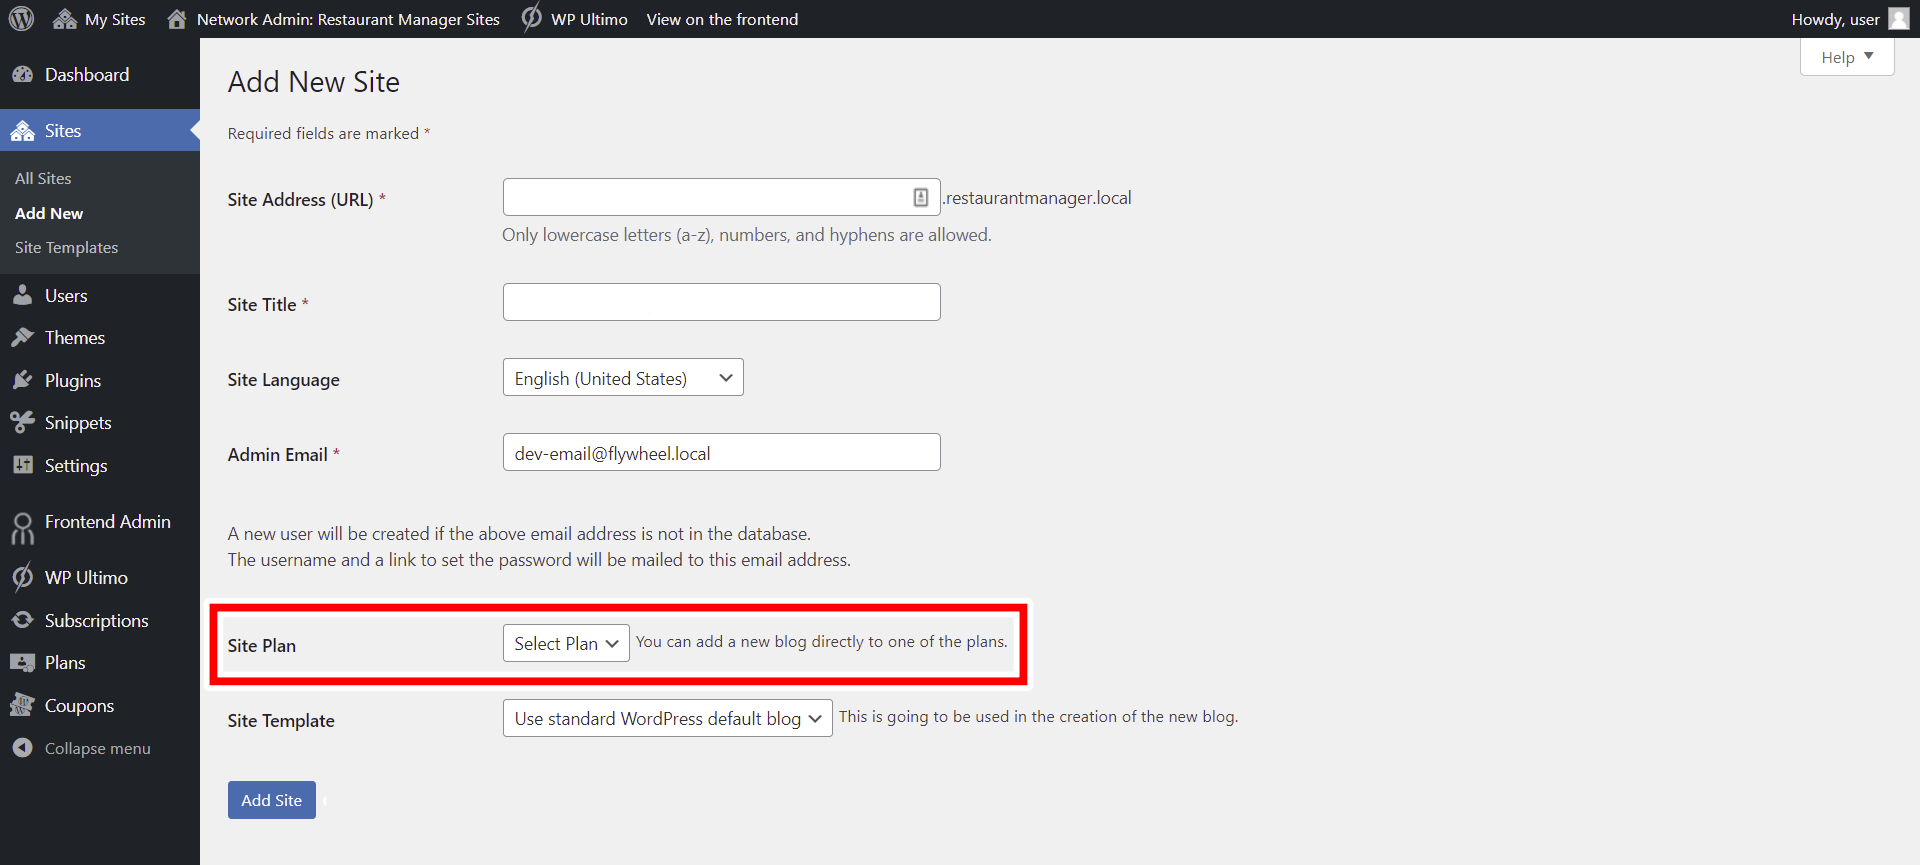
WP Ultimo 2 Users
Go to Network Admin > WP Ultimo > Customers and add a new customer.

Go to Network > WP Ultimo > Memberships and add a new membership associated with the customer you just created.
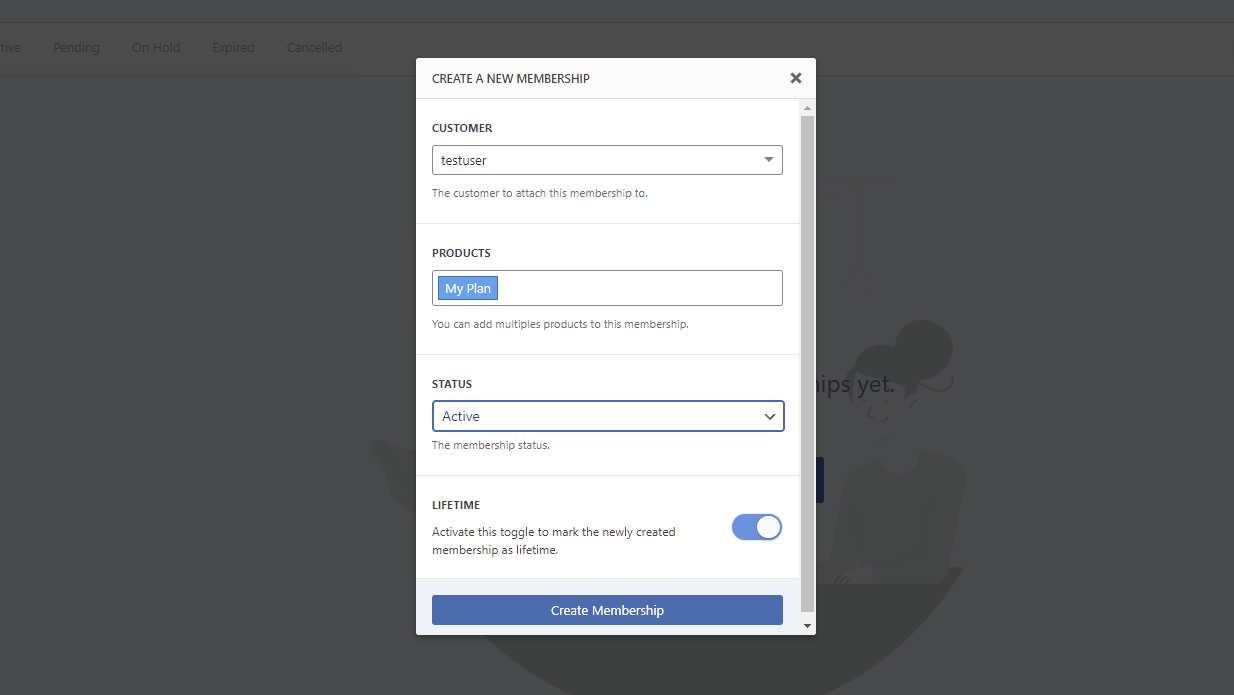
Go to Network Admin > WP Ultimo > Sites and add a new site associated with the membership you just created.
Once you do that, you’ll see the WP Ultimo account page content and you can hide any elements or change any texts.

5- Add beautiful icons to the frontend dashboard menu
Now that we’re done building our frontend dashboard, it’s time to make it look more beautiful by adding some icons to the menu items.
For this, we’re using the WP Menu Icons plugin, so we need to open the frontend dashboard’s site and head to Appearance > Menus.
Once there, add an icon to each element by hitting the + sign there.

Once you choose the icon you want to add to the element, hit Save and continue with the other elements.
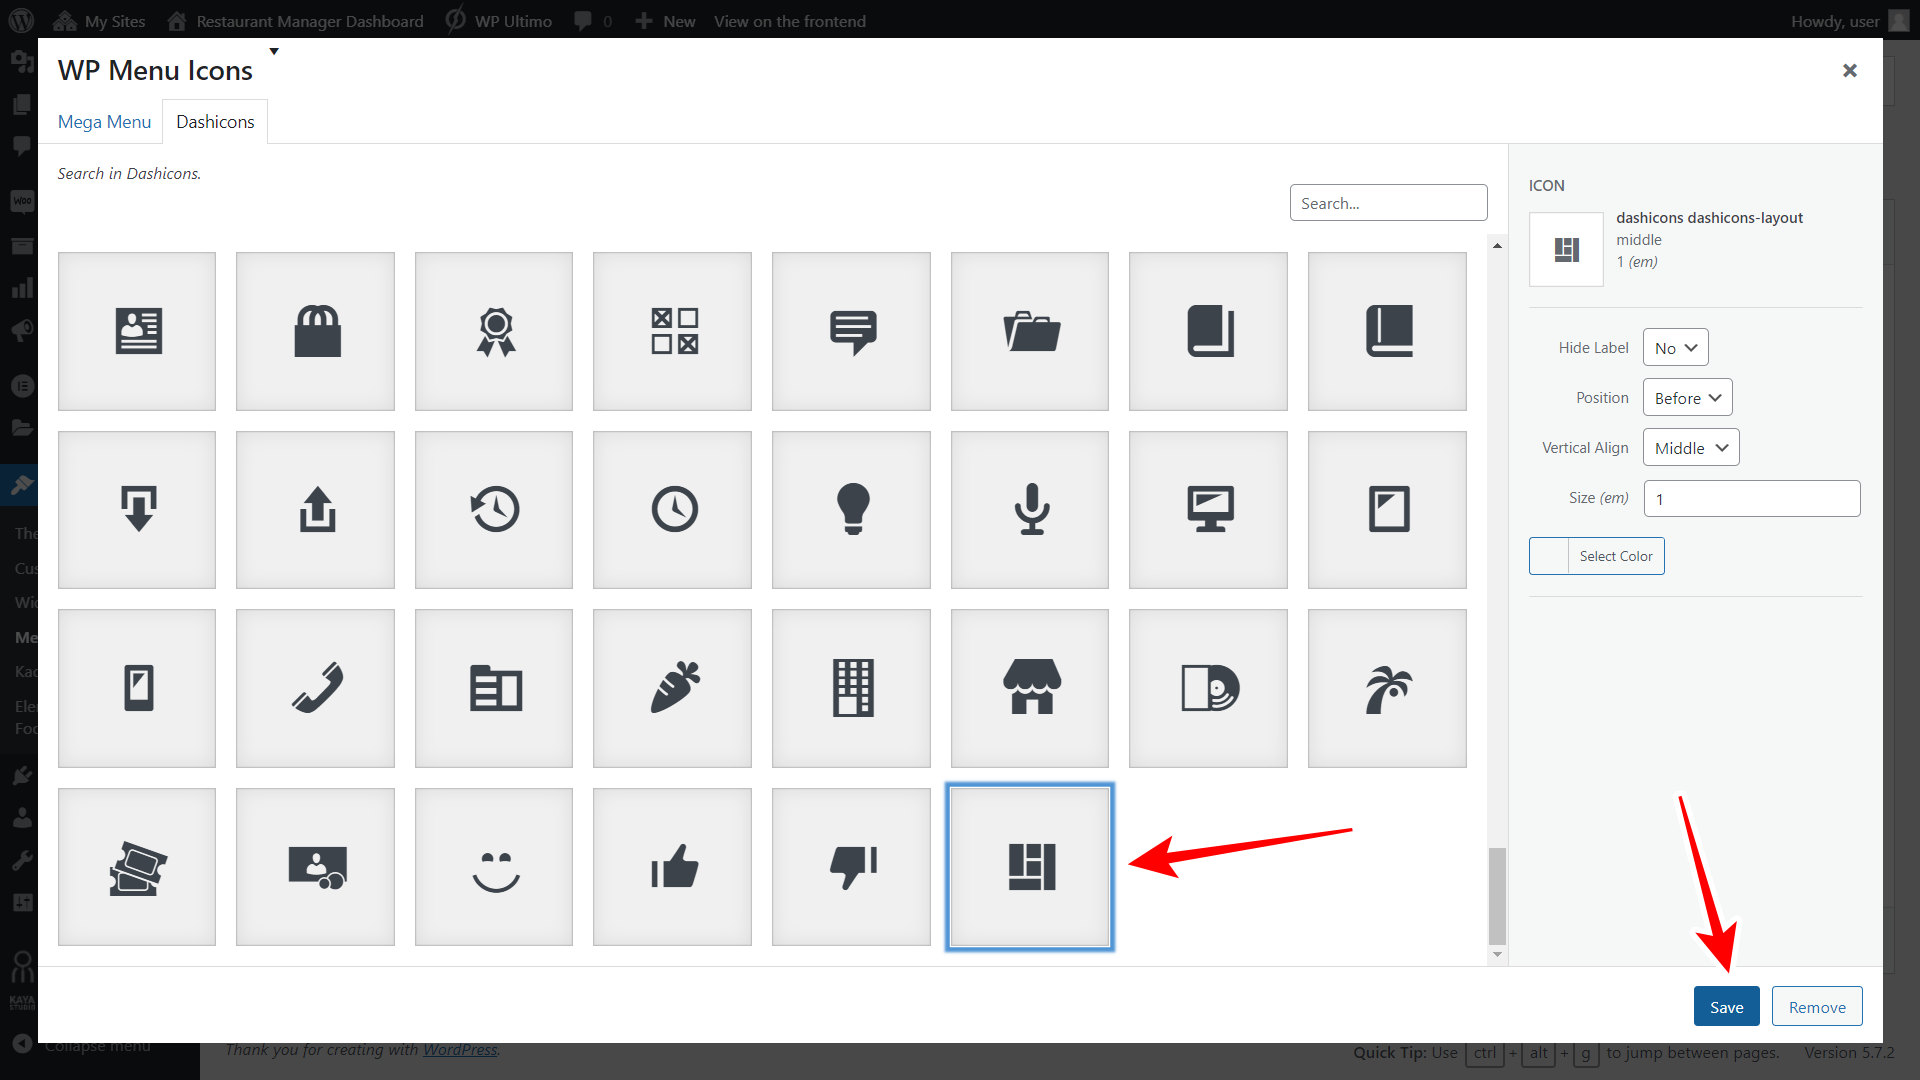
After adding icons to all the menu items, you just need to hit Save Menu to apply the changes to your frontend dashboard’s navigation menu.

6- Select the homepage for the frontend dashboard
Finally, we need to select the first page our users will see when they open their frontend dashboard to manage their sites. In this case, we’ll select the Sales page because we want them to be aware of their sales reports as soon as they log in to their frontend dashboard.
Go to Settings > Reading and select the Sales page (or the page you want) on the Homepage dropdown.

This is the frontend “Settings” page
Once the “Settings” page is published on your frontend dashboard, users will be able to view and manage the general store settings, payment gateways, restaurant store taxes, the time it takes for the order page to automatically refresh, etc.
They will also be able to select the design of the restaurant’s food menu, select the colors and logo of their own site, design beautiful invoices that will be sent to the customers’ email, and manage their membership options.