Let’s continue building our donations platform with WordPress. In this lesson, we’ll see how to add the GiveWP Donors page to the frontend dashboard.
Users will be able to view and manage donors on the frontend dashboard, without having to access the wp-admin dashboard of their sites.
You need to follow these steps:
1- Open the frontend dashboard site
Go to Network Admin > WP Ultimo > Sites.
Click on Manage on the frontend dashboard site.
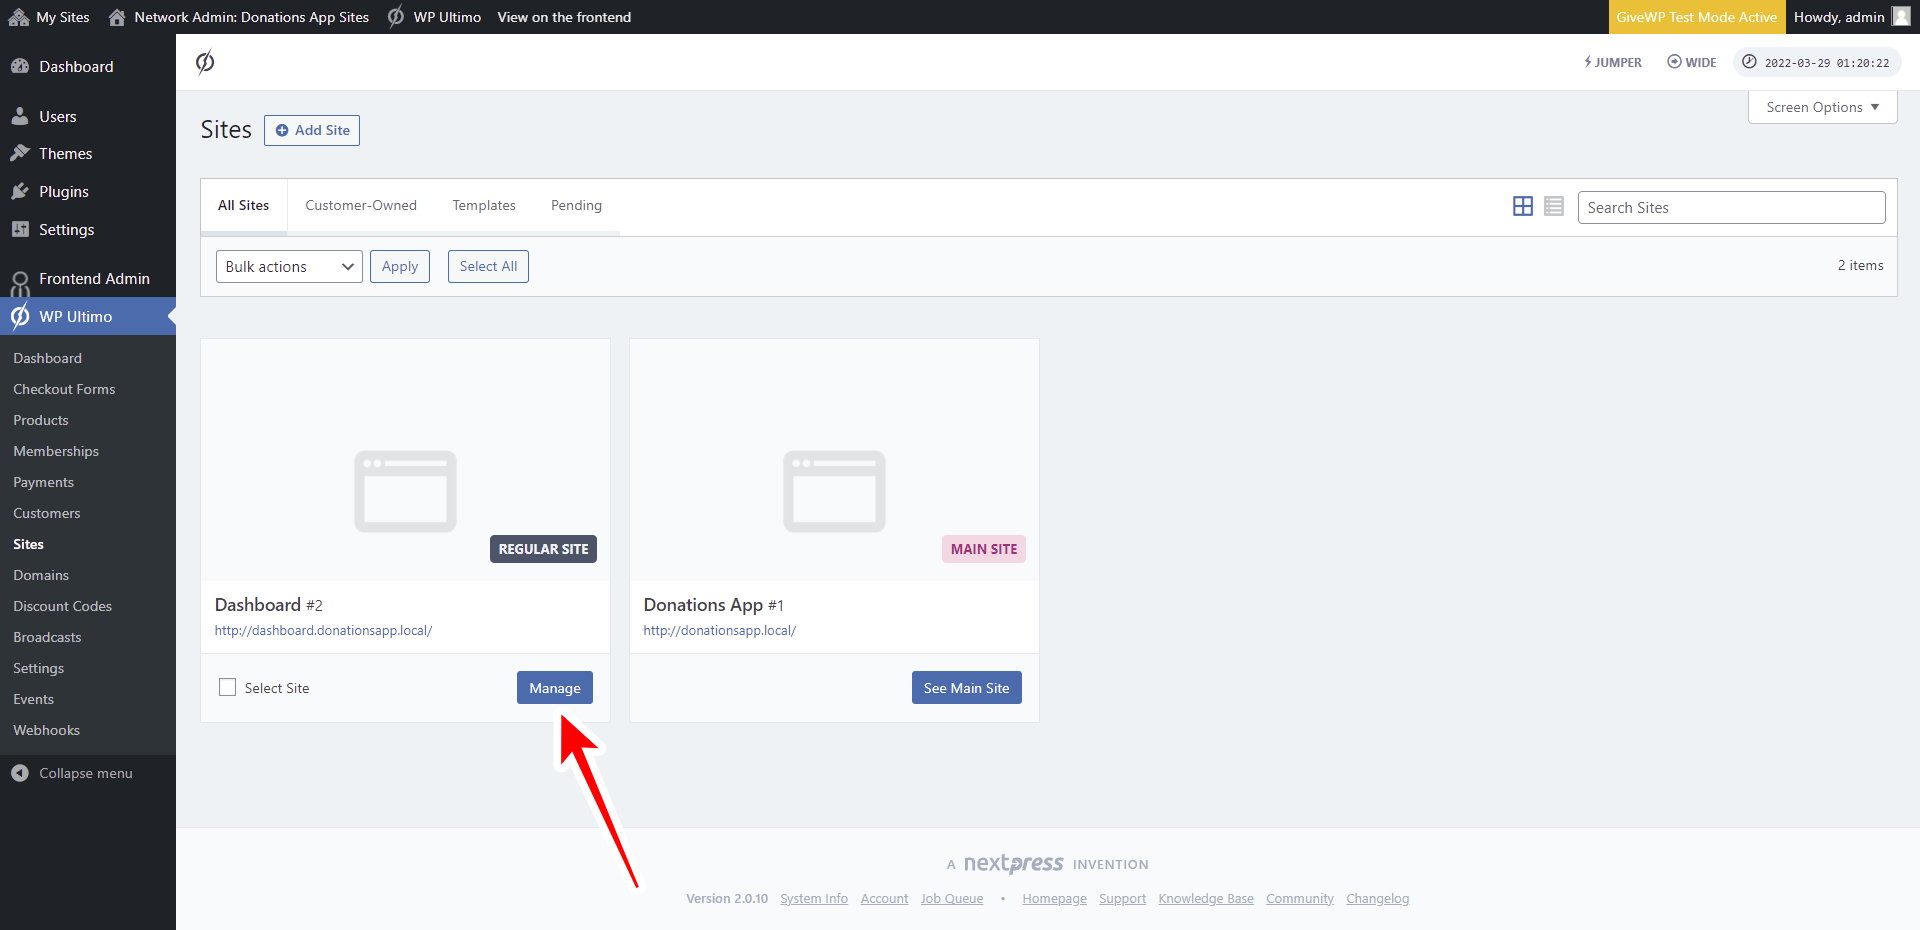
Now click on Dashboard to open the wp-admin panel of the frontend dashboard site.

2- Create a new page on the frontend dashboard site
Once you open the wp-admin panel of the frontend dashboard site, go to Pages > Add New.
Now enter the page title, select Elementor Canvas as the page Template, and click on Edit with Elementor.

Once in Elementor, let’s import the template we’re using to build our frontend dashboard.
Click on Add Template.

In the Elementor library, go to My Templates and click on Insert once you find the frontend dashboard template.

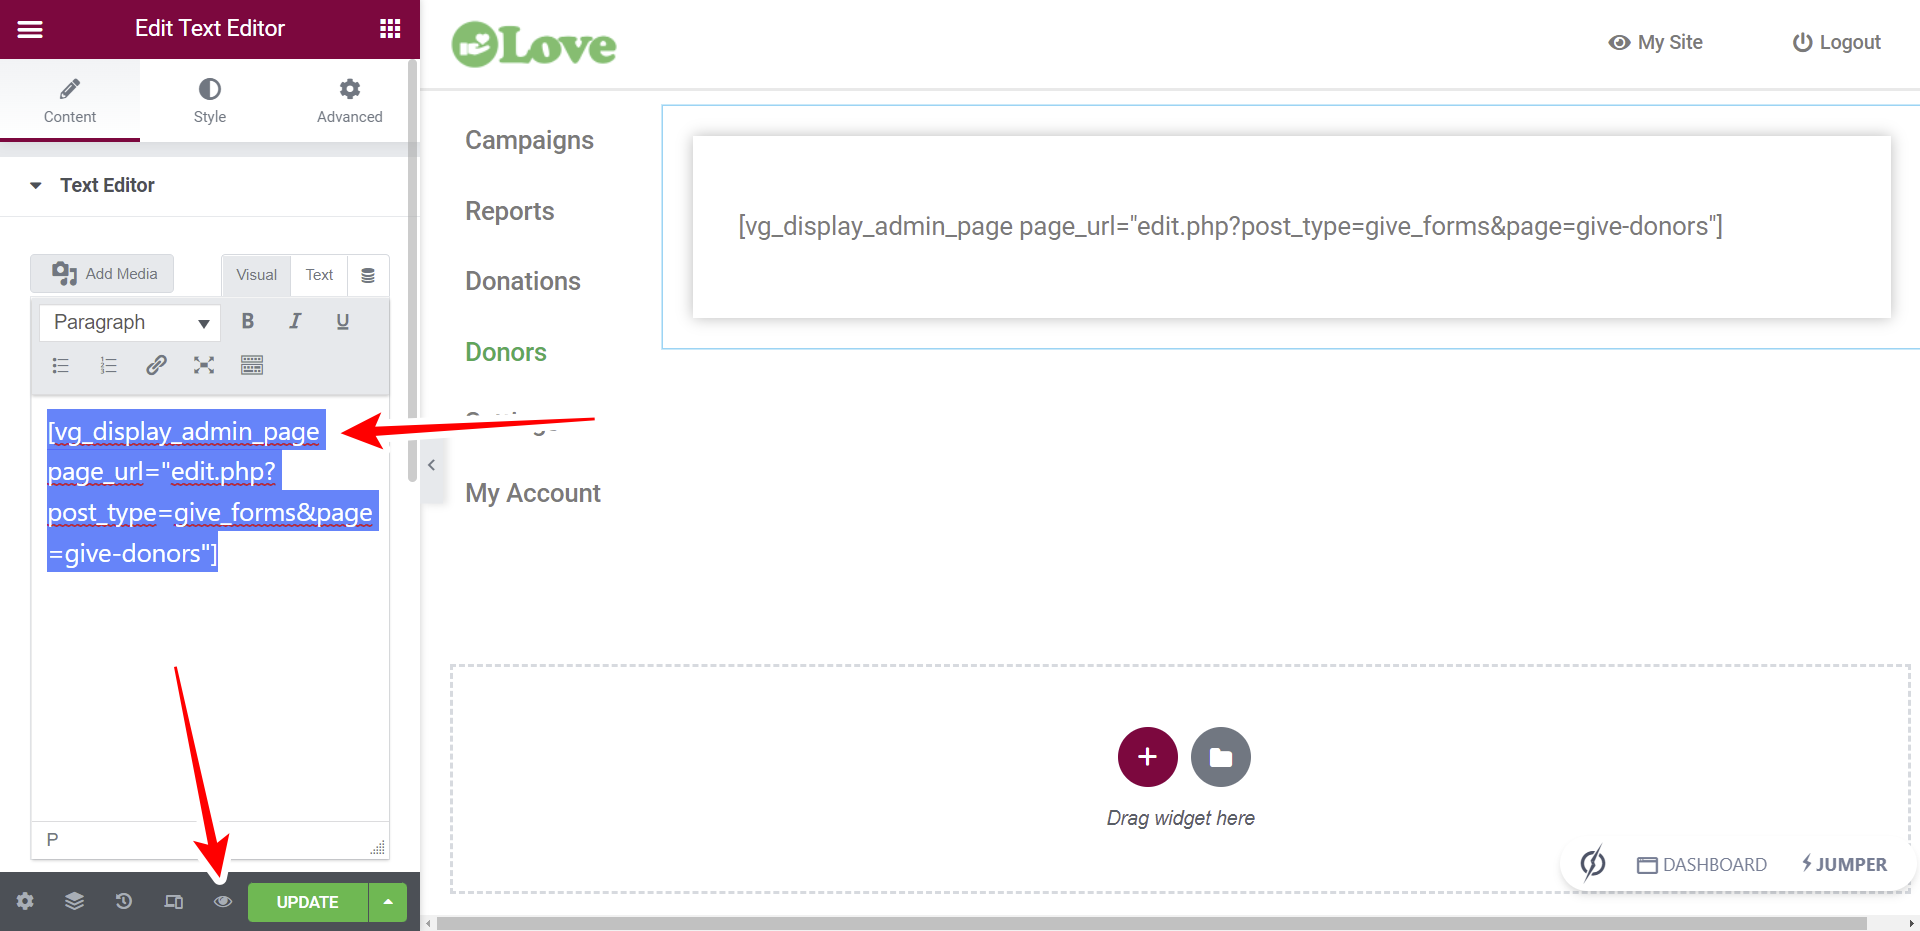
After importing the template, you need to paste the following shortcode on the page content section:
[vg_display_admin_page page_url="edit.php?post_type=give_forms&page=give-donors"]
This shortcode will allow you to display the GiveWP Donors page on the frontend dashboard.
Now click on Preview changes.
3- Set up the GiveWP Donors page on the frontend
You need to use the Quick Settings panel to set up the Donors page on the frontend dashboard.
You can start by selecting the following information:
- Page title: Donors
- URL slug: donors
- Page template: Elementor Canvas
- Add to this menu: Select the frontend dashboard menu

You can remove any unnecessary elements from the frontend Donors page.
Just click on Hide element, and click on the element you want to hide.
You need to repeat the same process with all the elements you want to hide from this page.

You can also change any texts from the GiveWP Donors page on the frontend. This is useful to rename fields, buttons and metaboxes.
- Click on Edit texts.
- Change all the texts you want.
- Click on Stop editing texts.
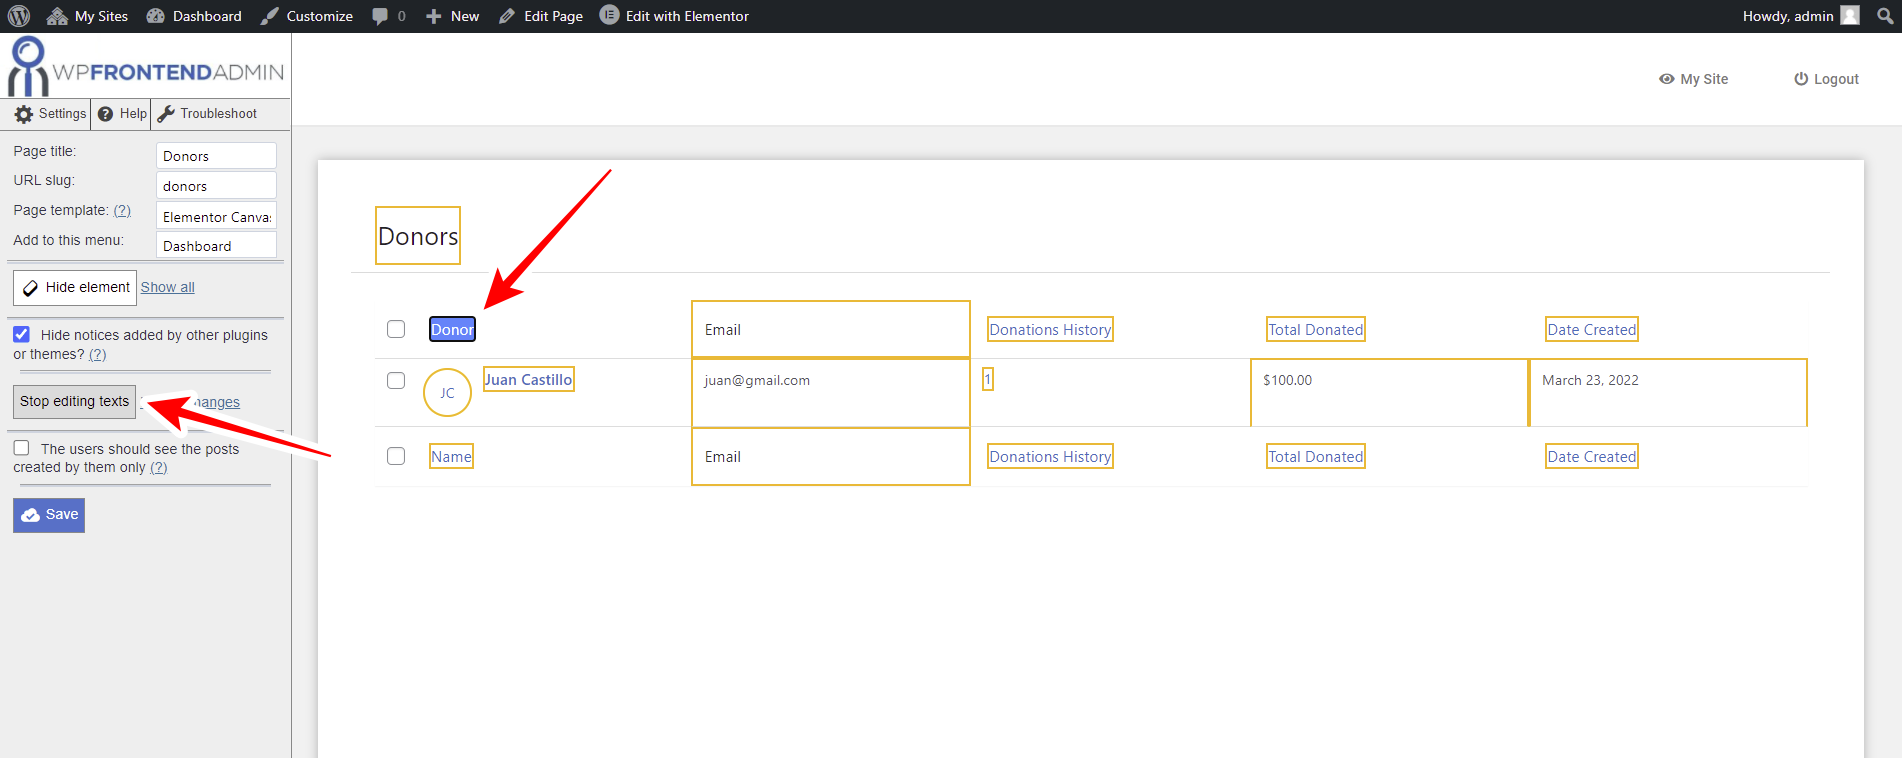
Before saving the changes, you can tick the Hide notices added by other plugins or themes checkbox.
You can also restrict this page based on the WP Ultimo plan purchased by the user. Just tick the plan for which the page is available in This page is available for these WP Ultimo plans.
Click on Save to apply the changes.

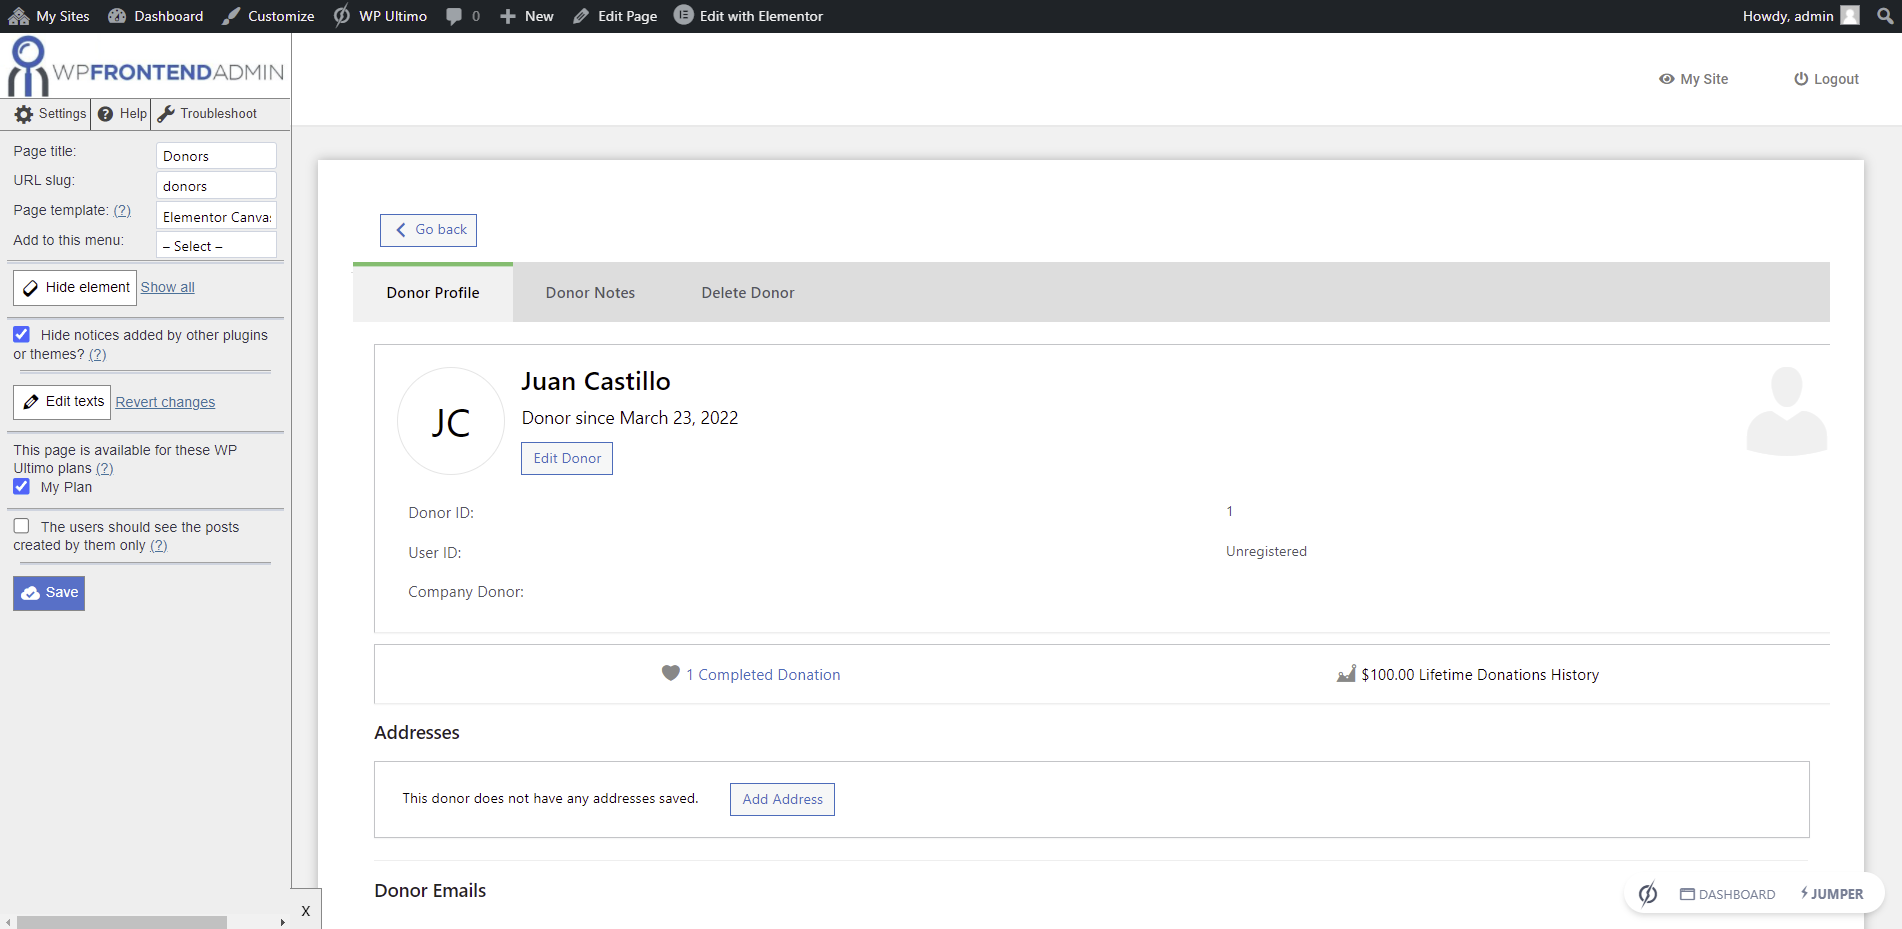
You can open a specific donor to see its profile and hide any unnecessary elements or edit any texts. You can apply changes to the Donor Profile, Donor Notes, and Delete Donor sections.
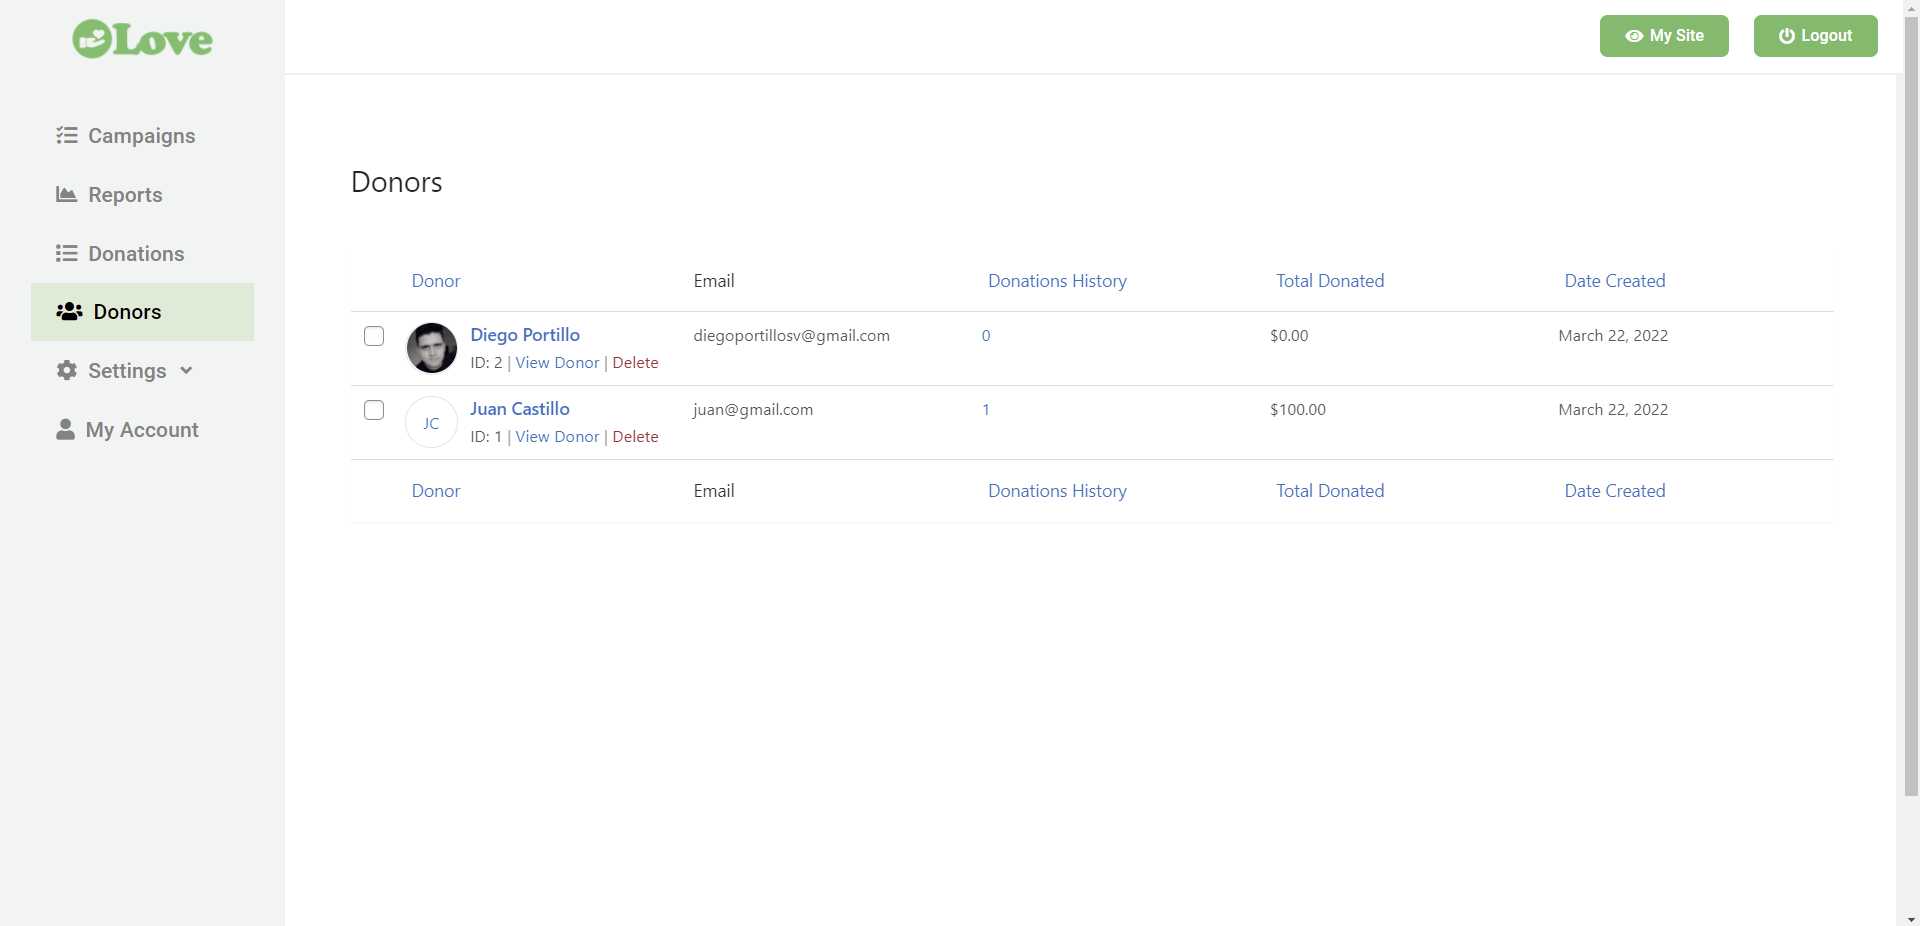
This is what the Donors page will look like on the frontend dashboard once it’s finished.
This is what our users will see when they open a specific donor profile.

In the next lesson, we’ll show you how to add the GiveWP location settings to the global frontend dashboard.