In this lesson, we’ll show you how to install WordPress Multisite and set up a multisite network.
A WordPress Multisite network allows you to have several websites using the same WordPress resources.
All the sites use the same WordPress installation, the same WordPress plugins, the same WordPress themes, and are hosted on the same server.
This is very handy for a platform like the one we’re creating in this course because it’s easier to manage all the websites from the same dashboard on one WordPress installation.
How to Install WP Multisite
To install WP Multisite, you need to first check if your hosting provider has a tool to create WordPress sites automatically. If that’s the case, make sure you create a Subdomains network, and you can skip this lesson.
If your hosting provider doesn’t have a tool to create WordPress sites automatically, you need to install WordPress manually.
Note – We won’t cover the WordPress installation process in this course, but you can click here to find a tutorial on YouTube.
After installing WordPress, we need to install WP Multisite on our regular WordPress installation and configure the multisite network:
1- Enable Multisite on a Regular Site
After installing WordPress as a normal site, you need to enable the WP Multisite feature by following these simple steps:
Step 1 – Open your “wp-config.php” file
Step 2 – Look for this text line:
/*That's all, stop editing! Happy blogging. */
define( 'WP_ALLOW_MULTISITE', true );
The result should be this:

Step 5 – Save the changes on the “wp-config.php” file.
Step 6 – Log in to your WordPress site.
2- Set up the multisite network
Once you enable the WordPress Multisite feature, set up the network by following these steps:
Step 1 – Go to Tools > Network Setup
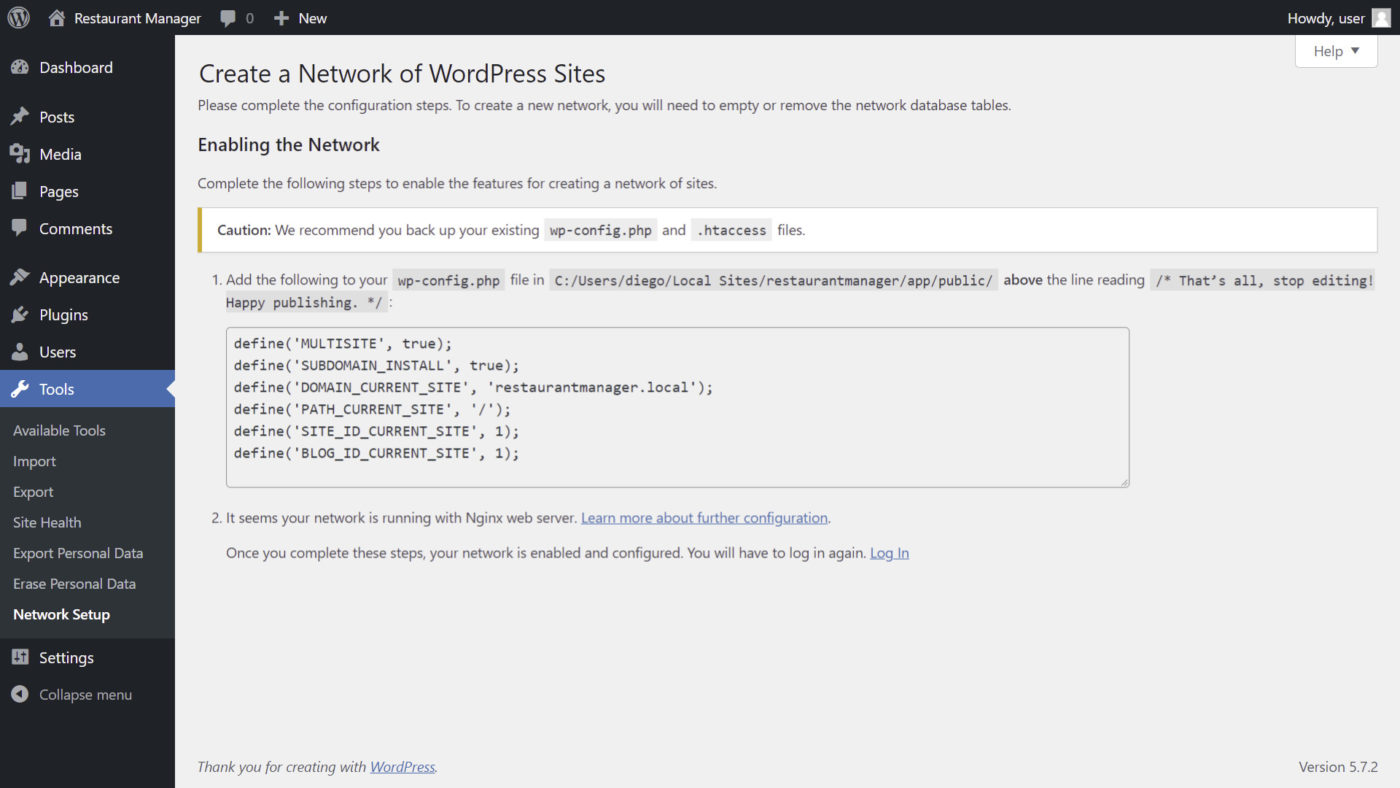
Step 2 – Open the “wp-config.php” file, add the provided code to it, and save.
The result should be this:

NOTE – You may be asked to open the “.htaccess” file, add the provided code, and save the changes. If not, the previous two steps will be enough.
Once you create your multisite network and enable the subdomain feature, you’ll have to log in to your site again, and you’ll see that now it’s a multisite network instead of a simple site.
Since you’ve created a subdomains network, the sites added to your network will be something like site1.mynetwork.com, site2.mynetwork.com, etc.
Important: If you experience issues when installing WordPress or enabling the multisite network, contact your hosting provider, and they will guide you step by step. We can’t guide you in this step because it depends on your server.