In this lesson, we will show you how to create a WP Ultimo template site for your fundraising platform.
When users create a new account on your platform, the template site that we will create in this lesson will be cloned to the users’ sites. This will save users from having to set up their sites manually from scratch.
The template site we will create in this lesson will have the following pages:
- Homepage – On this page we will display the donation forms created by the site administrator.
- Donor dashboard – This page will display the donor’s donation history and allow them to edit their profile. This page will only be available to users who register and log in.
- Log in – We will display the login form on a custom page created with Elementor.
- Register – Donors will be able to register on the site using this custom page that we will create with Elementor.
- Donation confirmation – This is the page that donors will see when the donation is successful.
- Donation failed – This is the page that donors will see when the donation fails.
You need to follow these steps to create and set up a template site on your network:
1- Add a new template site to your network
Go to Network Admin > WP Ultimo > Sites > Templates.
Click Add Site.

Enter these values to create your new template site:
- Site title: We’ll enter something like “template”.
- Site domain/path: We’ll enter something like “template” so that the site domain is something like “template.platform.com”.
- Site Type: Site Template
- Click Add new site.

After adding the template site to the network, click on Manage.
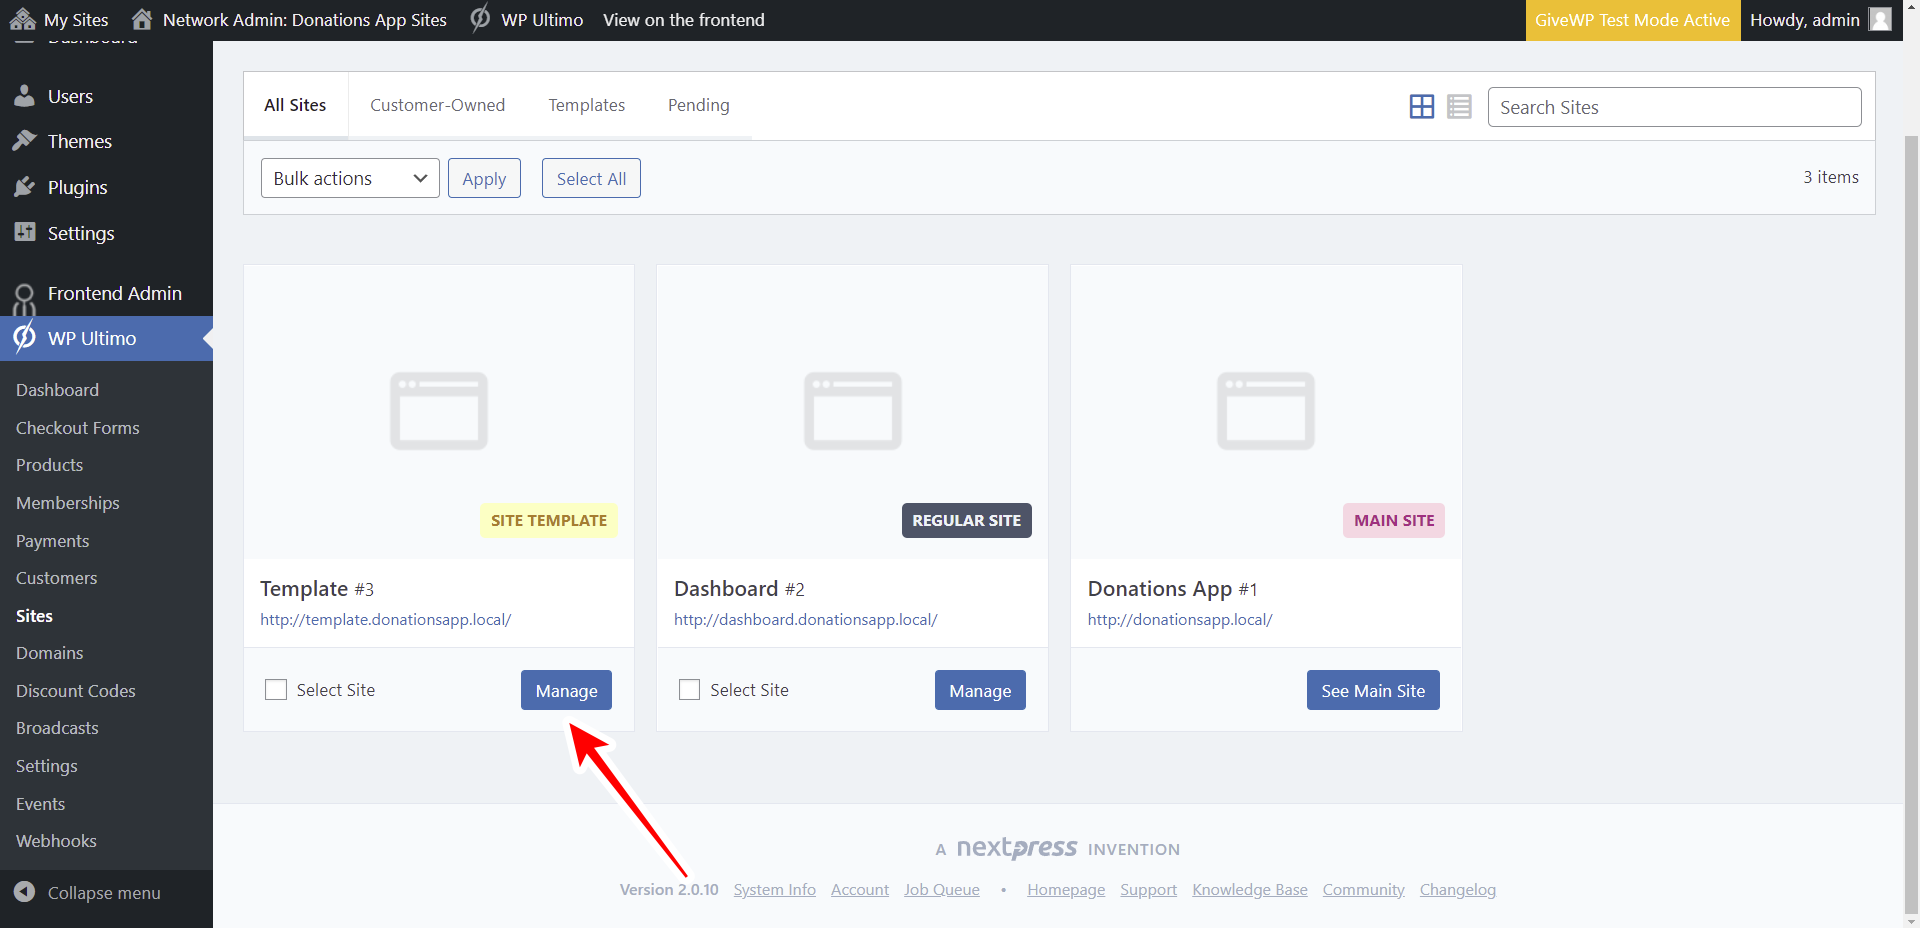
Click on Dashboard to open the wp-admin panel of the new template site.

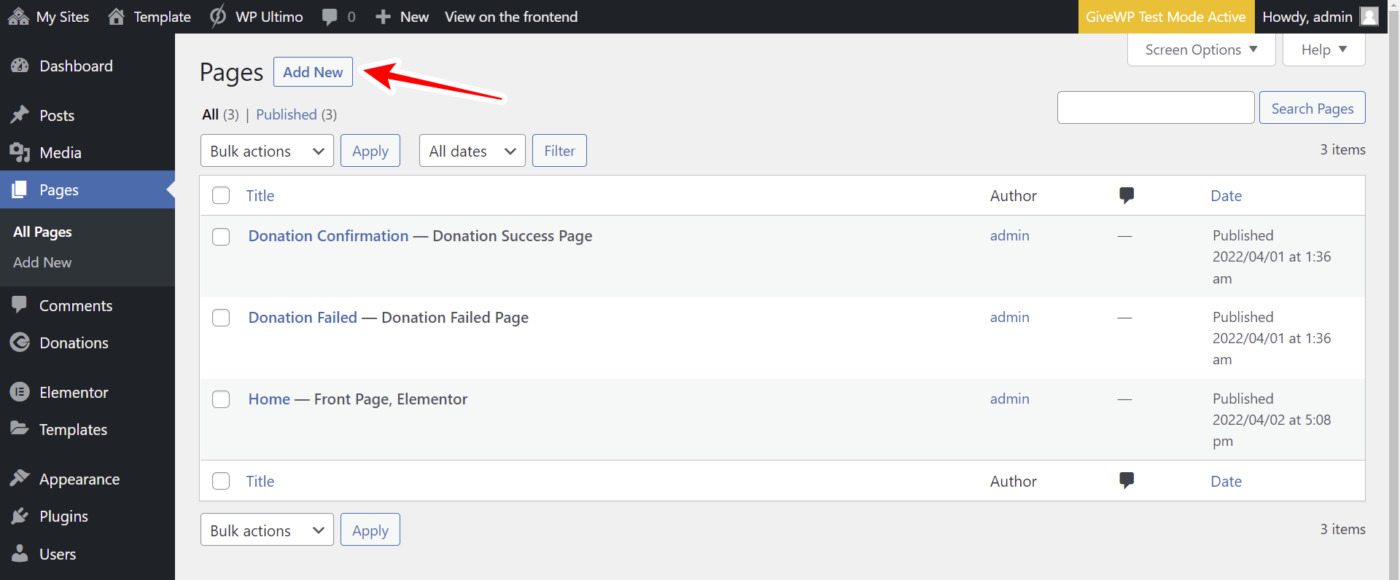
2- Remove unnecessary content from the page
New WordPress installations always create a sample post, a sample comment, and a sample page. That content is unnecessary, so you need to remove it manually.
Note – Do not delete the “Donation Confirmation” and “Donation Failed” pages.

3- Import the theme settings
If you don’t want to use our appearance options, you can design the site as you want, using any WordPress theme. However, we want to save you the time of designing the site, and below you can download the customizer options for the Kadence theme. You can import them using the Customizer Export/Import plugin.
First, go to Appearance > Themes and activate the Kadence theme.
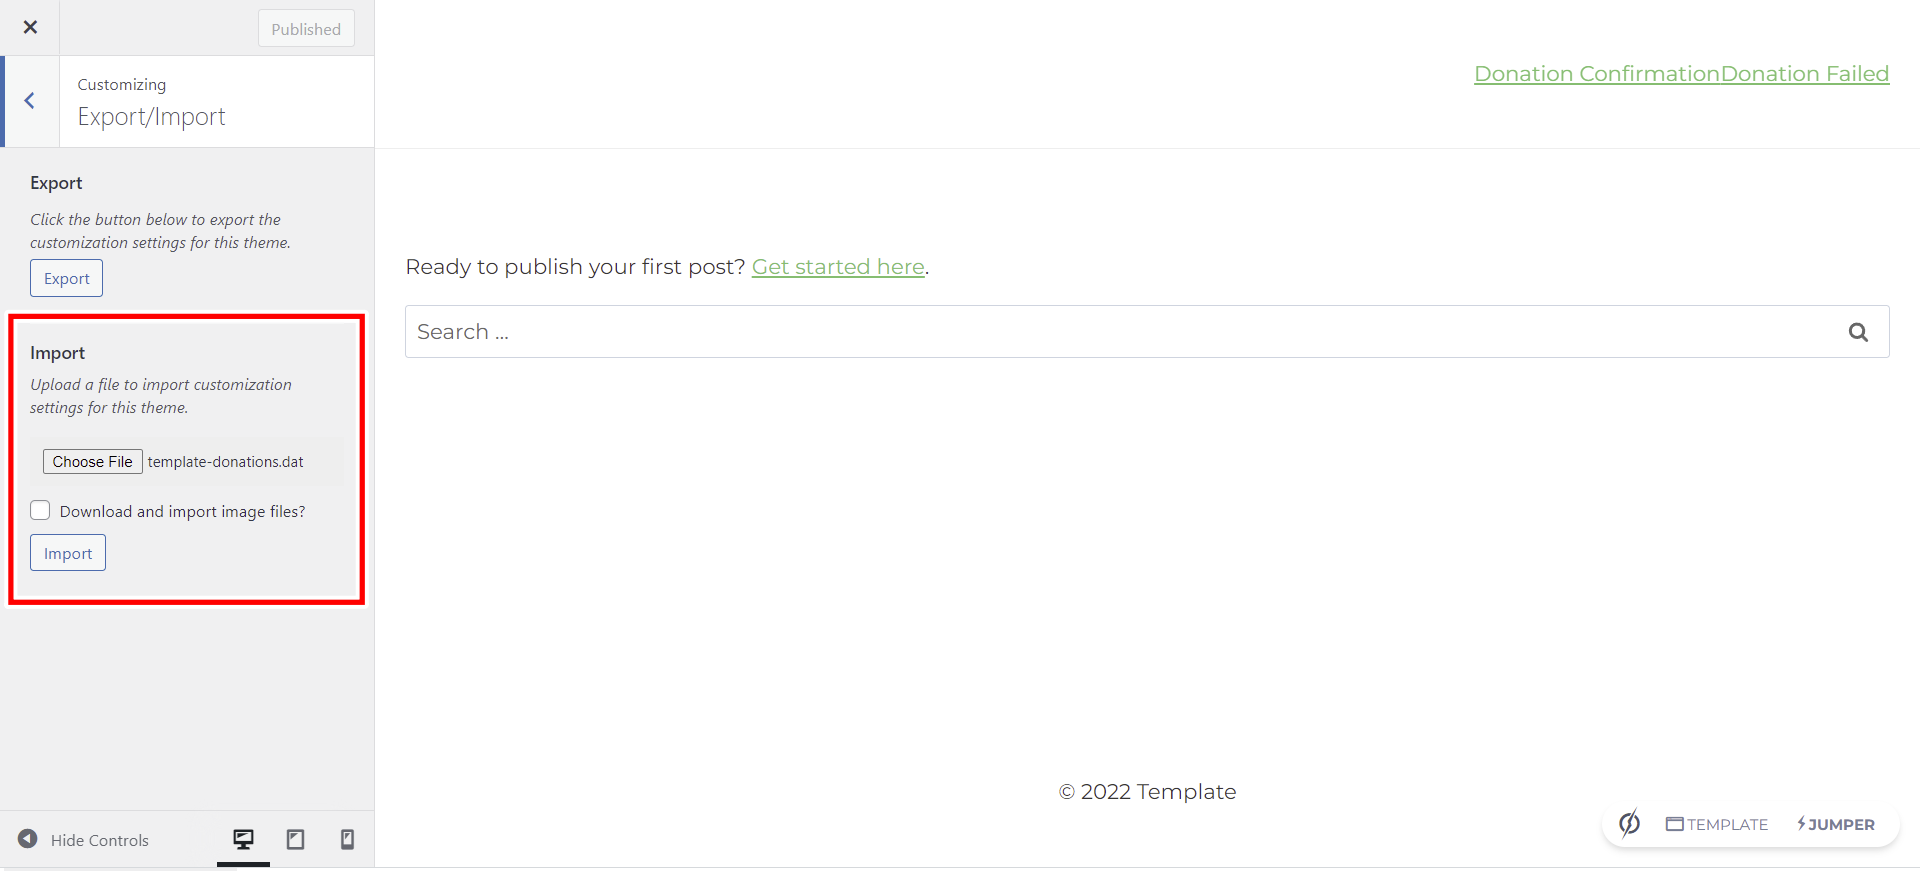
Second, go to Appearance > Customize and do this:
- Go to Export/Import
- Click on Choose File and search for the downloaded file on your computer.
- Hit Import.
Now go to Site Identity and upload your platform’s logo.
Once you upload and set up the logo, click on Publish.

You can close the customizer now.
4- Add the homepage to the template site
The homepage of our template site will contain the donation forms added by the site owner. Users will be able to create as many donation forms as the WP Ultimo plan allows them to create.
Go to Pages > Add New.

Enter the page title, select Elementor Full Width as the page template, and click on Edit with Elementor.

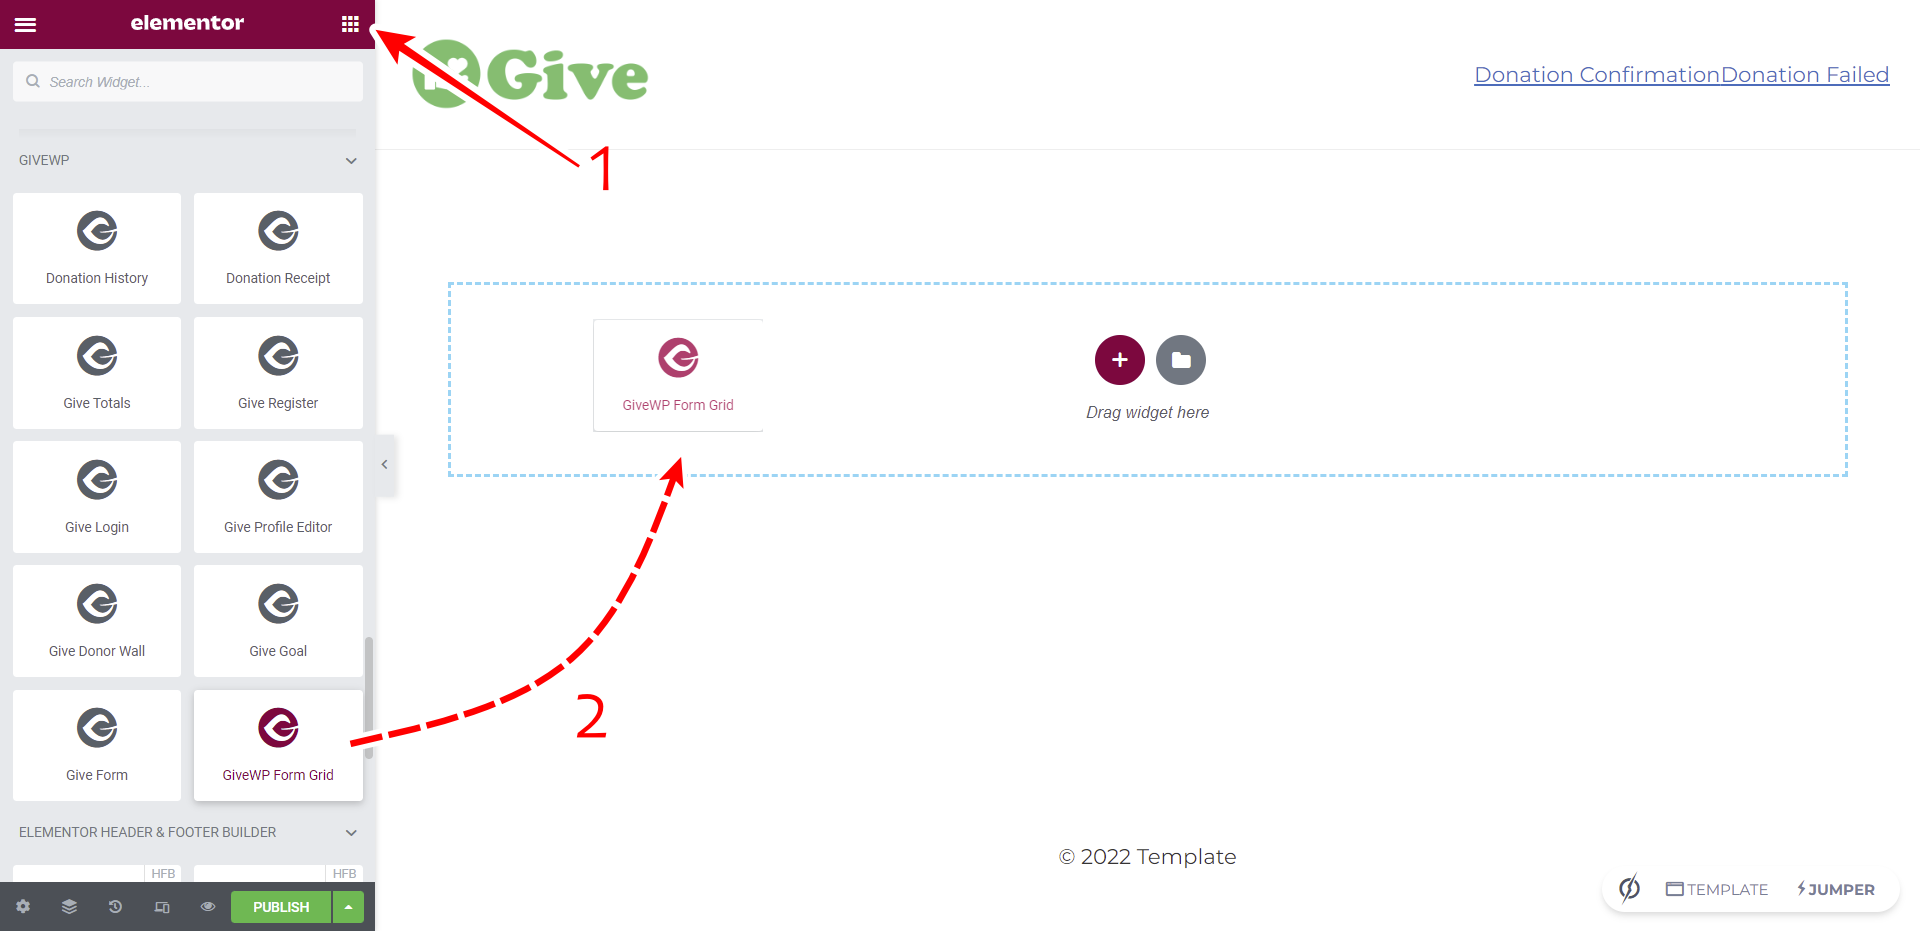
Once you’re in Elementor, go to the Elementor elements.
Search for the GiveWP Form Grid element.
Drag the GiveWP Form Grid element to the main section.
Go to Edit Section and add a 50px padding top and bottom.

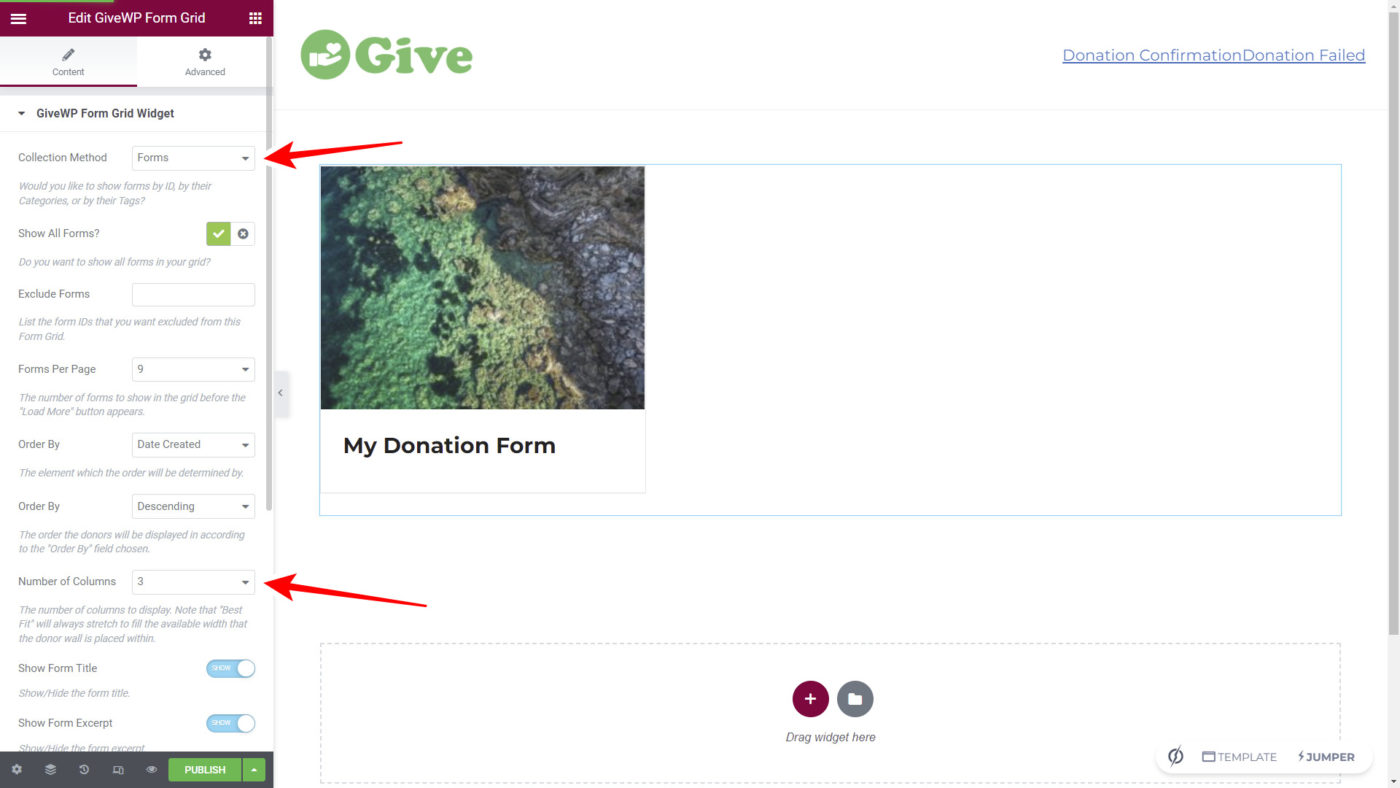
Go to Edit GiveWP Form Grid and select the following values:
- Collection Method: Forms
- Number of Columns: 3
You can select any other value to show the form grid as you want.
Now you can Publish the page and proceed to select this page as the homepage.
Go to Settings > Reading.
Select A static page in Your homepage displays.
Now select the page you just created as the Homepage.
Click on Save changes.

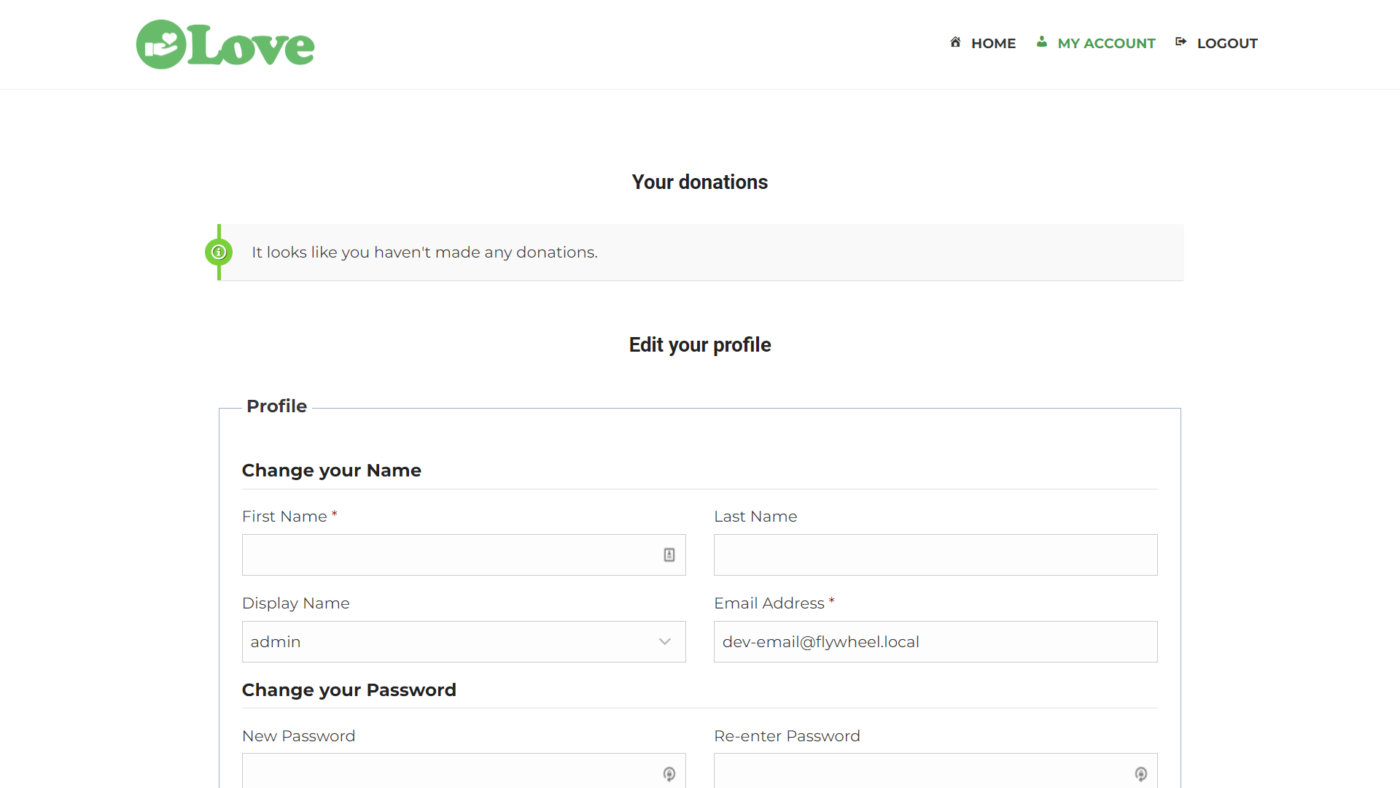
5- Add the donor dashboard page
Now we’ll add the donor dashboard page, which will allow donors to view their donation history and edit their profile.
Go to Pages > Add New.
Now enter the page title, select Elementor Full Width as the page template, and click on Edit with Elementor.

Once you’re in the Elementor editor, add a new section to the page and go to Edit Section.
Move to Advanced and enter 50px of top padding and 50px of bottom padding.

Now you need to add the following elements to this page:
- Title: You can add something like “Your donations”
- Donation History Widget
- Title: You can add something like “Edit your profile”
- GiveWP Profile Editor Widget
This is what the page should look like in Elementor:

6- Add the login page
Now it’s time to add the page donors will use to log in to their donor account.
- Go to Pages > Add New.
- Select the Elementor Full Width template.
- Click on Edit with Elementor.

Once you’re in the Elementor dashboard, add the GiveWP Login Widget element to the page.
After users log in, we will redirect them to their donor dashboard. Select the page created in step 5 of this lesson.
You can Publish the page after adding the login form.

7- Add the registration page
The registration page will be used by donors who want to create an account on the site.
- Go to Pages > Add New.
- Select the Elementor Full Width template.
- Click on Edit with Elementor.
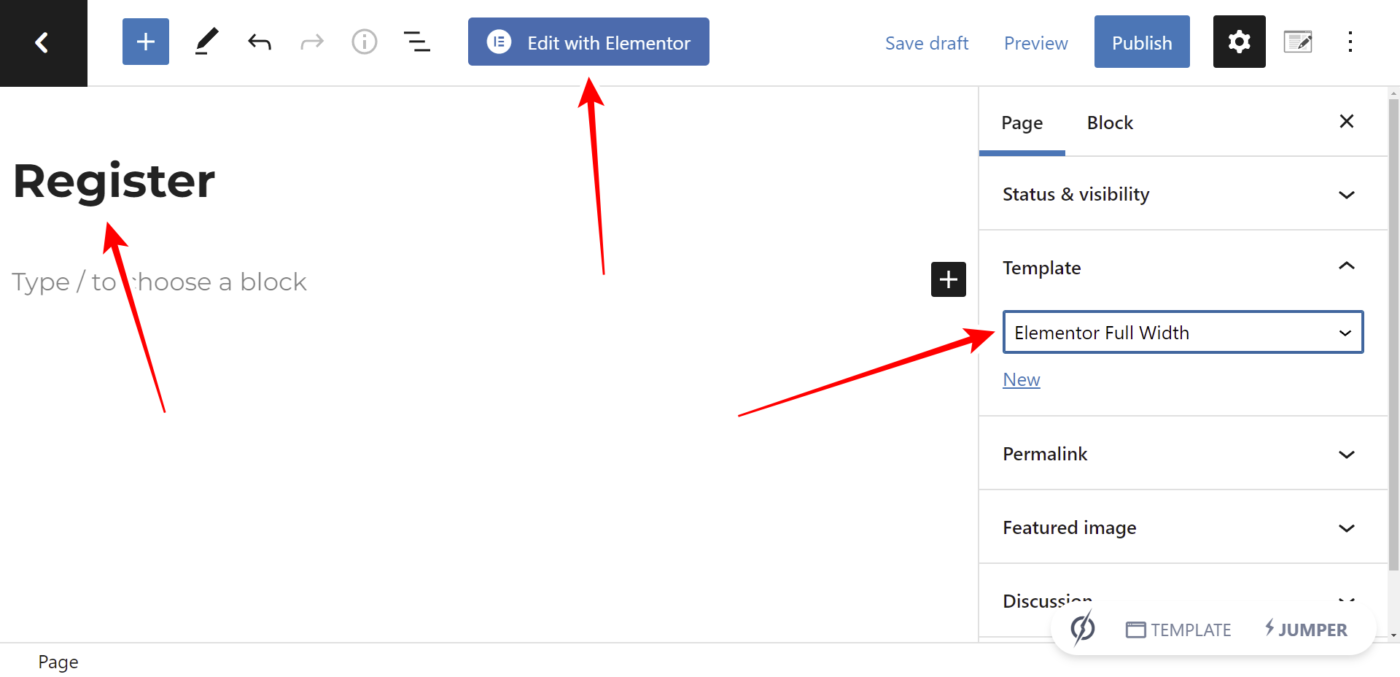
Once you’re in the Elementor dashboard, add the GiveWP Register Widget element to the page.
After users register a new account, we will redirect them to the homepage. Select the page created in step 4 of this lesson.
You can Publish the page after adding the registration form.

8- Set up the navigation menu
After adding the template site pages, we need to configure the navigation menu.
This navigation menu will have some visibility conditions. This means that the login and registration pages will be shown only to logged out users, and the donor dashboard page together with the logout button will be shown only to logged in users.
For this, we will use the User Menu plugin.
First, go to Appearance > Menus, and create a new nav menu.
- Add the Menu Name.
- Tick the Primary checkbox.
- Click on Create Menu.

Once you create the nav menu, add the following pages to it:
- Home
- Dashboard
- Log in
- Register

Move to User Links and add the Logout link to the menu.

Now let’s select the visibility settings for every menu item.
Use the Who can use this link dropdown in each menu item and select the following values:
- Home: Everyone
- Dashboard: Logged In Users
- Log in: Logged Out Users
- Register: Logged Out Users
For the Logout item, you can select the Home page in Where should users be taken afterwards.

Note – You can add icons to the menu items of your site template just as we showed you in the previous lesson.
Once you’re done configuring your site template click on Save Menu to apply the changes.
This is what the homepage will look like for logged out users:

As you see, the visitors will only see the Home, Log in and Register items on the navigation menu.
This is what the registration page will look like:

This is the login page:

Once users log in or register a new account, they will be able to view the donor dashboard and the logout button on the navigation menu.
9- Set up this site template on your WP Ultimo plan
Now that we have created the template site in our multisite network, we need to select this site to be automatically assigned when users create a new account on our platform using a membership plan.
For this, we need to go to Network Admin > WP Ultimo > Products, and open the plan we want to edit.
Once you open the plan you want to edit, go to Site Templates.
Enable the Allow Site Templates field.
Select Assign Site Template in the Site template selection mode dropdown.
Enable the site template, and save the changes.

Now, every time users purchase this plan and create a new account, the site template will be automatically cloned to their sites; they won’t have to configure the site manually.
In the next lesson, we’ll show you how to create a custom login page for your fundraising platform built with WordPress.