In this lesson we will show you how to create a beautiful homepage for your WordPress-based fundraising platform. This page will allow you to present your platform to the world to attract new users.
The best thing is that you won’t have to create it from scratch, because we have prepared a beautiful template for Elementor, which you will only have to import and edit on the main site of your donations platform.
Follow these steps:
1- Open your network’s main platform
This page must be created on your network’s main site.
Go to Network Admin > WP Ultimo > Sites.
Click on See Main Site.

Now click on Dashboard to open the wp-admin panel of your network’s main site.

2- Import the homepage Elementor template
You can download the homepage template for your donations platform by clicking on the button below:
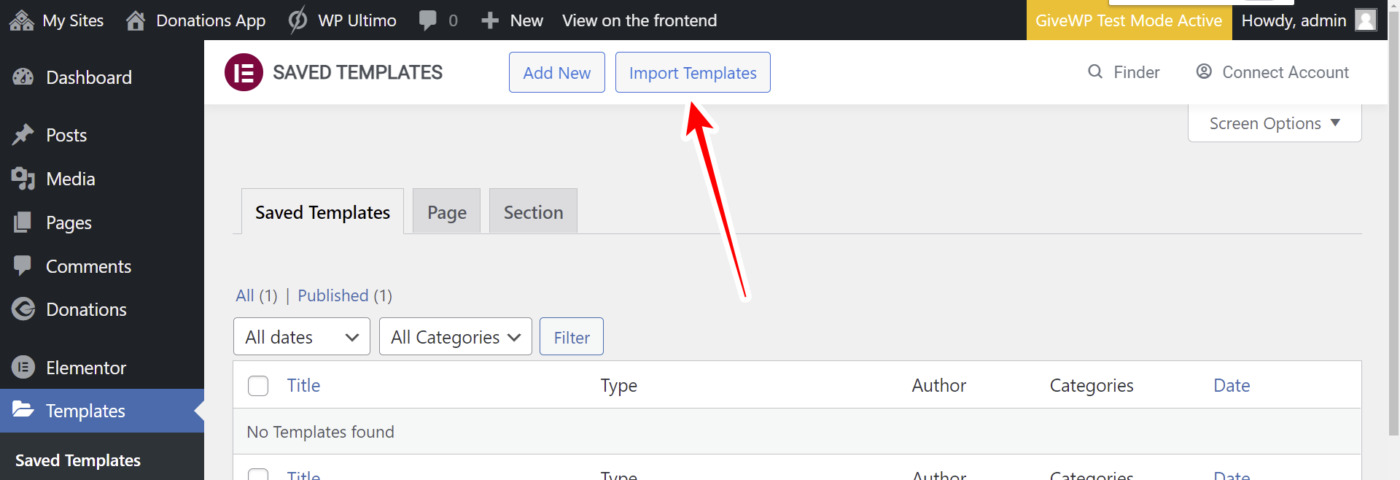
After downloading the page template, you need to go to Templates > Saved templates.
Once there, click on Import Templates.
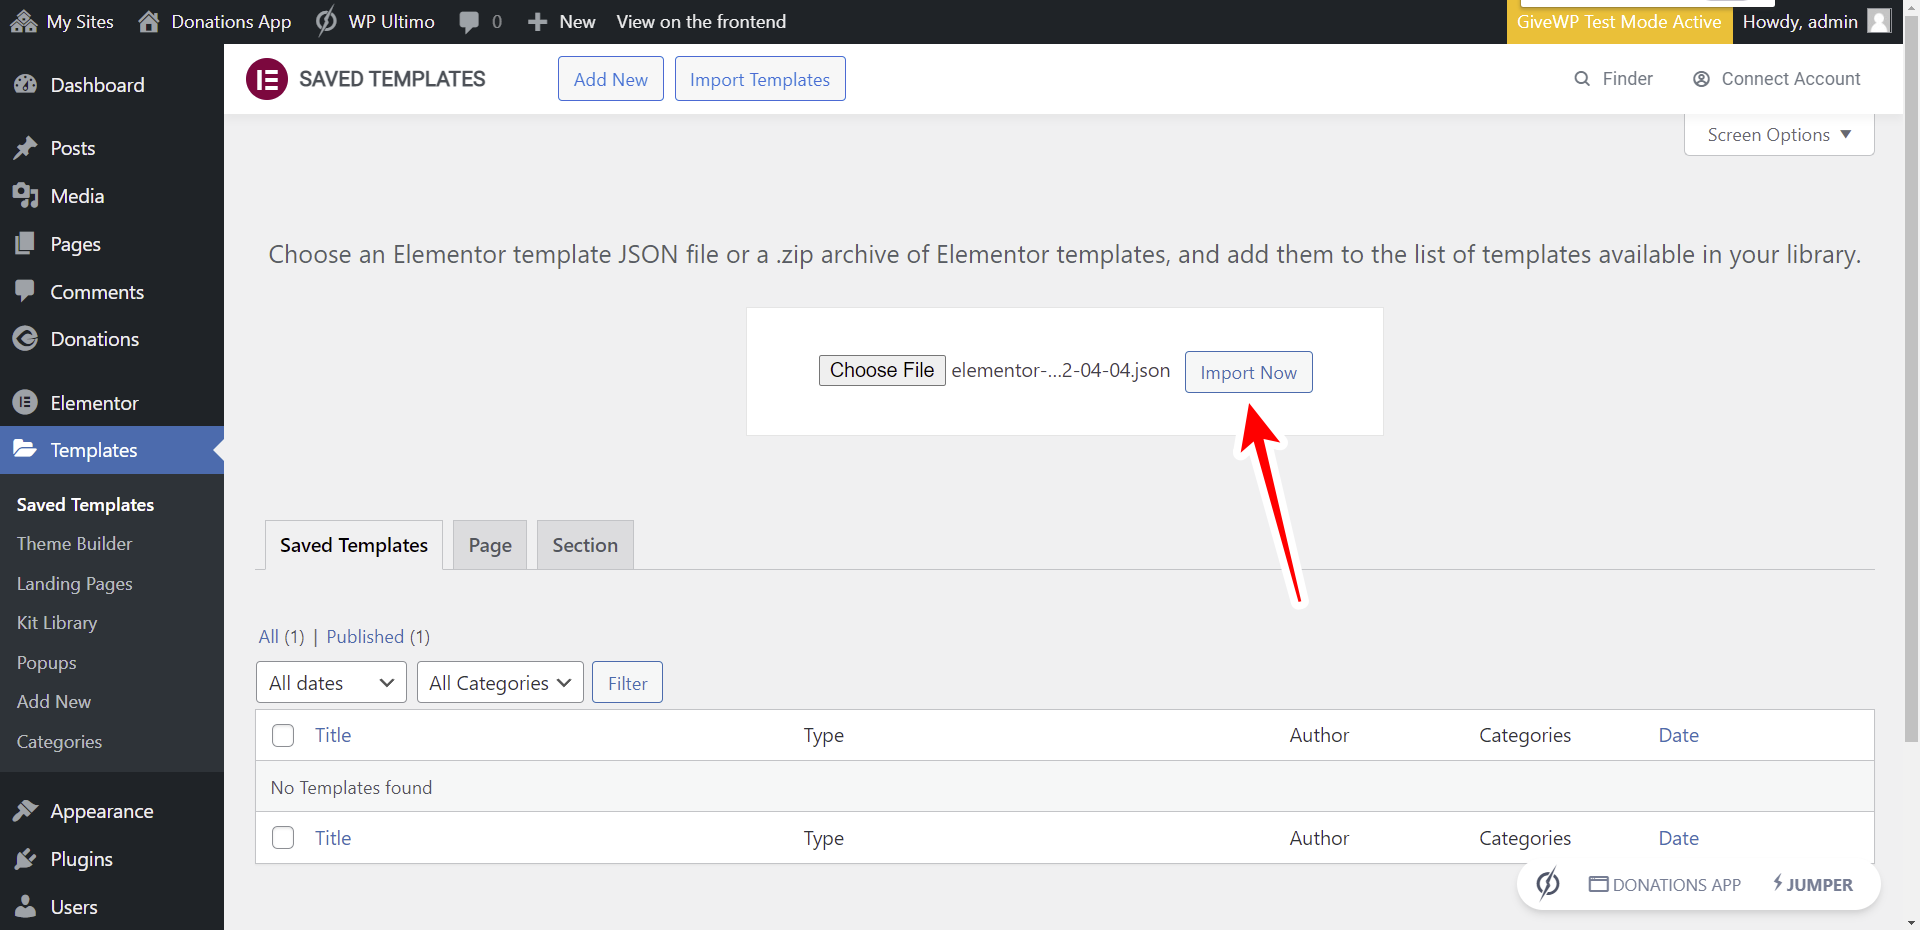
Click on Choose File, find the template you downloaded to your computer, and then click on Import Now.
3- Create your homepage with Elementor
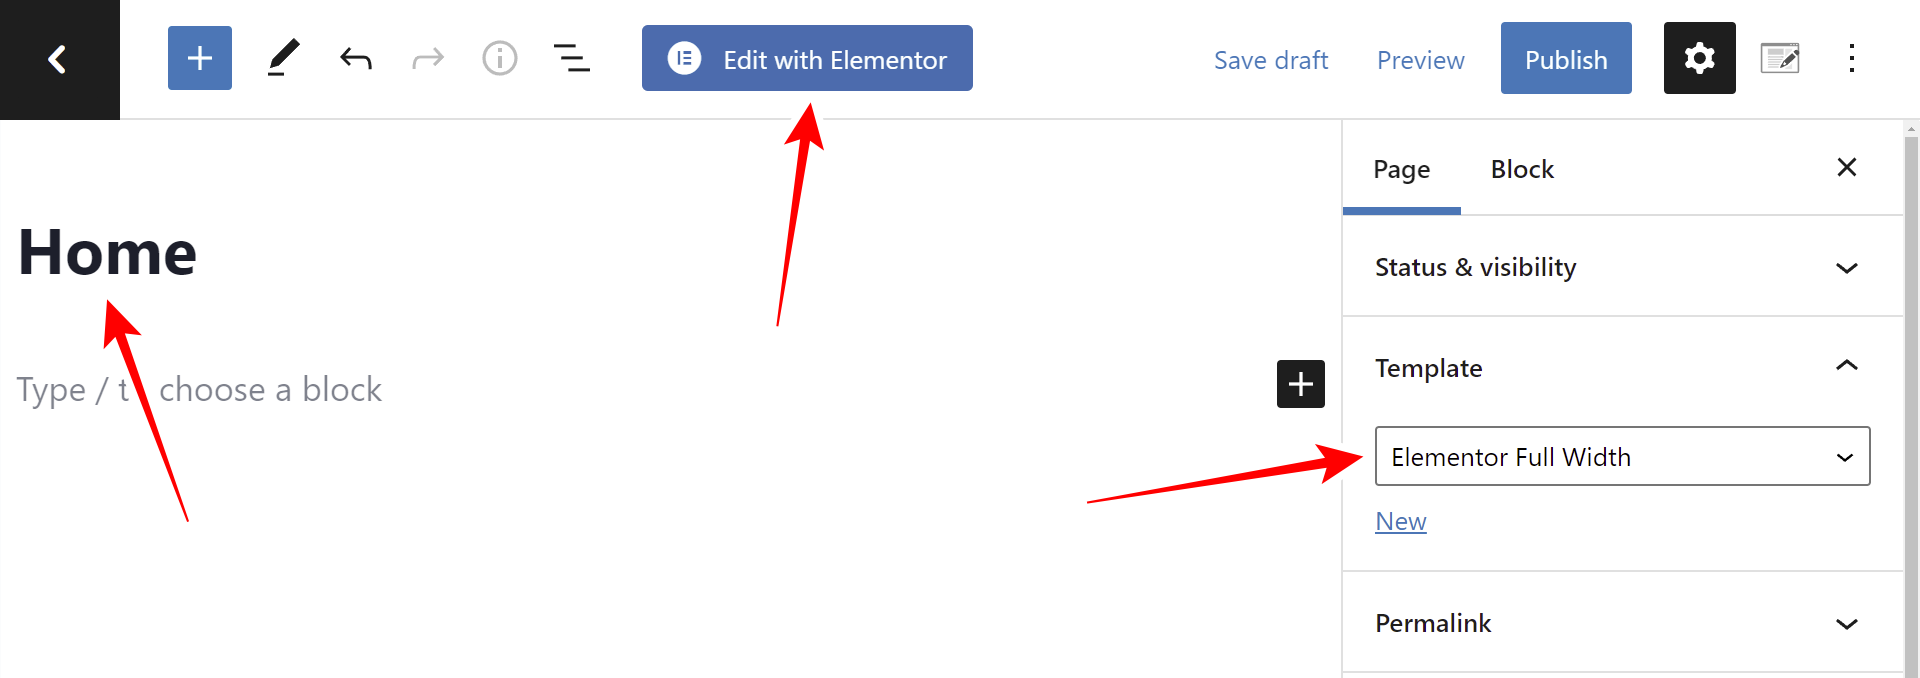
Go to Pages > Add New.
Enter the page template, select Elementor Full Width as the page template, and click on Edit with Elementor.
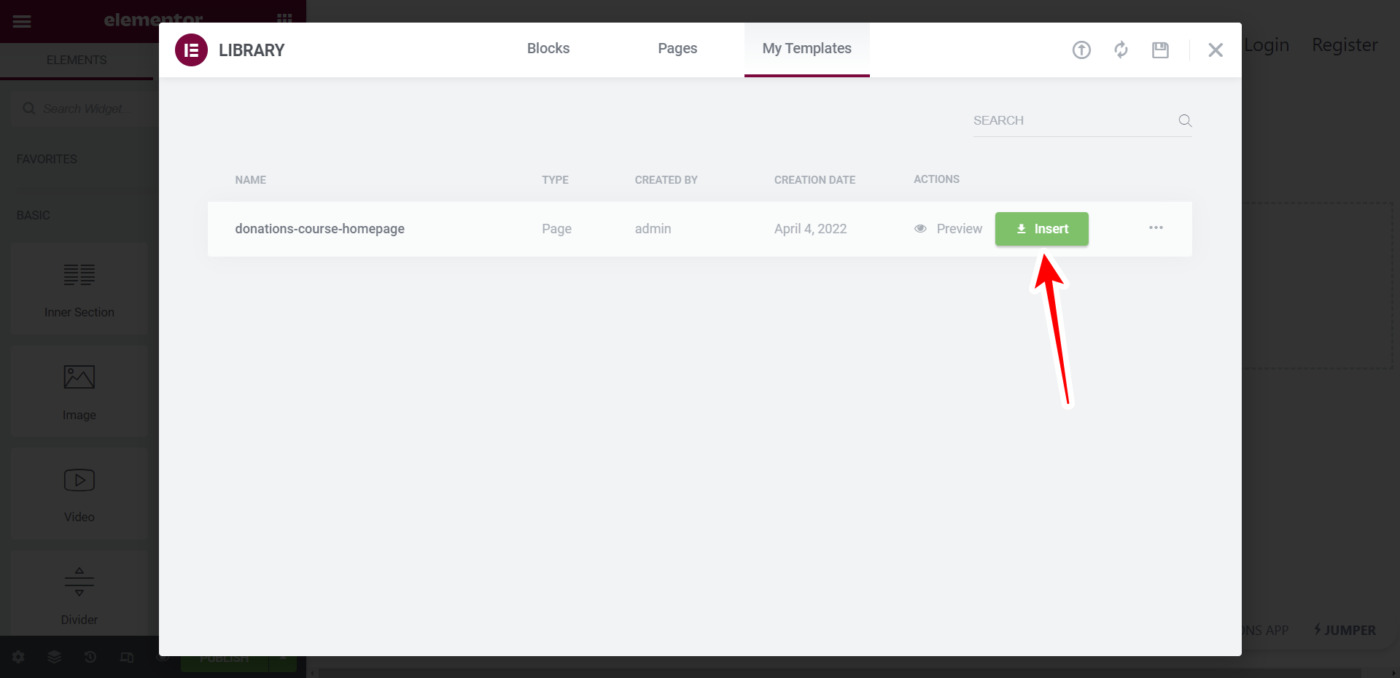
Now click on Add template to open the Elementor library and locate the homepage template.

Once you locate the template, click on Insert.
4- Edit the homepage with Elementor
After importing the page template, you can start editing the texts, changing the button links, changing the images, deleting any element you won’t need, etc.

In the first section of the page, you will display a call to action in short words and a small paragraph of information about your platform.
Then, there are two buttons. The first button is to redirect users to the registration page we have created in previous sections. The second button is to redirect users to the login page.
The second section shows four columns in which you can display some main features of your platform. Be sure to select appropriate icons for each feature you want to display.

In the third section, you can show other important features or aspects of your platform, including illustrative images. Make sure to select appropriate images and edit the headings and paragraphs we have included in this section.

The last section includes a pricing table that you can easily edit in Elementor. This will be very useful if you create multiple WP Ultimo membership plans.

The buttons should redirect to the signup page or membership plan link.
To get the membership plan link, go to Network Admin > WP Ultimo > Products.
Once there, open the membership plan you want, and click on Click to copy Shareable Link.
Finally, go back to Elementor and paste that link into the button link you want.

Once you make all the necessary changes to your homepage, you can Publish the page.
5- Select this page as the homepage of your network’s main site
After publishing the page, you need to select it as the homepage of your network’s main site.
- Go to Settings > Reading.
- In Your homepage displays select A static page.
- Select the page you’ve just created as Homepage.
- Click on Save changes.

Note – Your platform site will need other important pages. For example, you will need to create a privacy policy page, a page for publishing blog posts and tutorials on the use of the platform, a contact page, etc. You need to create these pages and configure the site as you wish.
In the next section, we’ll show you how to choose some admin restrictions to make your platform more secure.