IMPORTANT
WP Ultimo was abandoned by the author. But there is a free fork maintained by the community that you can use as a replacement of WP Ultimo. Read more and get the fork plugin here.
Let’s continue building our fundraising platform with WordPress. In this lesson, we’ll show you how to add the GiveWP donations history to the frontend dashboard.
Your platform users will be able to view the donations they have collected without having to access the normal wp-admin dashboard.
Follow these steps:
1- Open the frontend dashboard site on your network
Go to Network Admin > WP Ultimo > Sites.
Click on Manage on the frontend dashboard site.
Click Dashboard to open the wp-admin panel of your frontend dashboard site.
2- Add a new page on the frontend dashboard site
Once you’re on the wp-admin panel of the frontend dashboard site, go to Pages > Add New:
- Enter the page title.
- Select Elementor Canvas in Template.
- Click on Edit with Elementor.
Note. Make sure the URL slug of the page is not /donations, because GiveWP already has a page with that URL slug. /donation-history can be a good URL slug.
Once you’re in the Elementor editor, you need to import the template you’re using to build the frontend dashboard into the page.
Click on Add template.
Go to My Templates, locate the template you’re using to build the frontend dashboard and click on Insert.
Now that you have imported the template, you need to add the following shortcode to the page to display the donation history on the frontend:
[vg_display_admin_page page_url="edit.php?post_type=give_forms&page=give-payment-history"]
Click on Preview changes.
3- Set up the frontend donations page
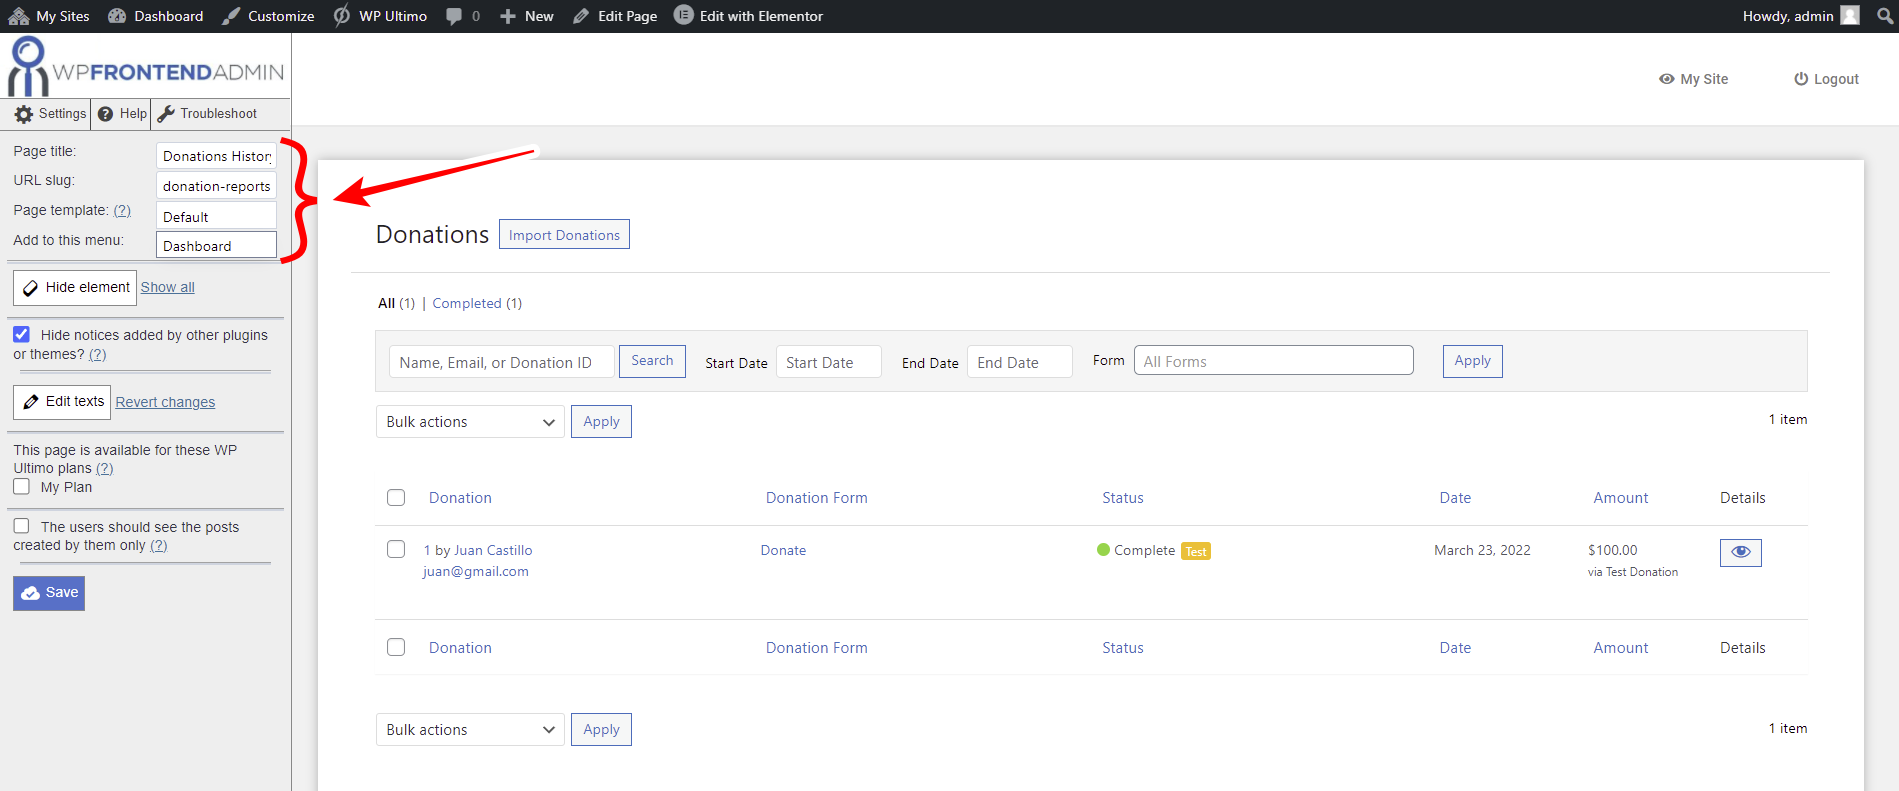
Now that the donations history has been displayed on the frontend, use the Quick Settings panel to set up the page.
Note. You should create a new test donation on this site to be able to view the donations page correctly.
You can start by selecting the following information:
- Page title
- URL slug
- Page template
- Add to this menu
You can hide any unnecessary elements from the Donations page. For example, we won’t allow users to import donations, so we need to remove the Import Donations button from this page.
- Click on Hide element
- Click on the element you want to hide.
Repeat these two steps for every element you will hide from the page.
Besides hiding any unnecessary elements on the page, you can edit any texts to customize the page even more. You can rename buttons, fields and metaboxes.
- Click on Edit texts.
- Edit all the texts you want.
- Click on Stop editing texts.
If you don’t want admin notices to be displayed on this frontend page, tick the Hide notices added by other plugins or themes checkbox.
If you want to restrict this page based on the WP Ultimo plan, you can select the plans in the This page is available for these WP Ultimo plans section.
Click on Save to apply the changes.
After saving the changes, you can view an existing donation to edit the page by hiding any unnecessary elements or changing any texts on it.
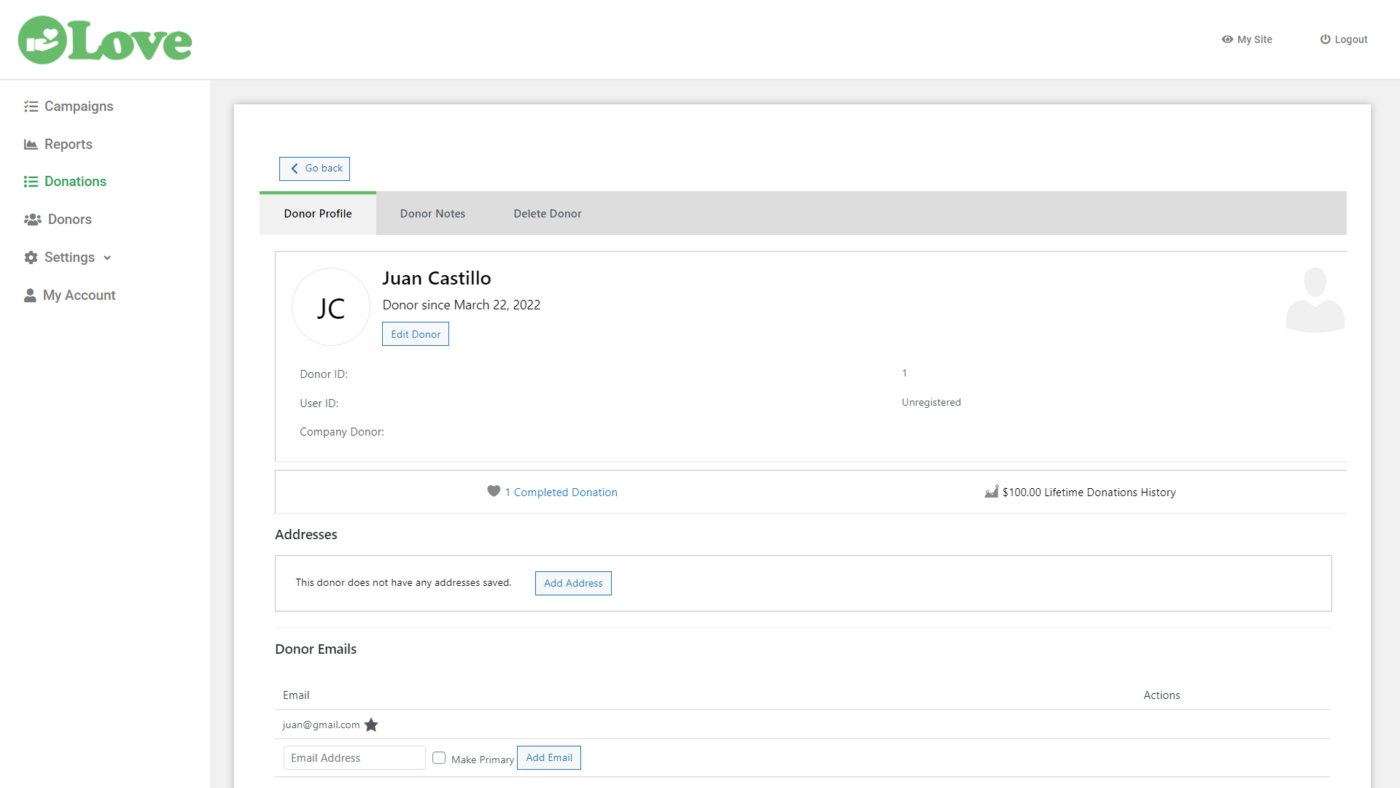
You can also view the donor’s profile and hide any unnecessary elements or rename fields, buttons or metaboxes.
This is what the GiveWP Donations page will look like on the frontend dashboard once the dashboard is complete.
This is the donation information page on the frontend:
When your users open a specific donor’s profile, this is what they will see on the frontend dashboard:
In the next lesson, we’ll show you how to add the Donors page to the frontend dashboard.
Download the whole platform
If you have a premium license of WP Frontend Admin, you can download the full backup of our platform and import it on your site, so everything shown in this course will be already configured for you. It will save you a lot of time.
Note – You need WP Ultimo 2.x.


