IMPORTANT
WP Ultimo was abandoned by the author. But there is a free fork maintained by the community that you can use as a replacement of WP Ultimo. Read more and get the fork plugin here.
In this lesson, we’ll add the first page of the dashboard.
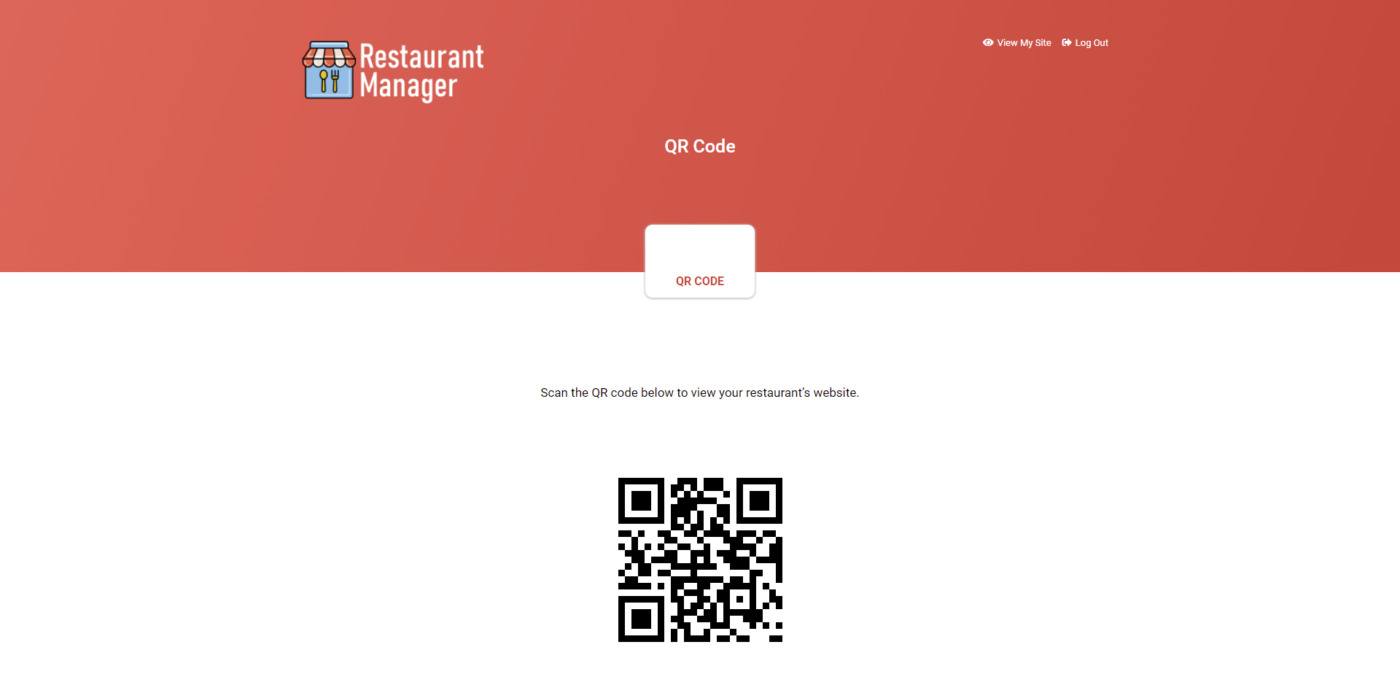
This page will display a QR code that will automatically redirect users to their own website.
Every time your users create a site, they will have a unique QR code that they can use for restaurant visitors to scan and be sent to the restaurant’s food menu page.
How will the QR code automatically send users to the restaurant’s site without needing manual configuration for each site?
We will use a shortcode that automatically redirects to the home page of the site upon scanning. This will prevent us from having to manually edit the shortcode on each site, and will save steps for the restaurant administrators.
Step 1 – On your frontend dashboard site, go to Pages > Add New.
Step 2 – Enter the page title and hit Edit with Elementor.
Step 3 – Once you’re in the Elementor live editor, change the page template to Elementor Canvas.
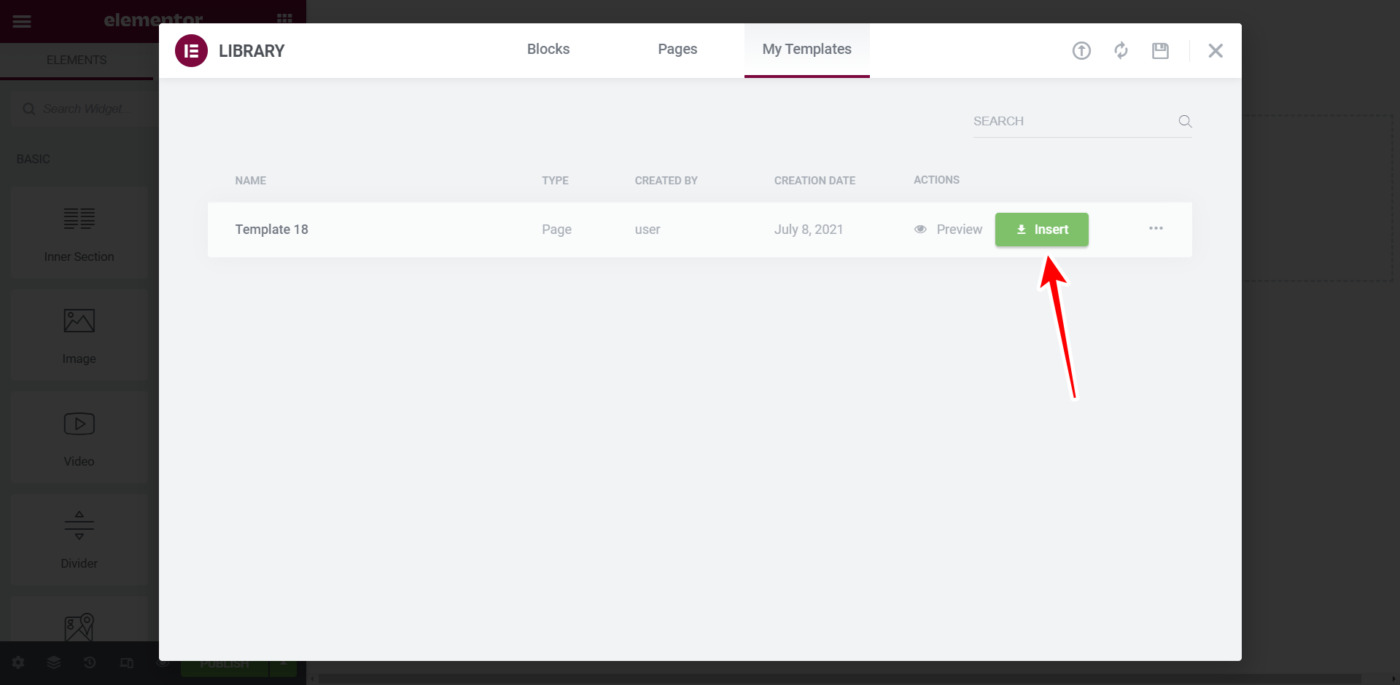
Step 4 – Hit the Add Template button to import the frontend dashboard template.
Step 5 – Go to My Templates, identify the template you want to import, and hit Insert.
Step 6 – Replace the “Enter the WP Frontend Admin shortcode here” text with something like, “Scan the QR code below to view your restaurant’s website“.
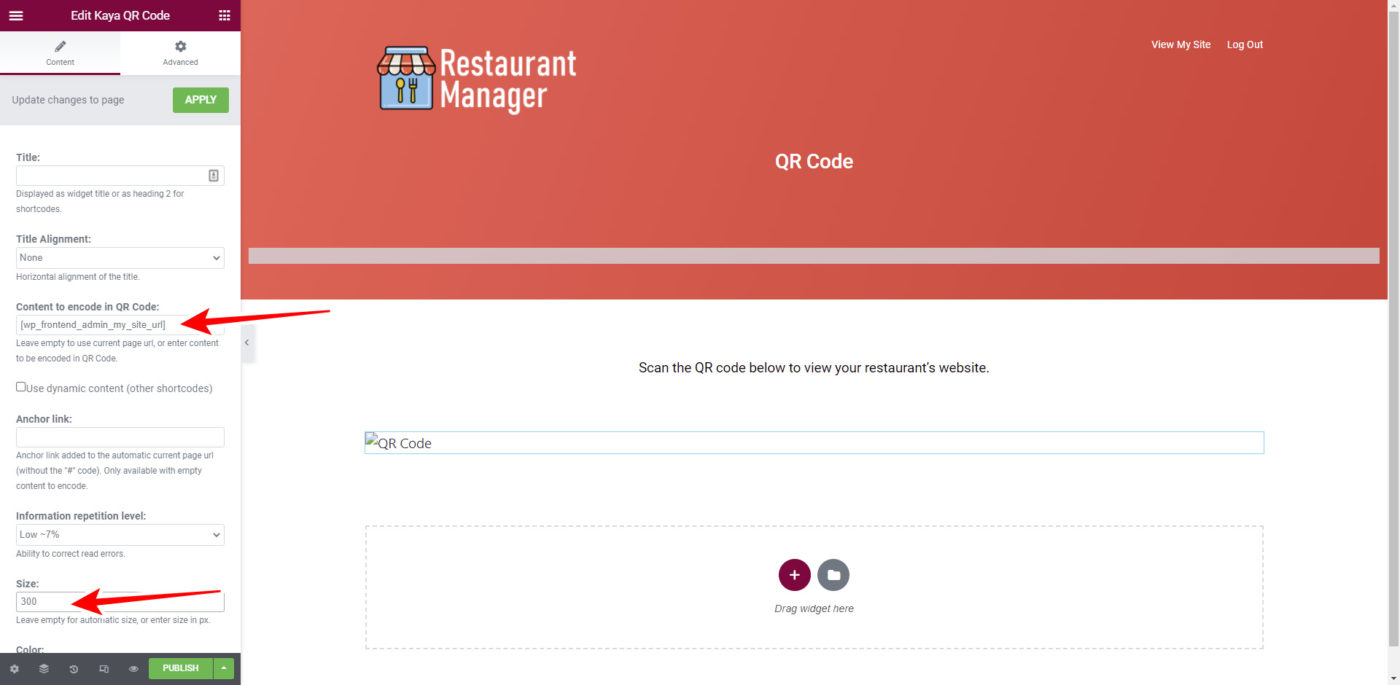
Step 7 – Add the Kaya QR Code element below the text you just edited.
Just hit the Elements button, search for QR, and drag the element to the position you want.
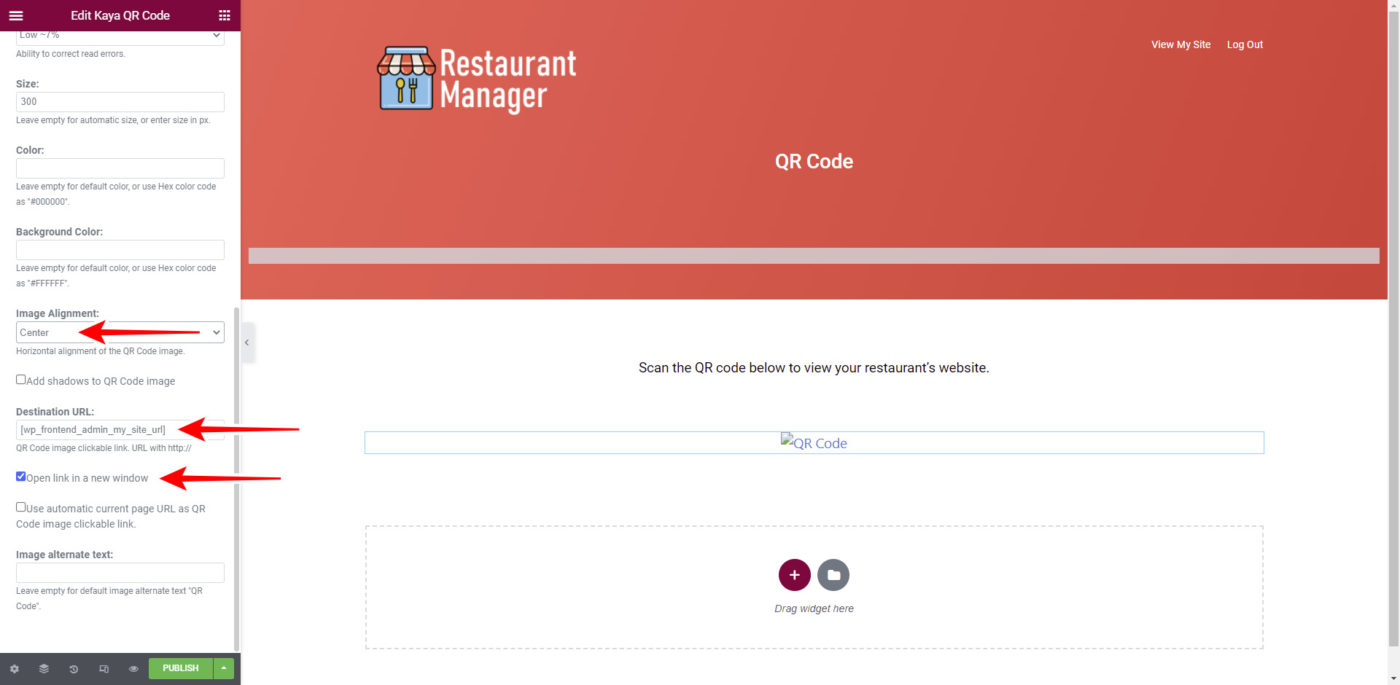
Step 8 – Set up the automatic QR code using these values:
- Content to encode in QR code: Enter this shortcode:
[wp_frontend_admin_my_site_url]
- Size: 300
- Image Alignment: Center
- Destination URL: [wp_frontend_admin_my_site_url]
- Tick the Open in a new window checkbox.
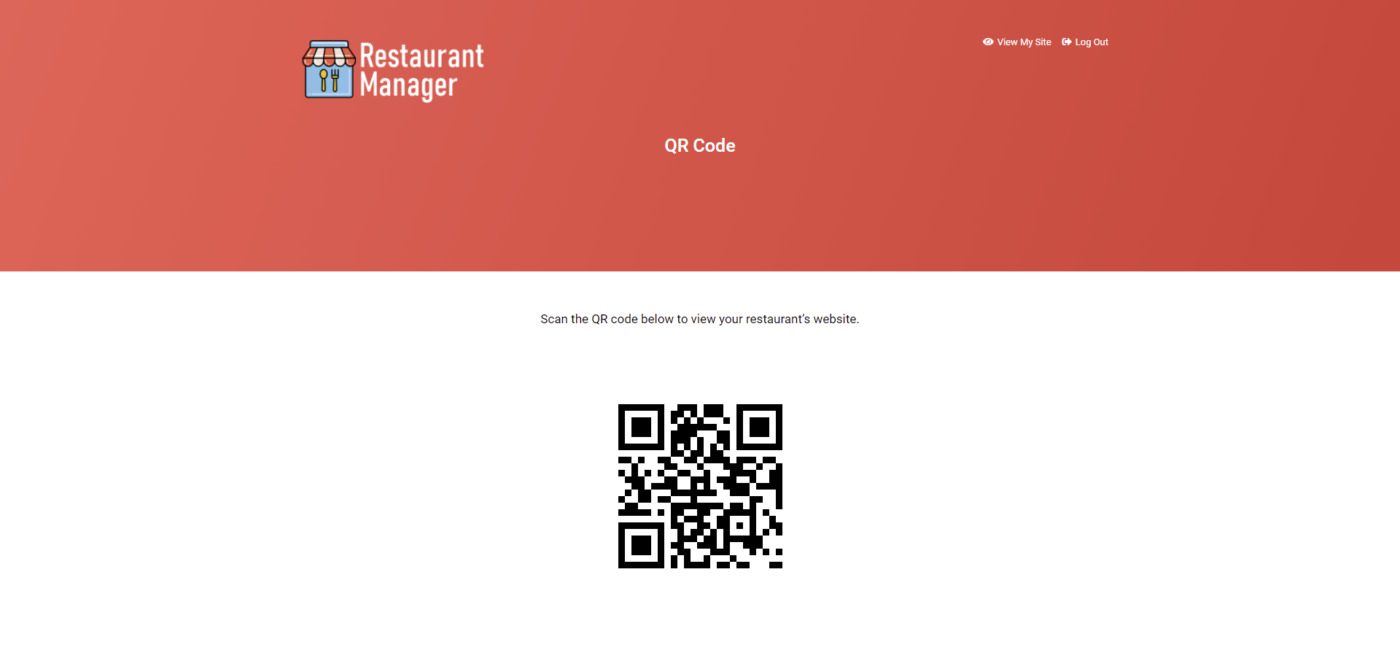
Once you’ve set these values, hit Preview or Publish.
This is what the page will look like, and the code will send users to the restaurant’s website.
Step 9 – Add this page to the frontend dashboard menu.
For this, go to Appearance > Menus on your frontend dashboard site.
In Pages, tick the QR Code page and hit Add to Menu.
Finally, hit Save Menu.
Once you save the changes to the menu, this is what the QR Code page will look like on the dashboard:
Note – The menu icons will be added in future sessions once we have completed the frontend dashboard pages.
TIP
If you have a premium license of WP Frontend Admin, you can download the full backup of our restaurants platform, so you can import it on your site and everything shown in this course will be already configured for you. It will save you a lot of time.


