In this tutorial, we show you how to create a frontend dashboard to manage Awesome Support tickets. It’s really simple because you won’t have to type a single line of code to create your frontend dashboard, you will only have to make a few clicks and fill in a few fields.
We will do it using WP Frontend Admin plugin, which allows you to create frontend dashboards, web apps, and any other platform that needs admin content deployed on the frontend.
Note. We assume you already installed and are using the Awesome Support plugin.
You can try the premium plugin on your website for free for 7 days.
Once you install WP Frontend Admin, you will need to follow these simple steps to create a frontend dashboard to manage your Awesome Support tickets.
1- Create a new frontend page with one click
WP Frontend Admin allows you to create a frontend page with one click. You don’t have to go through the difficult process of having to program your frontend pages from scratch. In fact, you don’t need any programming or codding knowledge to create your frontend pages with the WP Frontend Admin plugin.
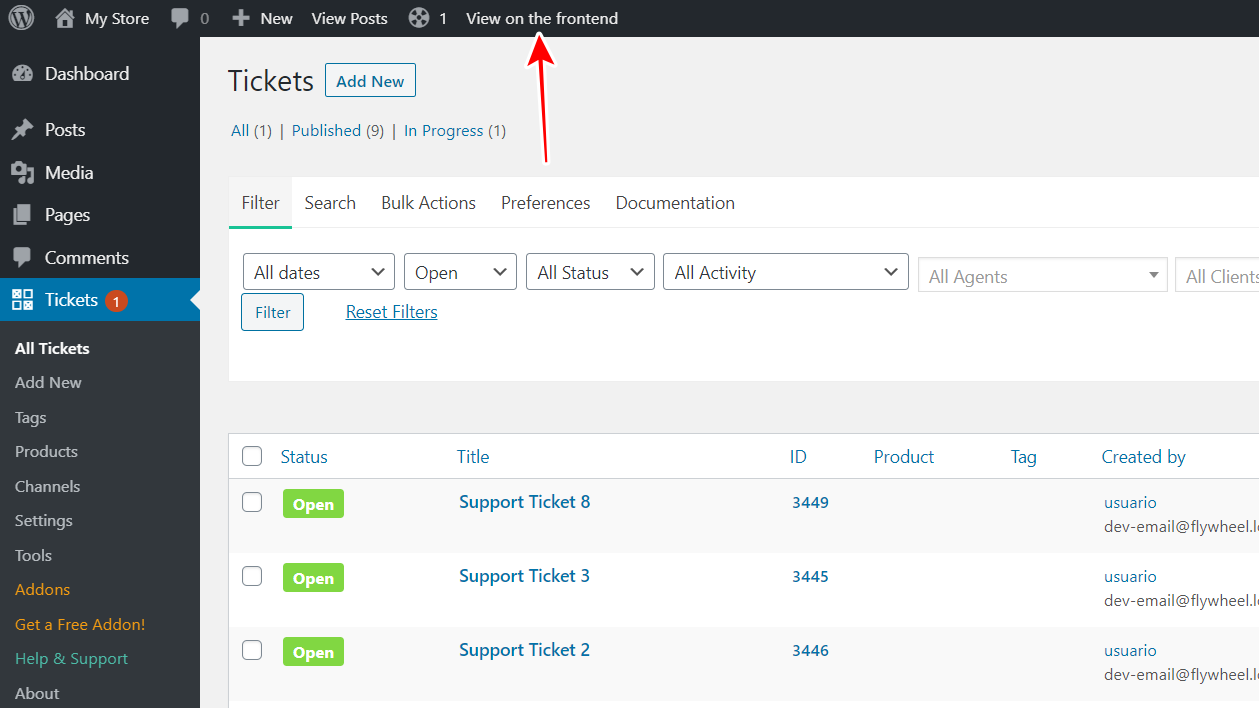
In this example, we’ll show you how to display the Tickets page on the frontend with one click.
- Go to Tickets > All Tickets.
- Click View in the frontend.
2- Select the frontend page’s basic information
Once you click View in the frontend, WP Frontend Admin will display the Awesome Support tickets page on the frontend. The plugin will allow you to edit the page using the Quick Settings panel on the left side of the screen.
You need to start by selecting the following information:
- Page Title: Enter the page title here.
- URL slug: Enter the URL slug here using keywords only.
- Page template: Select the page template here.
- Add page to this menu: This must be the dashboard site menu.

3- Hide any unnecessary elements from the frontend page
Once you select the page’s basic information, you can simplify the page and make it look more elegant. For this, you need to take two simple steps:
- Click Hide element.
- Click the element you want to hide.
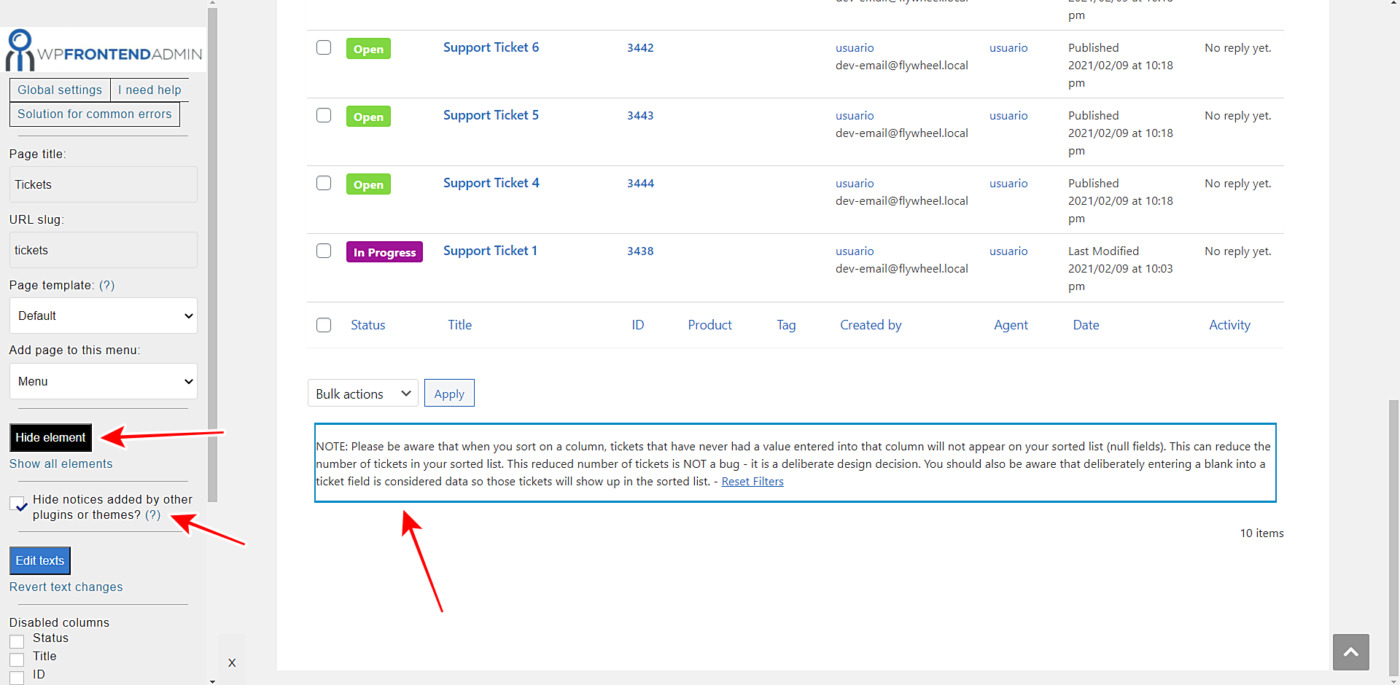
You need to repeat these two steps with every element you want to hide.
Also, you can toggle the Hide notices added by other plugins or themes checkbox to prevent users from seeing information about updates, upgrades, or ratings from other plugins or themes.
4- Edit the frontend page’s texts
You can go a step forward to customize your page even more by editing its texts. You just need to do this:
- Click Edit texts.
- Edit all the texts you want. The plugin will highlight the texts that can be edited.
- Click Stop editing texts.
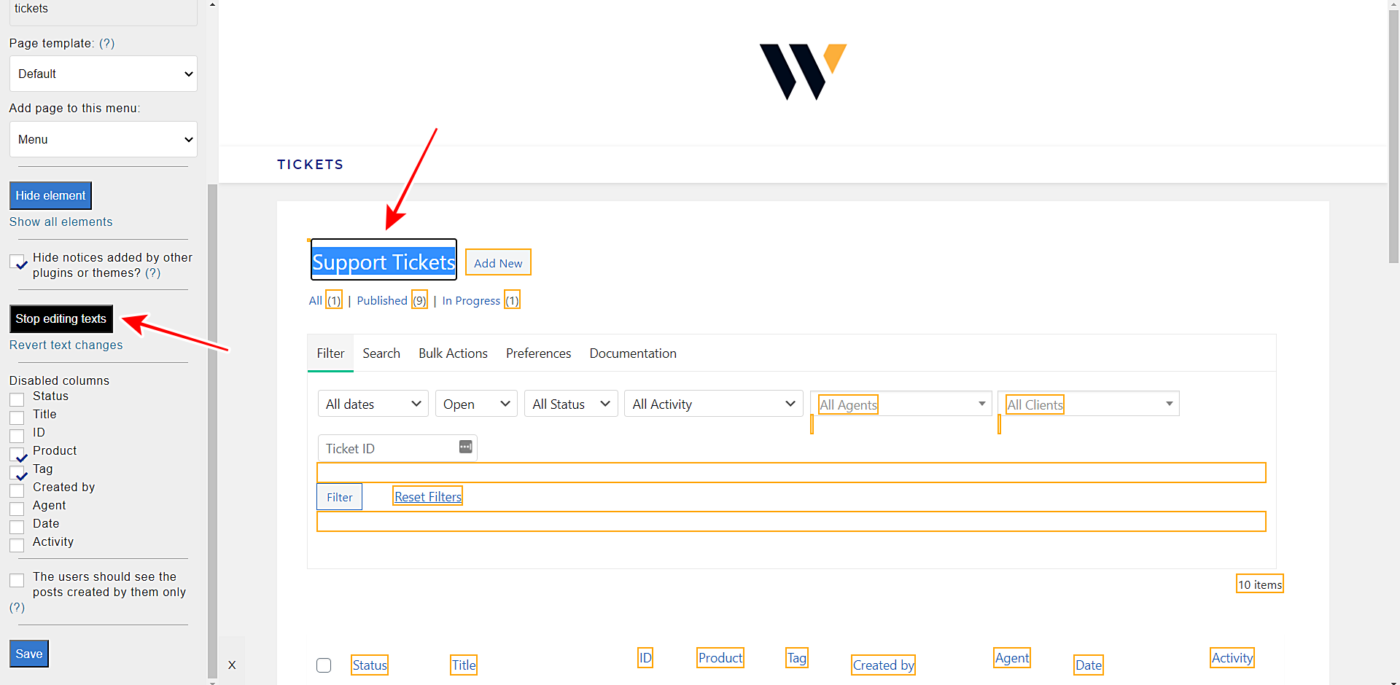
Editing the texts allows you to customize the page as you want, and it’s a perfect option if you’re creating a platform where you don’t want users to notice you’re using Awesome Support behind the scenes.
5- Optional. Disable unnecessary columns
If you’re showing pages that list tickets, products, or any other post type on the frontend, you can disable any unnecessary columns.
Just toggle the columns that you want to hide from the frontend page.
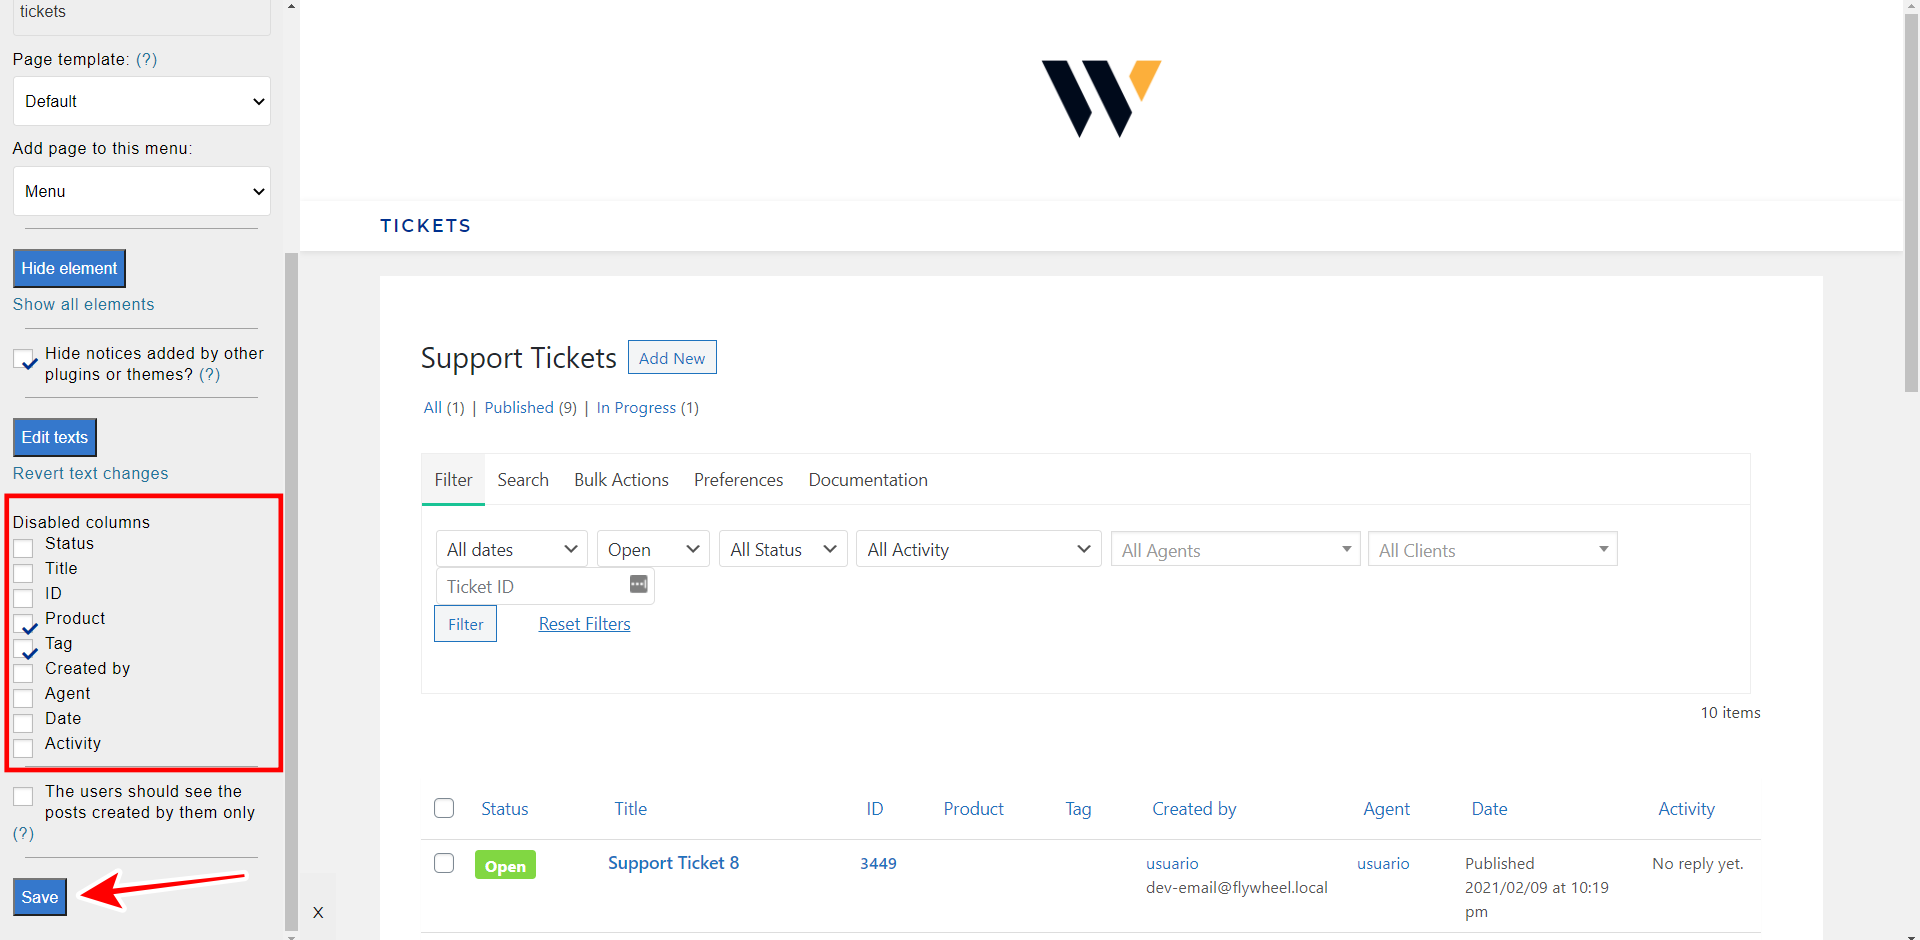
Finally, you can hit Save to apply the changes.
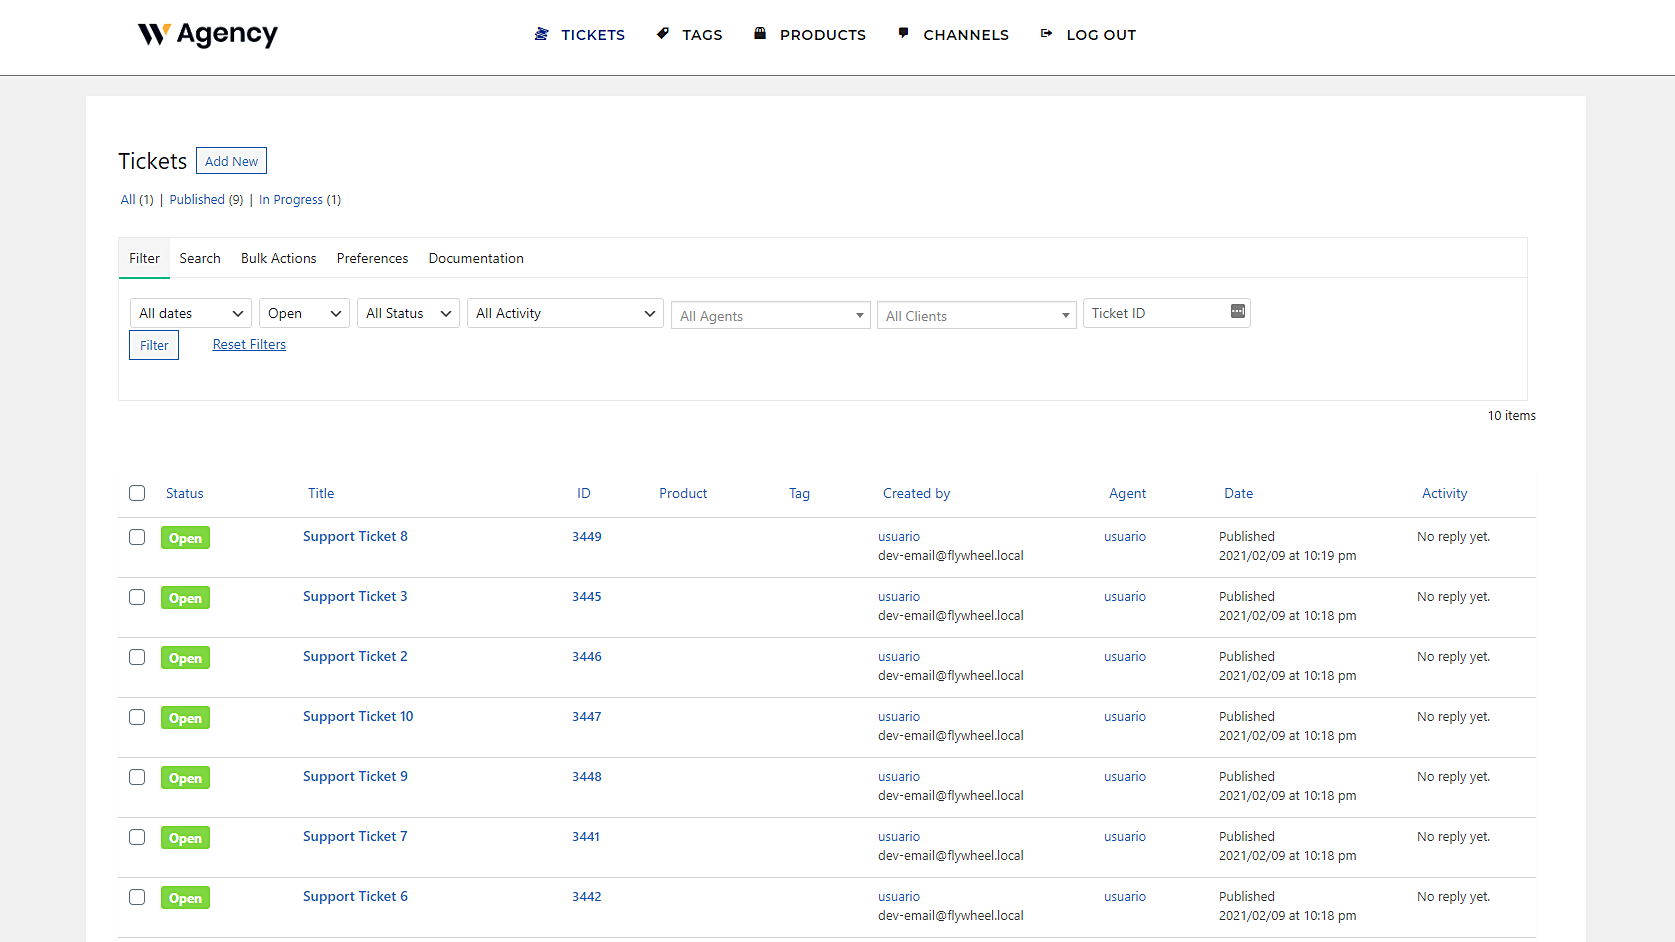
Manage Awesome Support tickets on the frontend!
As you see, creating the frontend pages to manage your Awesome Support tickers on the frontend is really simple. You just need to go to the wp-admin page you want to display on the frontend, click View in the frontend, and edit the page using the Quick Settings panel.
We have created the other pages following the same steps explained in this tutorial. Also, we’ve added icons to our menu items using the WP Menu Icons plugin. And here’s how our Awesome Support frontend dashboard looks:
1- Tickets page

2- Tags page

3- Products page

4- Channels page

Also, we’ve added a Log Out button as a custom link to our menu, using this shortcode from WP Frontend Admin:
[vg_display_logout_url
Here are some important documentation you may need if you want to take this platform a step forward:
- Understanding the general settings of WP Frontend Admin
- Understanding the general settings for WordPress Multisite
- How to integrate WP Frontend Admin with WP Ultimo to create a multisite platform and earn money
Definitely, there’s no easier way to create a frontend dashboard and manage your Awesome Support tickets on the frontend.
You can try the premium plugin on your website for free for 7 days.


