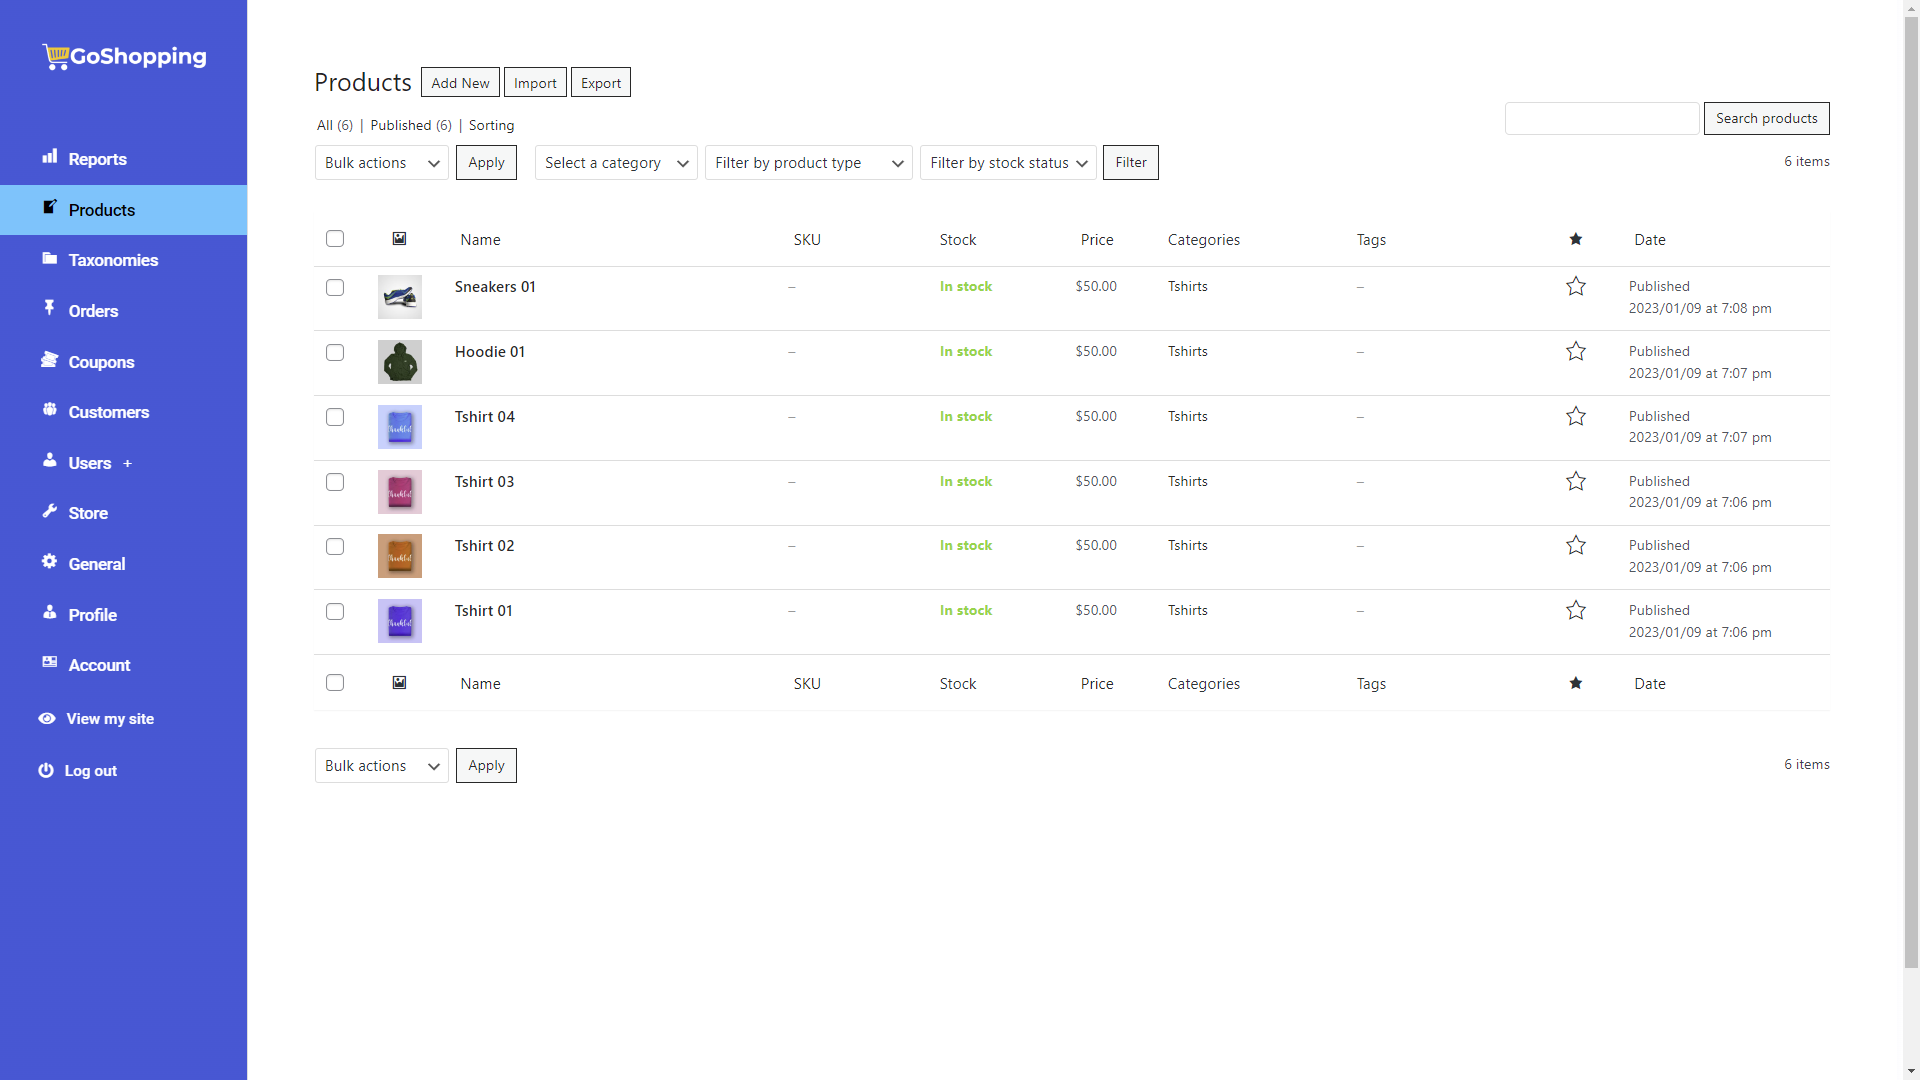


You need to follow these steps to set up the frontend dashboard templates in Elementor.
1- Install the required free plugins
Besides the WP Frontend Admin plugin, you need to download, install and activate these free plugins:
- Elementor. You need the free version of the Elementor page builder.
- Elementor Header & Footer Builder. This plugin allows you to use nav menus and other nice elements in Elementor free. Our templates use some of these elements, so you need to install and activate it.
- JetSticky For Elementor. This plugin allows you to add sticky style to entire sections in Elementor free. This will be useful for the frontend dashboard menus.
- WP Menu Icons. It will help us add beautiful menu icons to the nav menu items. Another option for this is the Menu Icons by ThemeIsle plugin.
- Shortcode in Menus. This plugin makes shortcodes work as button links in Elementor. It’s useful because all our dashboard templates include “View my site” and “Log out” buttons, which use shortcodes as links.
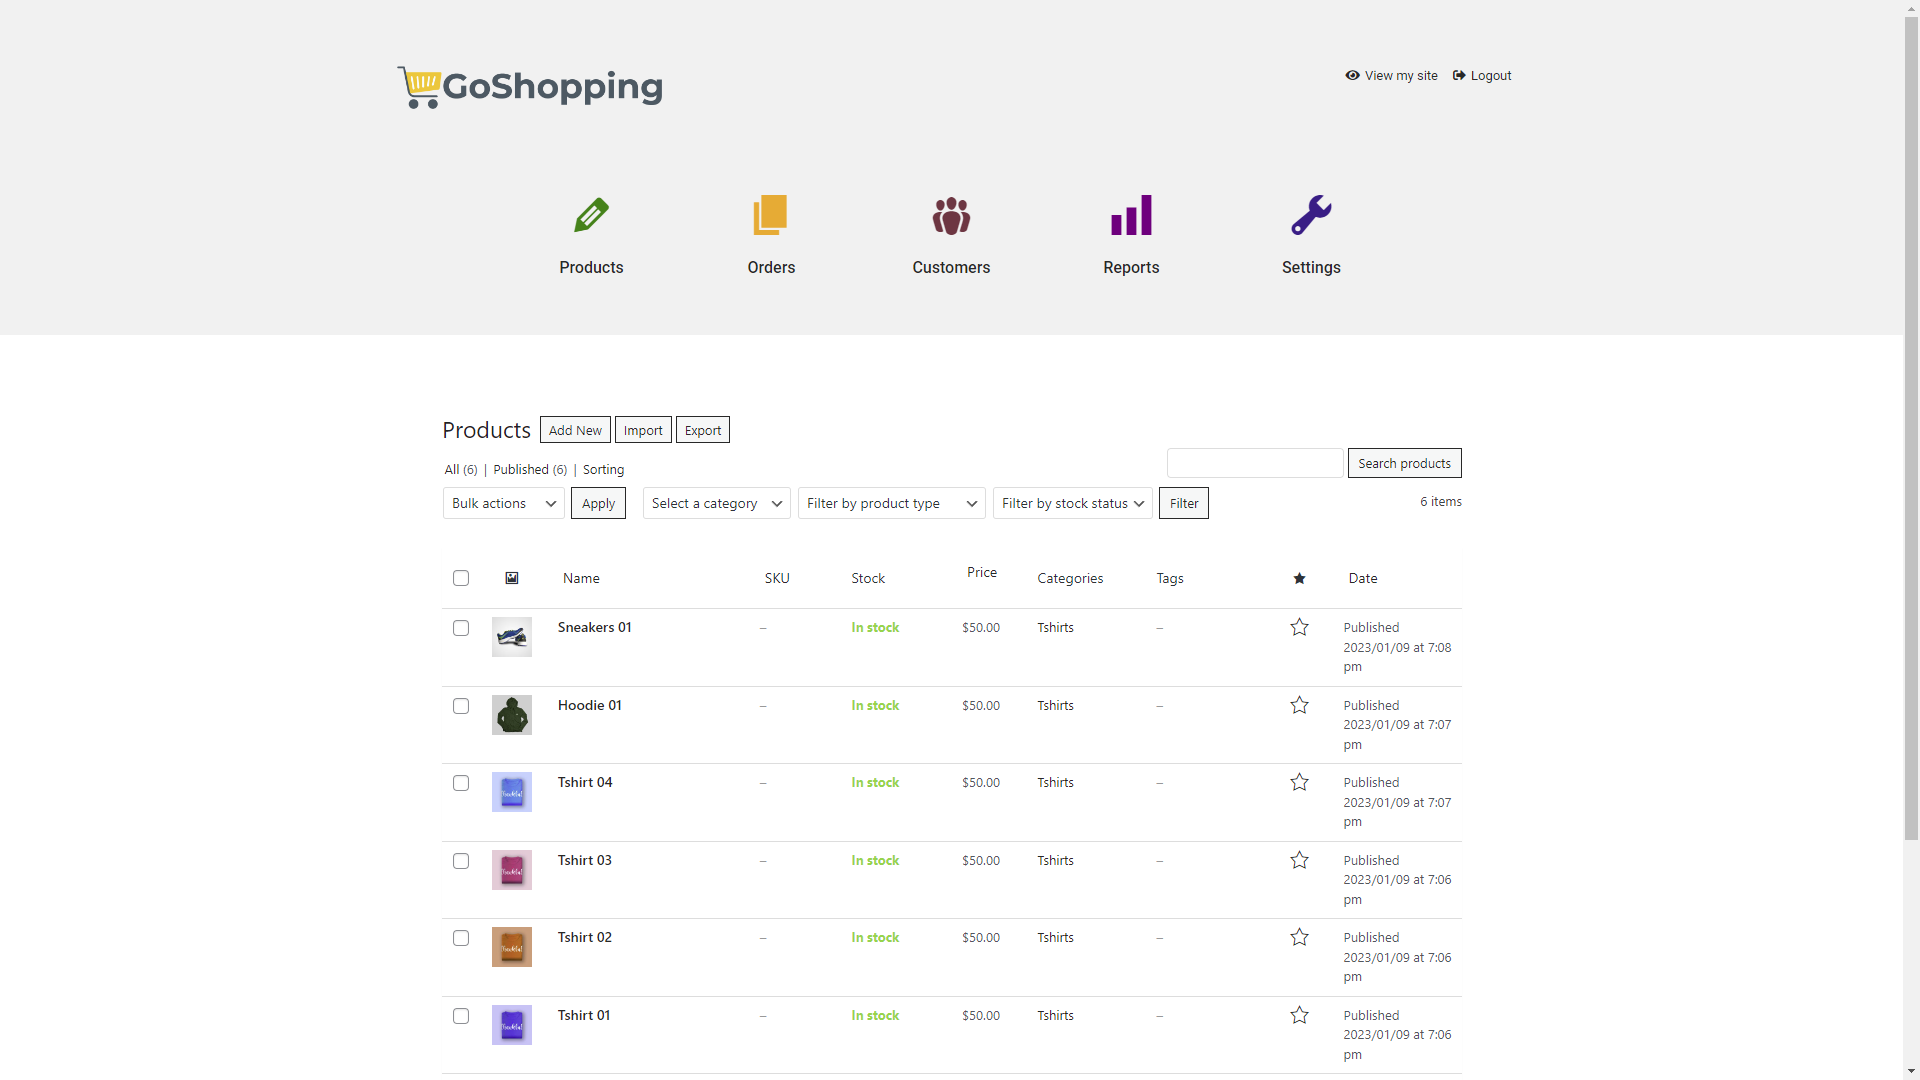
2- Set up your site’s logo
Our frontend dashboard templates for Elementor are designed to automatically recognize your website’s logo, so you will need to open the customizer of your WordPress theme and select the logo.
- Go to Appearance > Customize.
- Select the website’s logo.
Important: These templates don’t use the Site Logo element.
- Template 2
- Template 8
- Template 14
- Template 16
3- Set up a navigation menu
As with the website logo, our templates automatically recognize the navigation menu where you will add the frontend pages, so you need to create a navigation menu.
By default, the template will recognize the nav menu if you name it “Dashboard”. If you give it another name, don’t worry because you can select any other menu when using the template.
- Go to Appearance > Menus.
- Add a new menu.
4- Import the template you’ll use
You need to download the template you’ll use to create the dashboard pages, and import it into your site:
- Go to Templates > Saved Templates in wp-admin.
- Click Import Templates.
- Choose the File from your computer and click Import Now.

5- Set up the template globally
Once you import the frontend dashboard template, we recommend you to open it with Elementor to apply some changes to it.

For example, you may want to change typographies, colors, etc.
Editing the template prior to creating the pages will save you a lot of time because you won’t have to manually edit the template in each page.
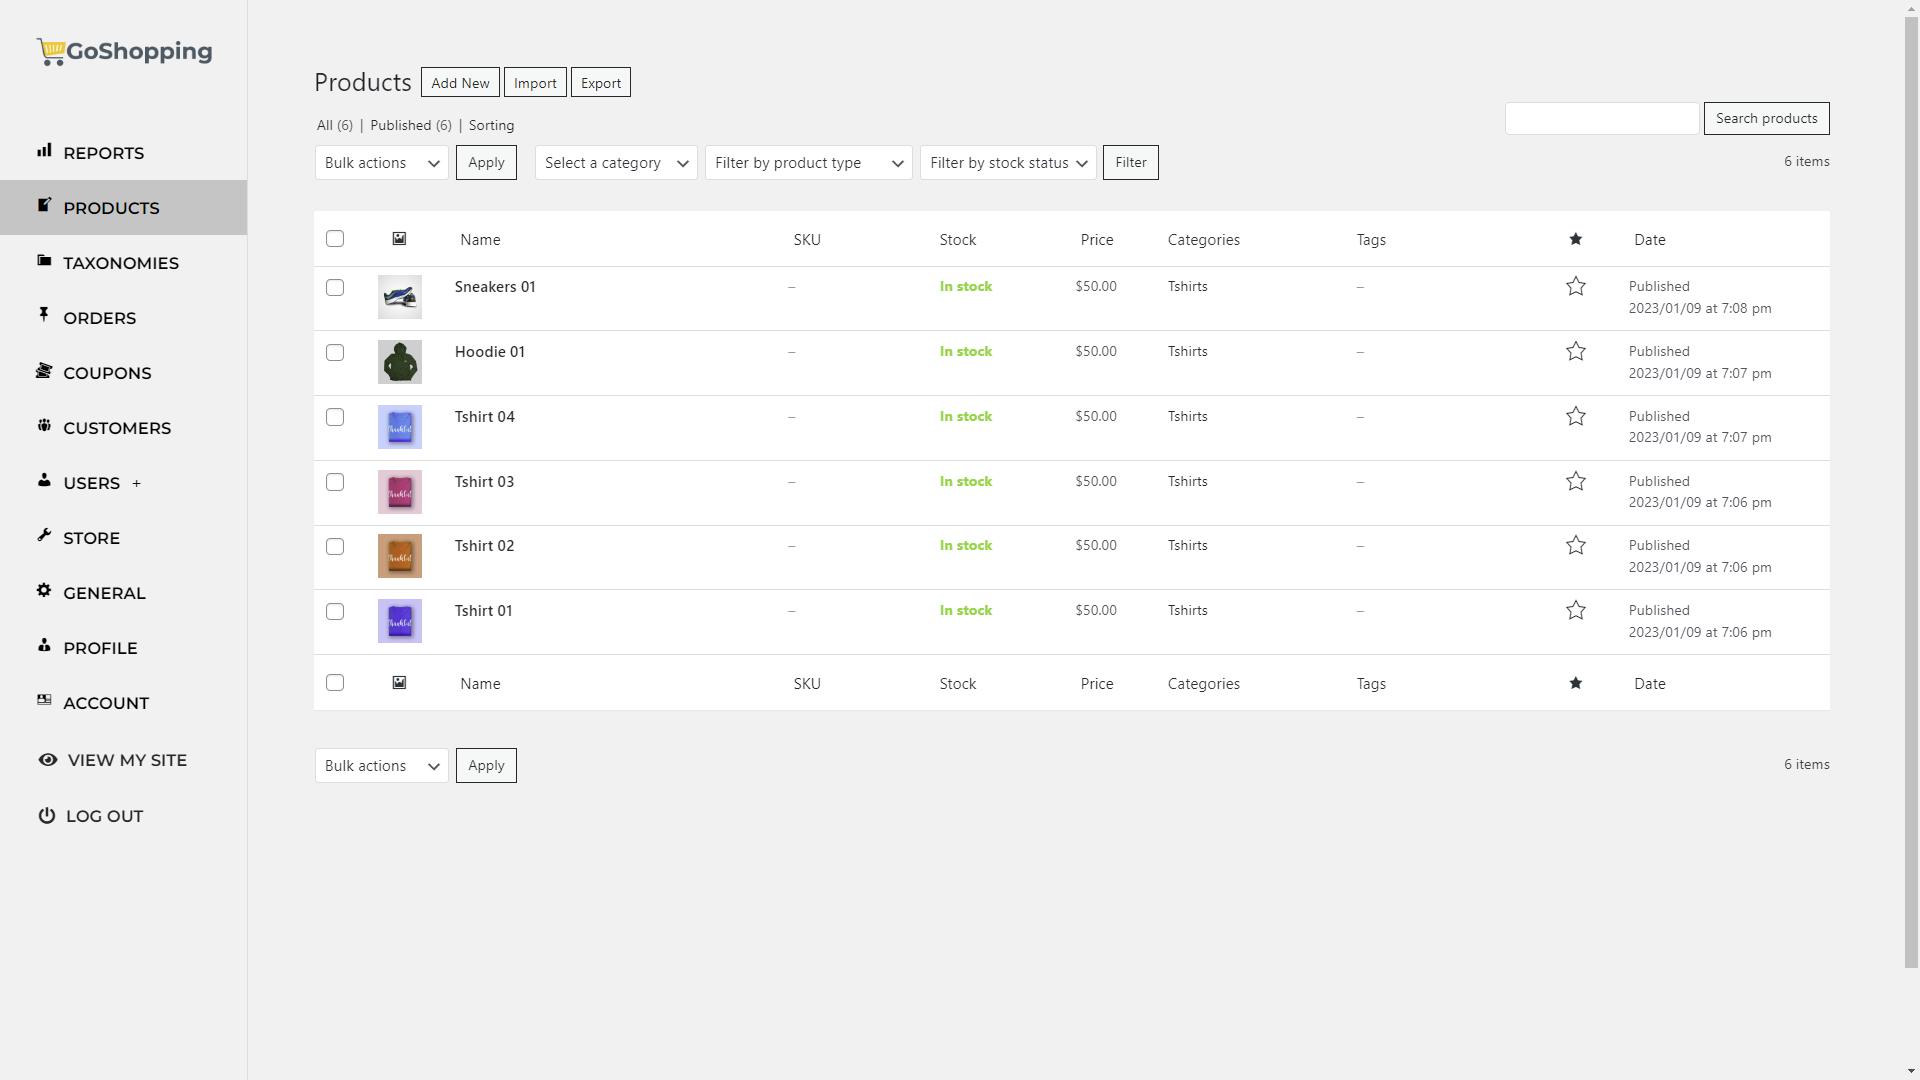
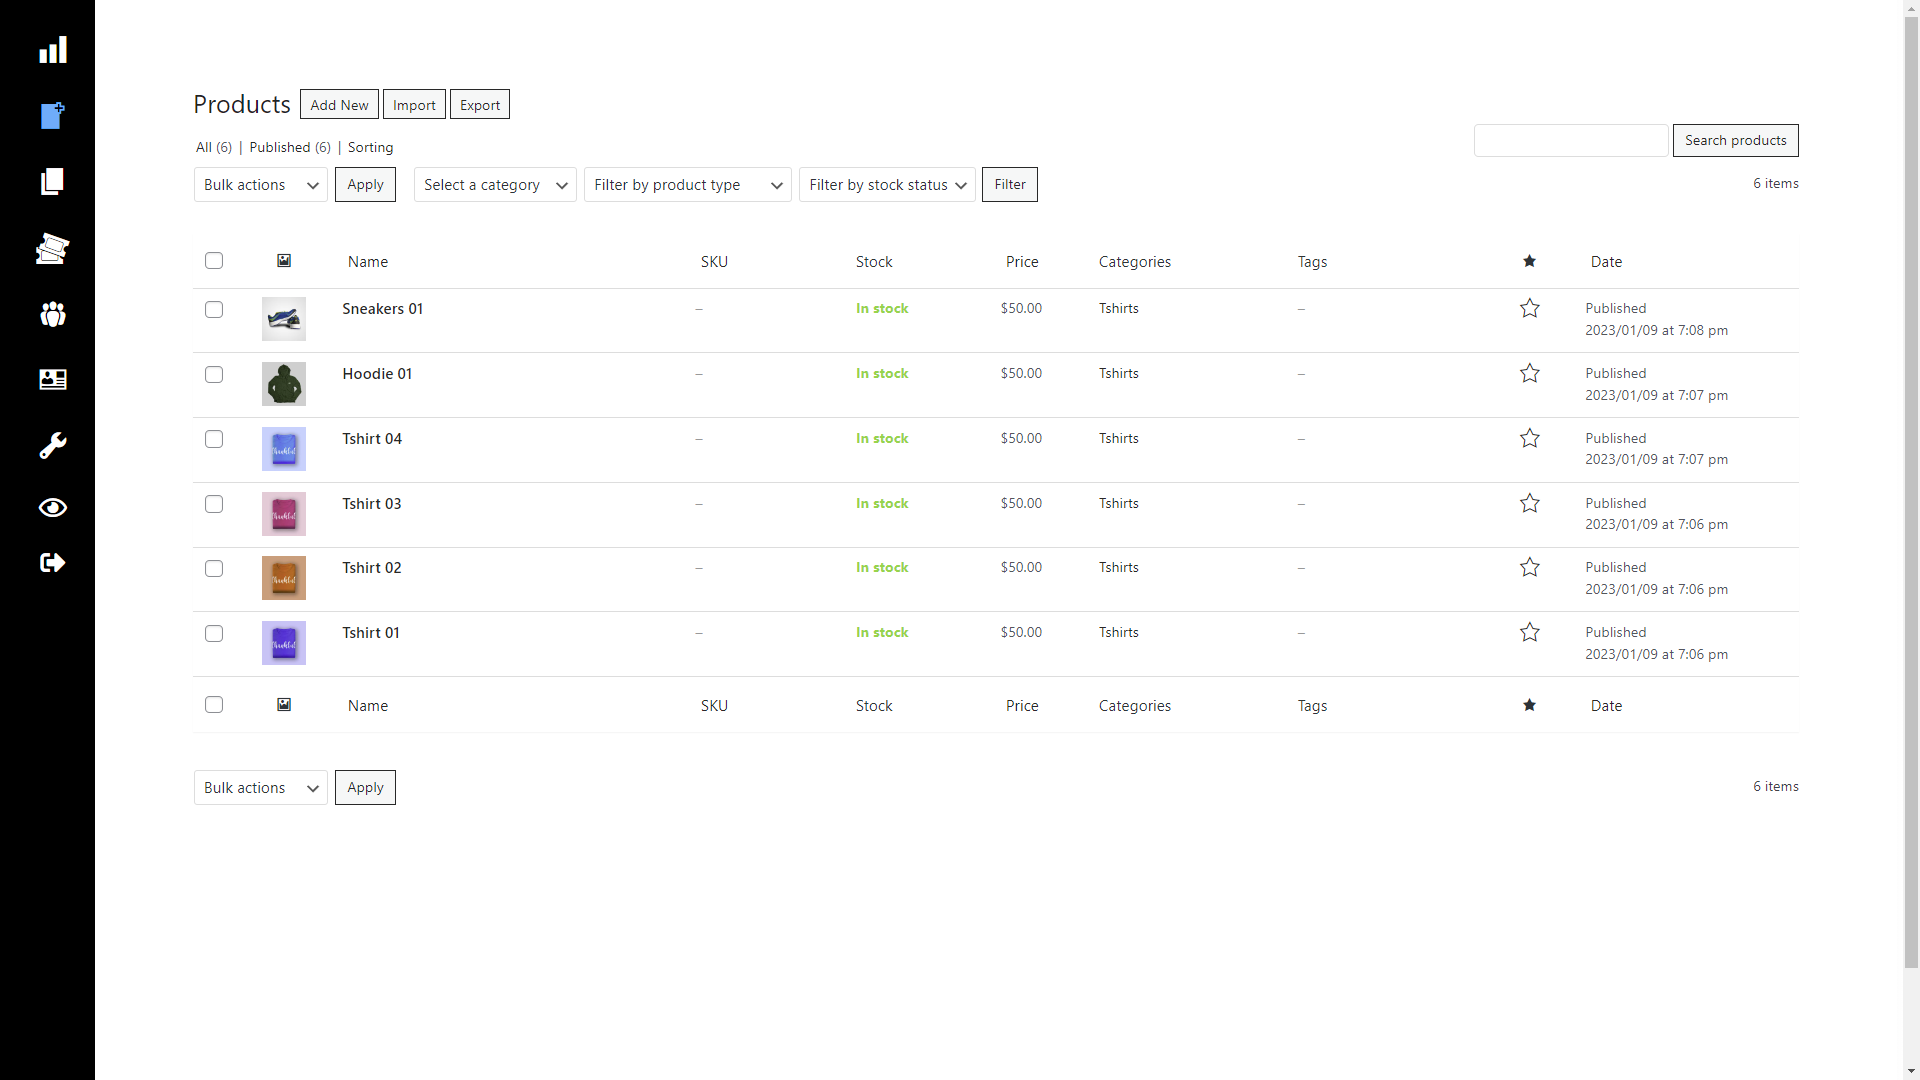
6- Start creating the frontend dashboard pages
Now you can create the dashboard pages one by one using the template you imported.
Here we show you how to create one page as an example to set up the template:
- Go to Pages > Add New.
- Enter the page title.
- Click Edit with Elementor.

Once you’re in the Elementor editor, you need to change the page template:
- Click Settings.
- Select Elementor Canvas in Page Layout.

After changing the page layout, you need to add the template you have imported. For this, just click Add Template.

The Elementor library will show you Blocks, Pages, and Templates, so you need to:
- Go to My Templates.
- Select the template you’ll import.
- Click Insert.
- Click Yes to import the template settings into the page.

Once the template is added to the new page, you can start configuring the page.
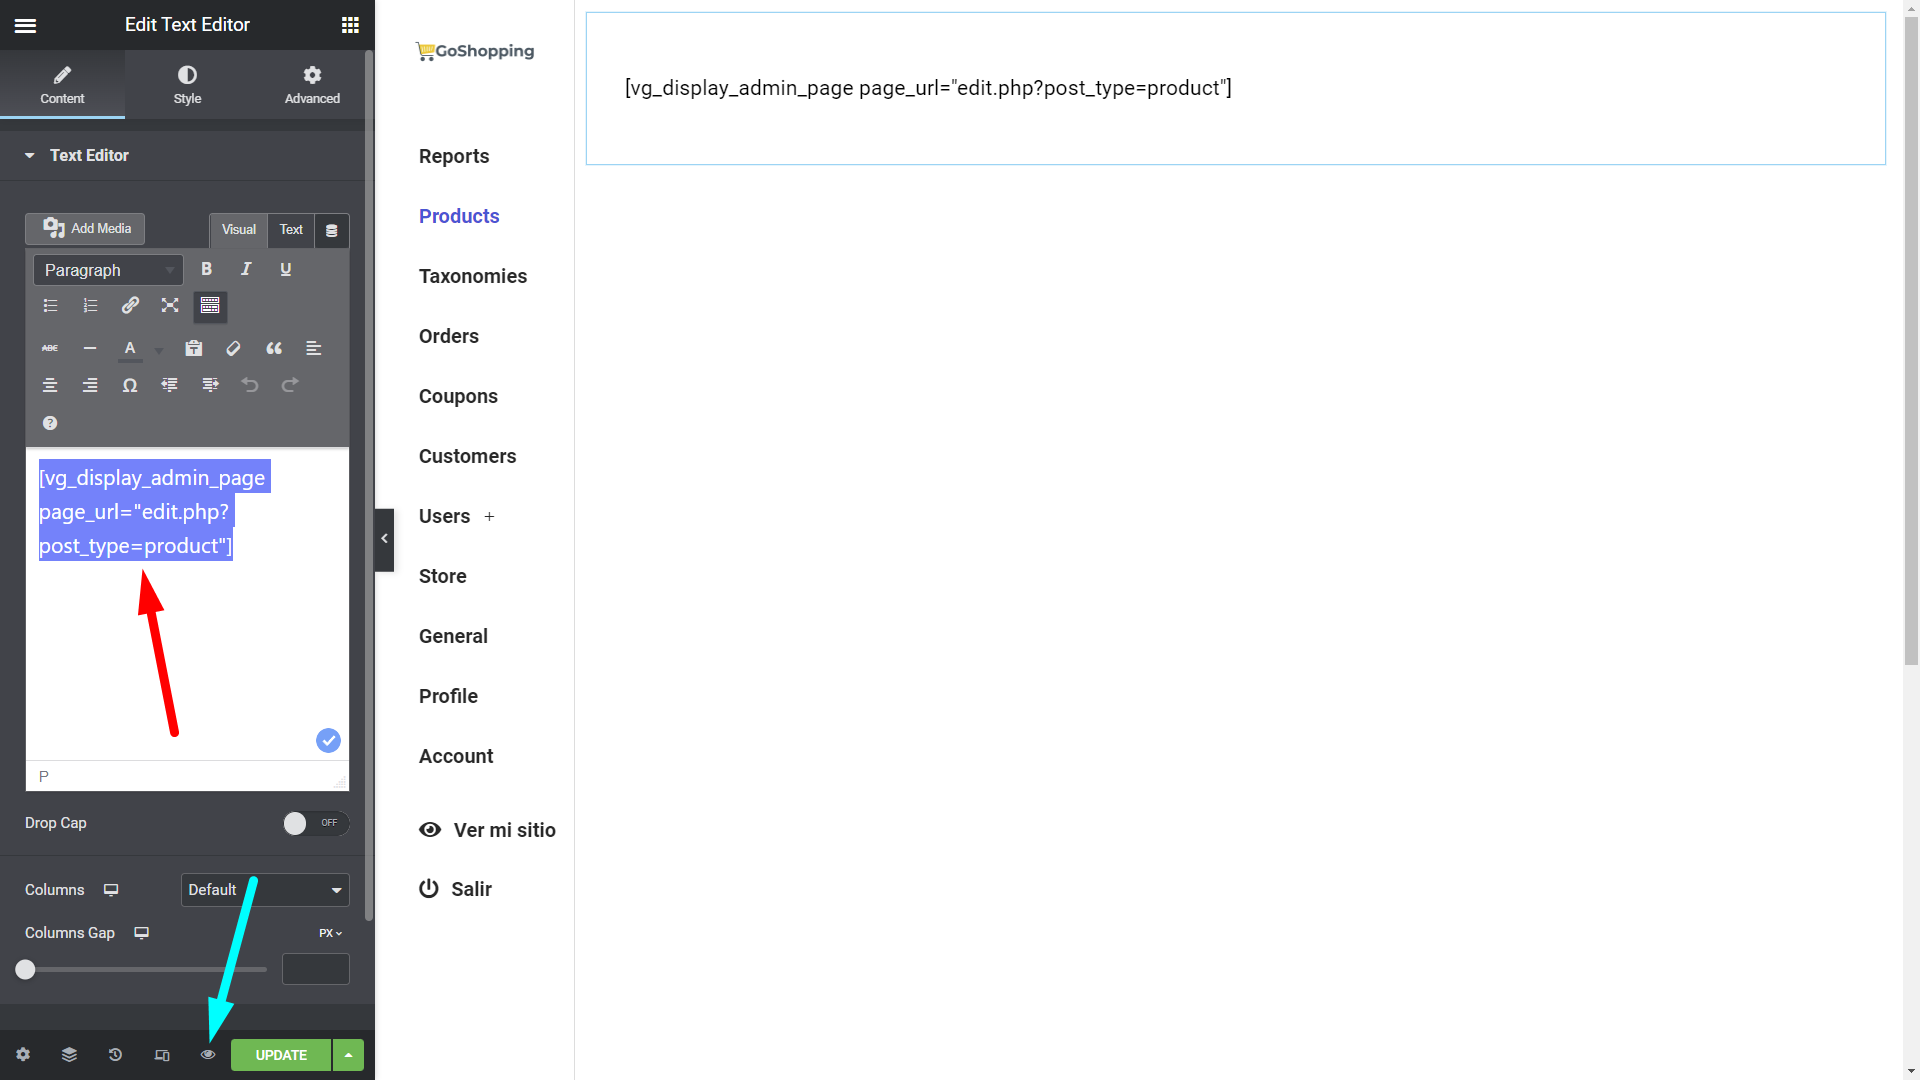
On the content area of the template, you need to enter this WP Frontend Admin shortcode:
[vg_display_admin_page page_url="wp-admin URL"]
Just replace the wp-admin URL text with the URL of the wp-admin page you’ll display on the frontend. For example, we can create the WooCommerce products frontend page by using this shortcode:
[vg_display_admin_page page_url="edit.php?post_type=product"]
Once you enter the WP Frontend Admin shortcode, you need to click Preview to see the page on the frontend and configure it live using the WP Frontend Admin quick settings.
Note. While you are editing the page in the frontend, the Quick Settings panel will be shown on the left side of the screen over the vertical menu of the templates containing the side menu. This won’t happen with templates with top menu.
You can select the dashboard page’s general information using the following fields:
- Page title: The title will be inherited from the page though you can change it.
- URL slug: Enter a friendly URL slug here including keywords only.
- Page template: Elementor Canvas
- Add page to this menu: Select the dashboard menu you created in the sections above.

Also, you can hide any unnecessary elements from the page to simplify it and make it look elegant:
- Click Hide Element.
- Click the element you want to hide.
- Repeat both steps with every element you want to remove from your page.
Besides, you can hide elements that might pop up in the future on your screen:
- Tick the Hide notices added by other plugins or themes checkbox.

WP Frontend Admin allows you to edit the texts from your admin pages to customize them even more:
- Click Edit texts.
- Edit all the texts you want.
- Click Stop editing texts.

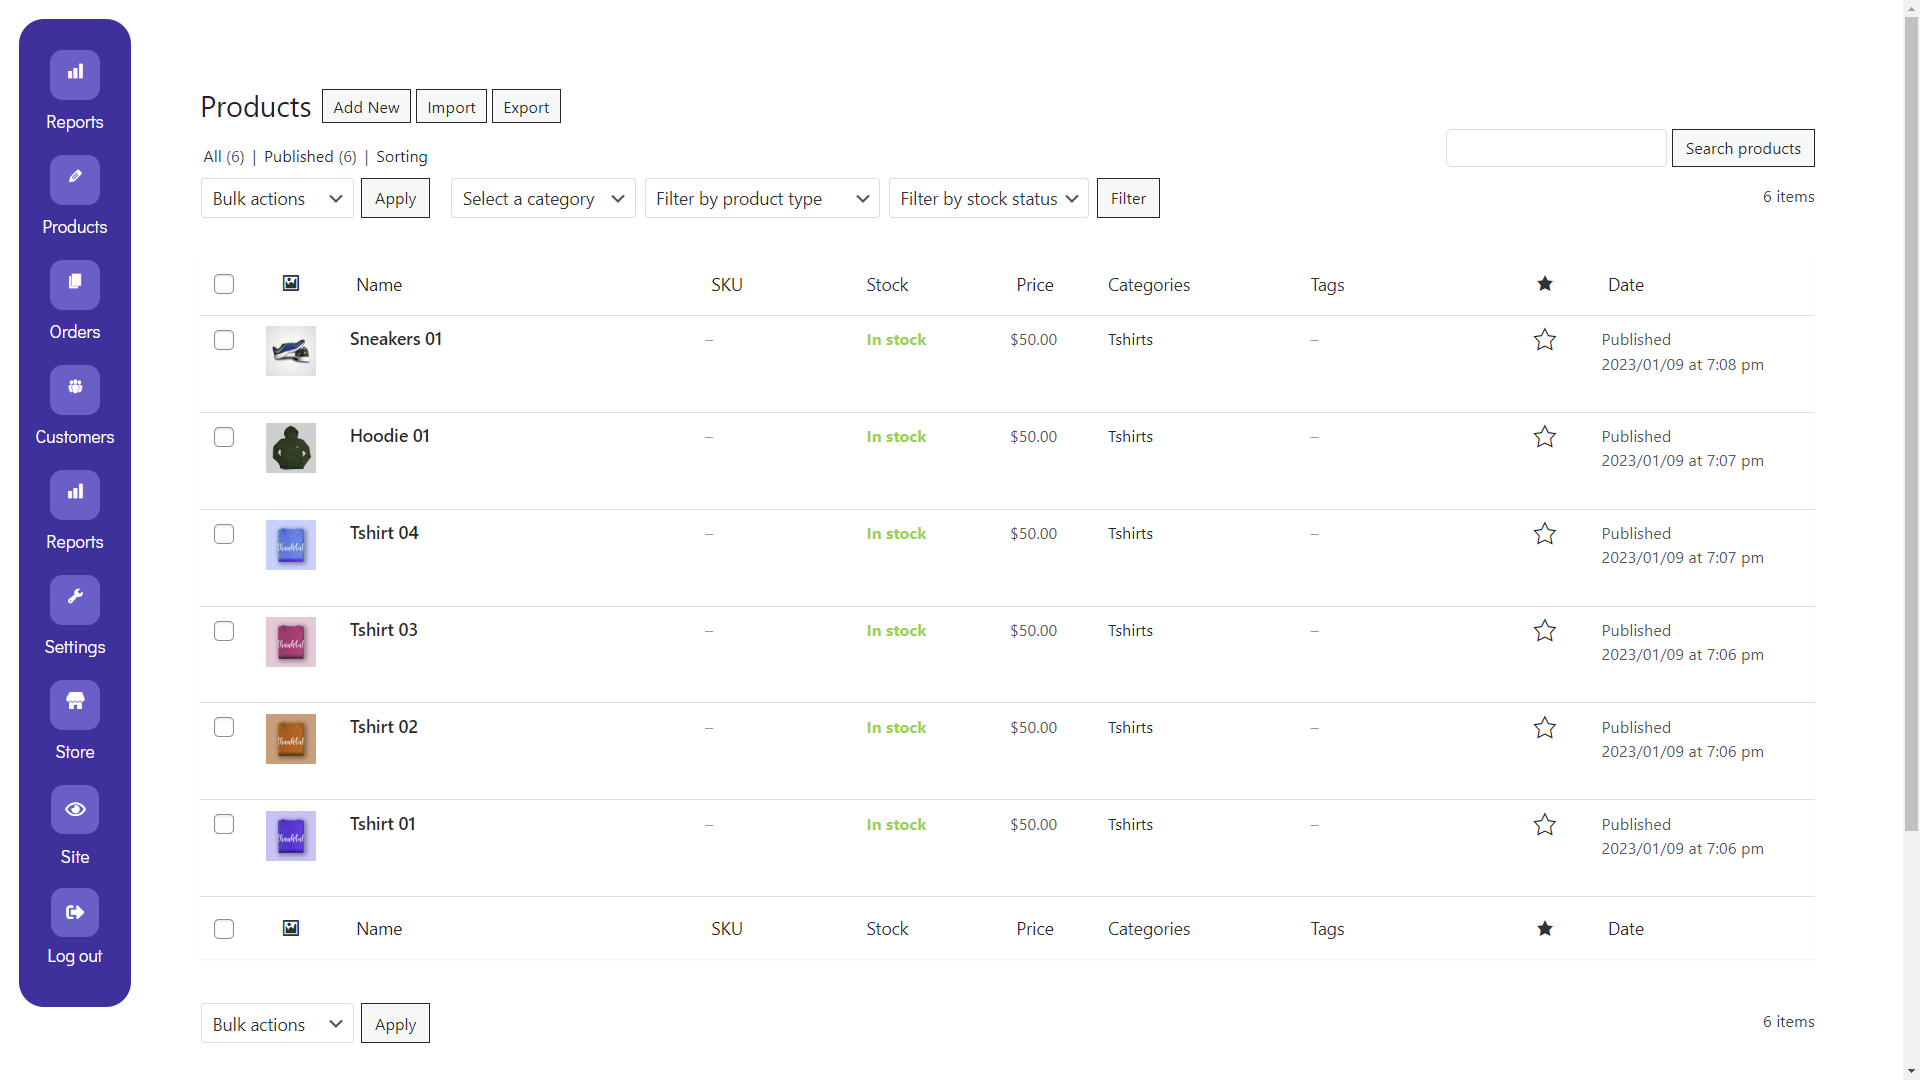
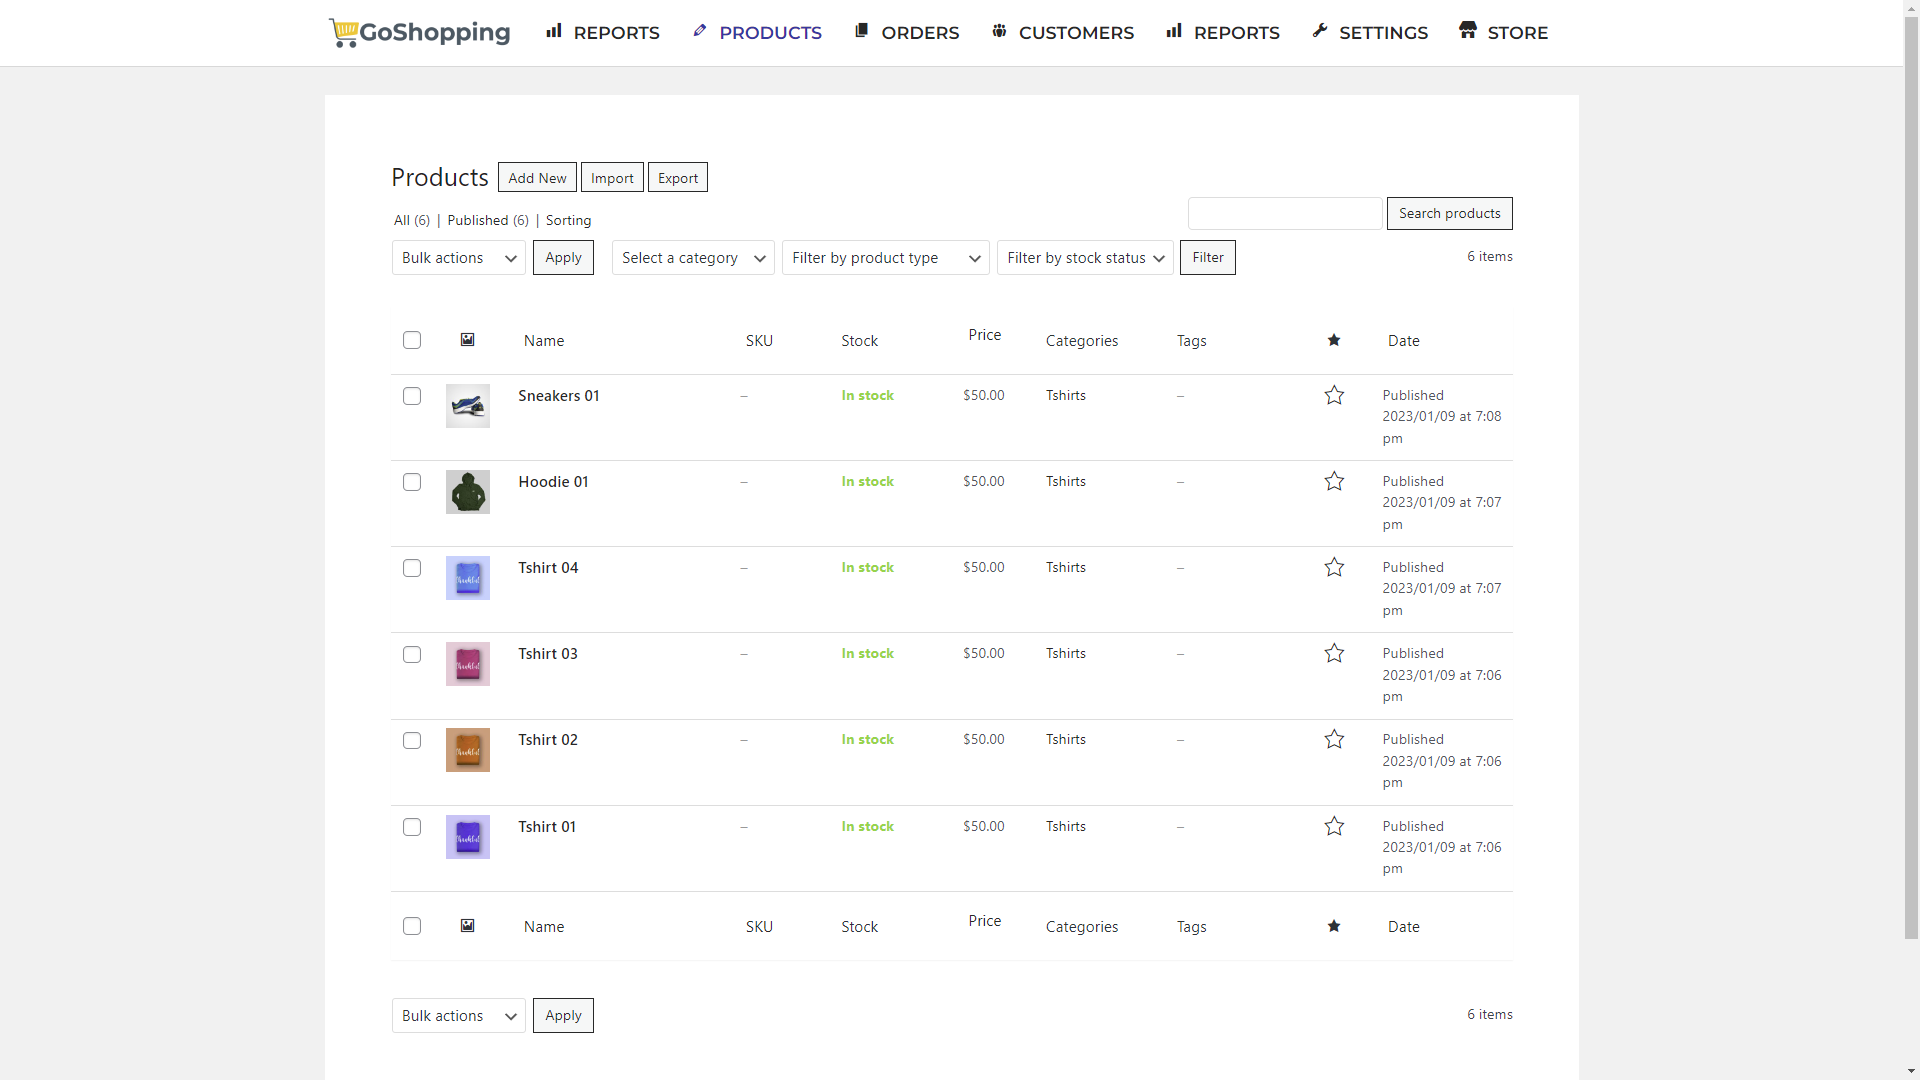
If your frontend page is a list of posts, products, or any post types, you can disable unnecessary columns. Just tick the columns you want to hide in the Disabled columns section of the Quick Settings pannel.
If you’re using WP Ultimo to manage memberships in your multisite network, you can restrict dashboard features based on the users’ WP Ultimo plan. Just select the plans that will have access to the current page in the section This page is available for these WP Ultimo plans.
Users on pages that list products, posts, pages, or any type of post on the frontend can view their own posts only, or they can view the posts of other users on the same site.
Finally, you can hit Save to publish the page.

Important:
- The Hide element button allows you to simplify any page. For example, if you’re showing the Posts admin page on the frontend, you can then open the Add New post form and remove all the non-essential fields and metaboxes.
- You can Edit texts in other pages as well. For example, you can edit texts on the Add New post form.
- You need to repeat the same steps to create the other frontend admin pages.
4- Optional. Display multiple admin content in Elementor pages
If you want to display more than one admin page in the frontend, you can easily do it using a Tabs element instead of a Text Editor element in Elementor.
- Enter the tab title.
- Enter the WP Frontend Admin shortcode in the tab’s description.
- Do this in all the tabs you’re creating.
- Click Preview to see how the page looks in the frontend and configure it using the Quick Settings panel.

5- Add menu icons to your dashboard menu
After creating all the frontend dashboard pages using your favorite Elementor template, you can add icons to your dashboard menu to make it more beautiful and intuitive.
- Go to Appearance > Menus on your dashboard site.
- Select a menu item and open the icon settings.
![]()
![]()
Now just select the icon and hit Save.
![]()
![]()
Important:
- There are some dashboard templates that don’t require menu icons.
- There are some dashboard templates that need to have the menu item labels hidden. In this case, you can select the menu item’s logo and select Hide Label = Yes.
- You can also edit the menu icons’ size using the Size field in the menu icon settings.
6- How to add “View User Site” and “Log Out” buttons to dashboard menus
WP Frontend Admin allows you to easily add the View User Site and Log Out buttons to your dashboard menus.
- Go to Appearance > Menus.
- Add a new Custom Link.
- Enter the shortcode in the URL field.
- Enter the menu item label in Link Text.
- Click Add to Menu.
- Do that with both the View User Site and the Log Oug buttons.

Here are the two shortcodes you need to use:
- View My Site: [wp_frontend_admin_my_site_url]
- Log Out: [vg_display_logout_url]
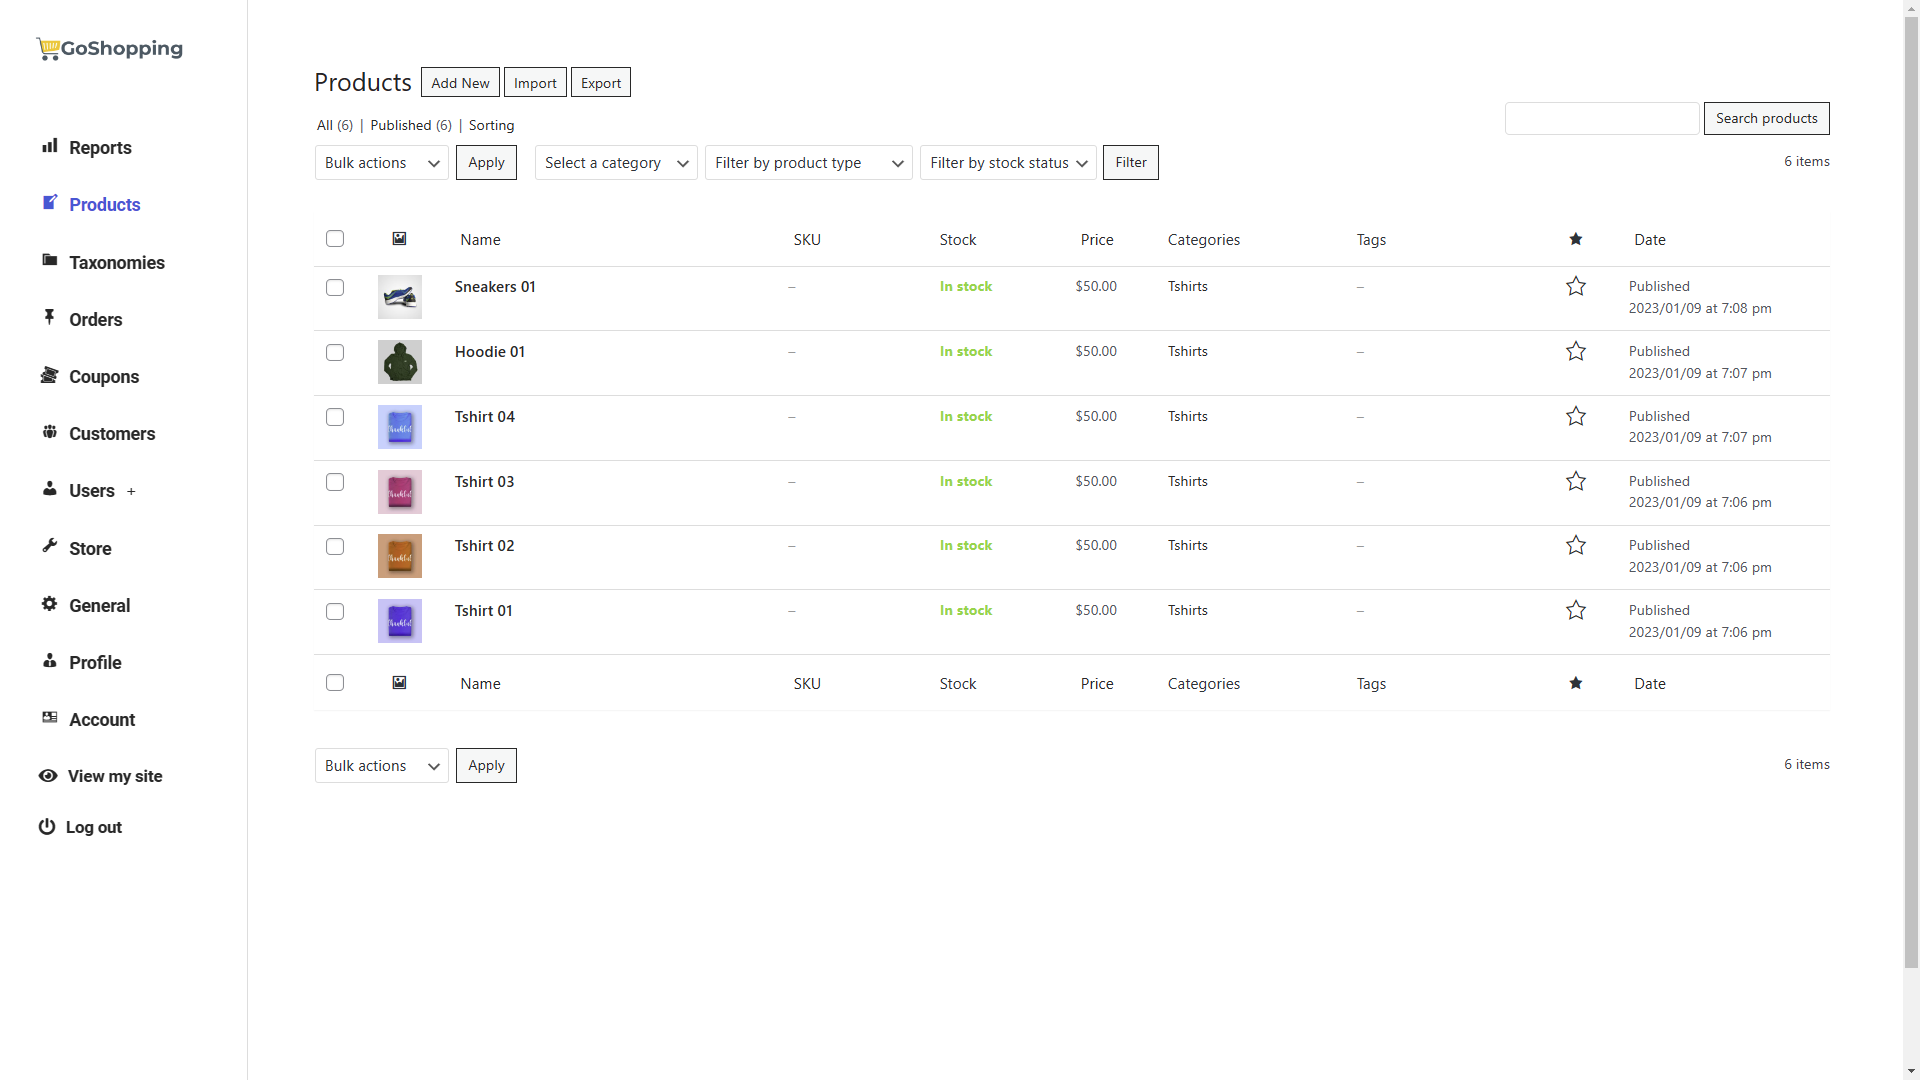
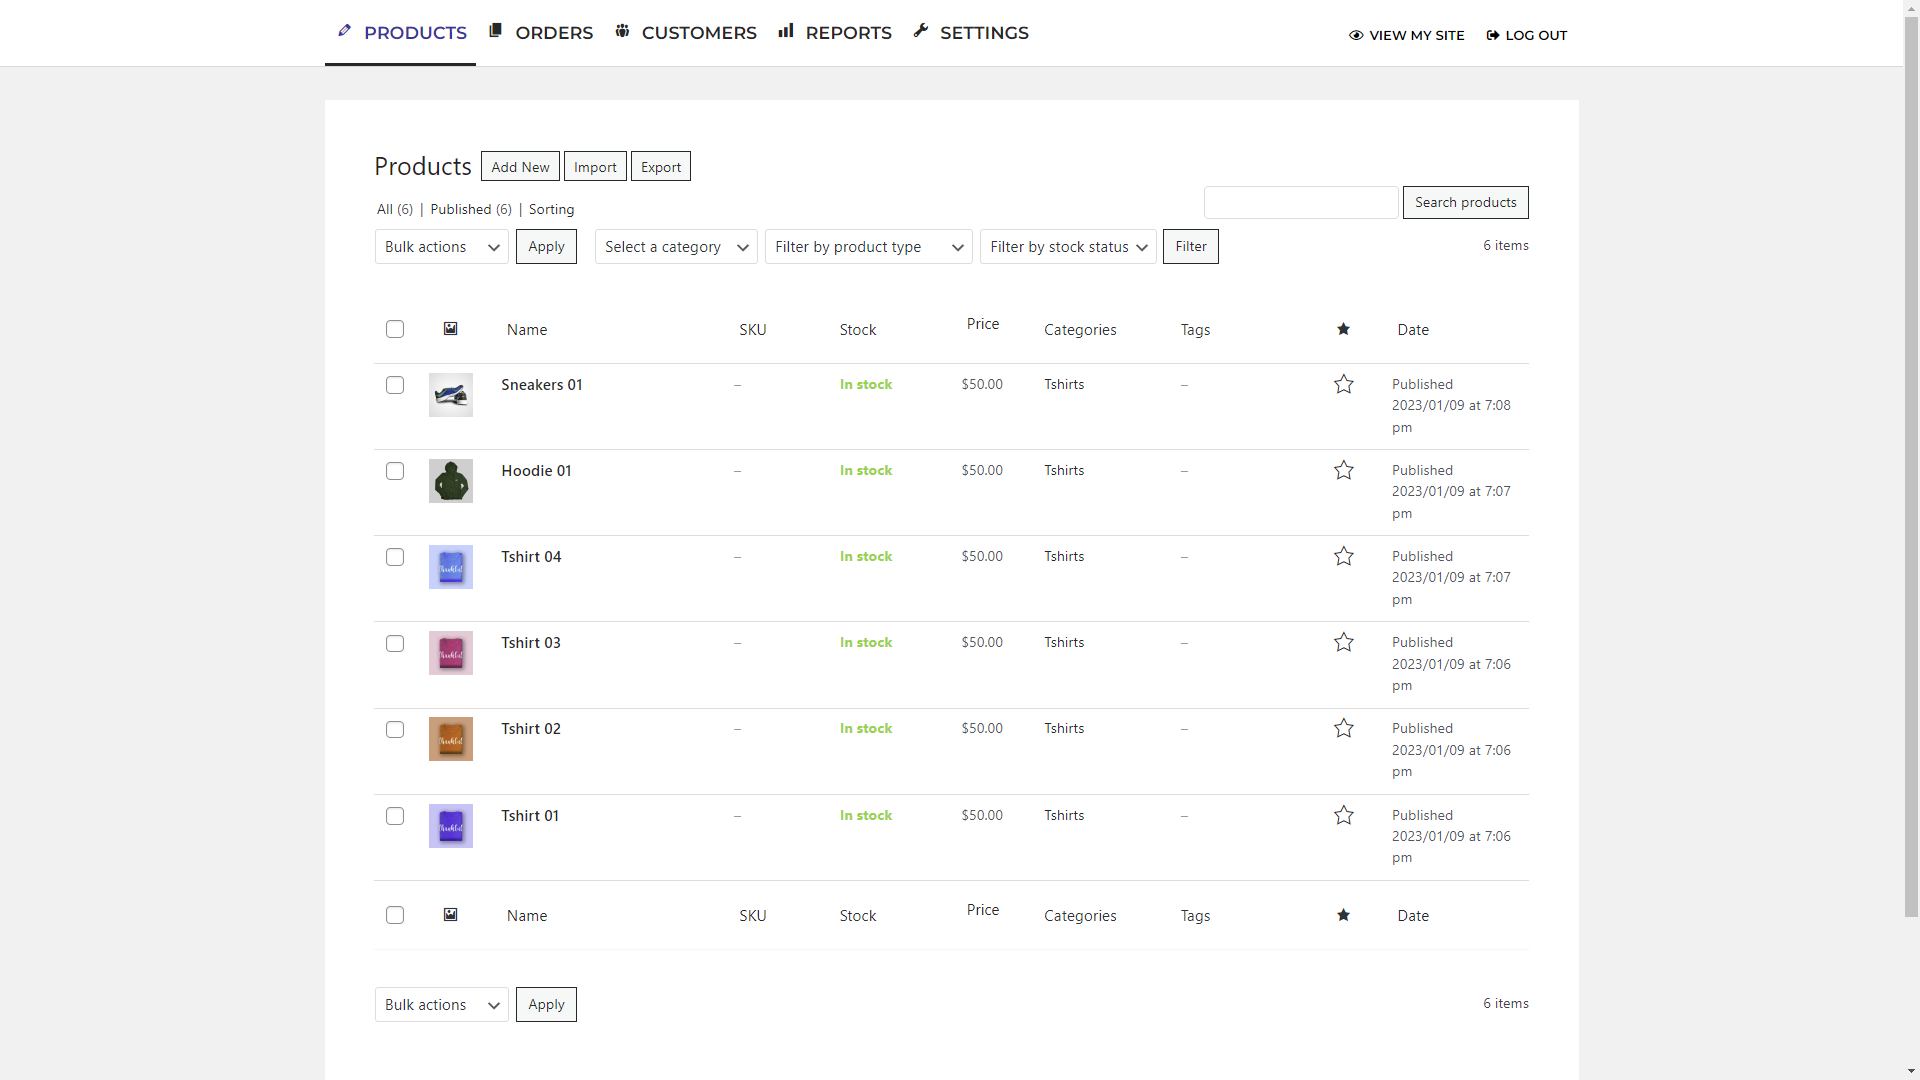
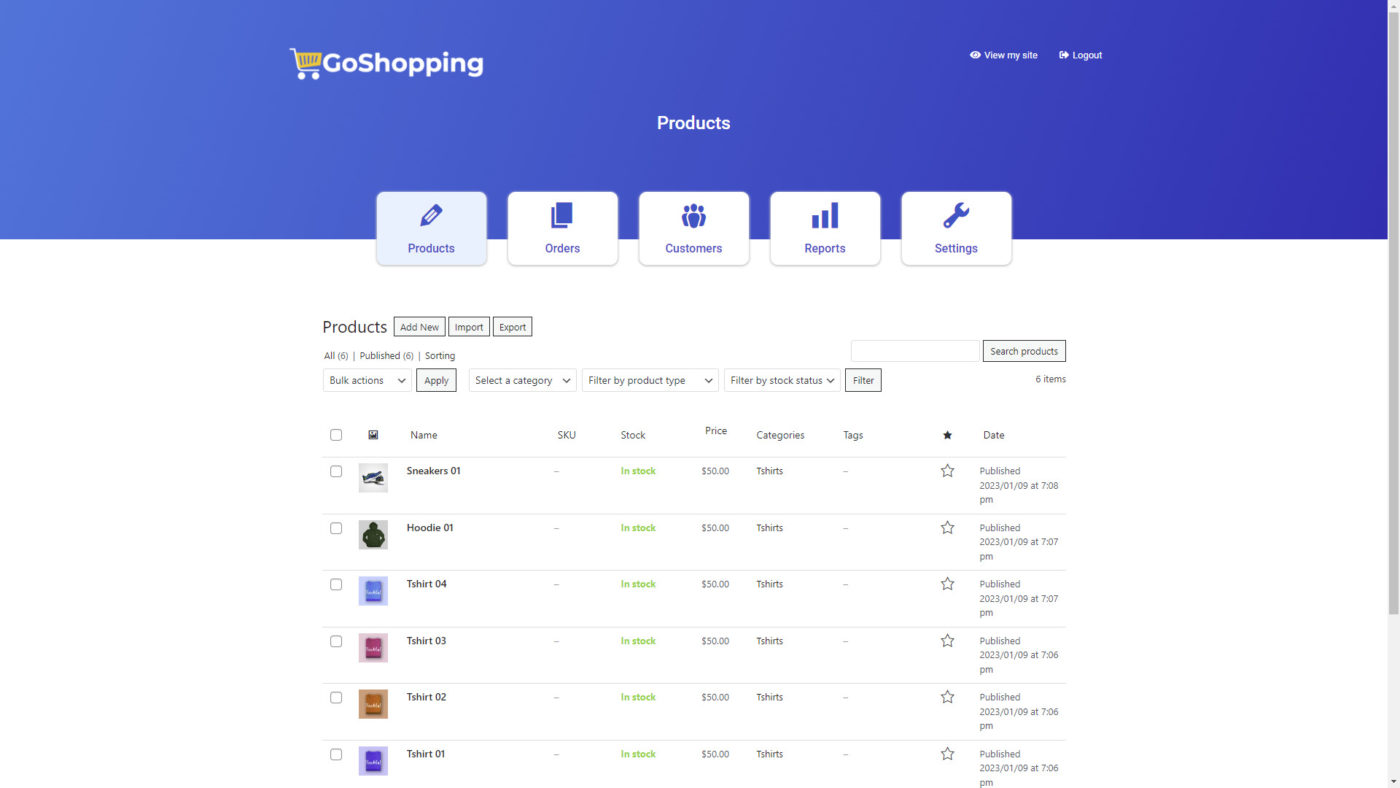
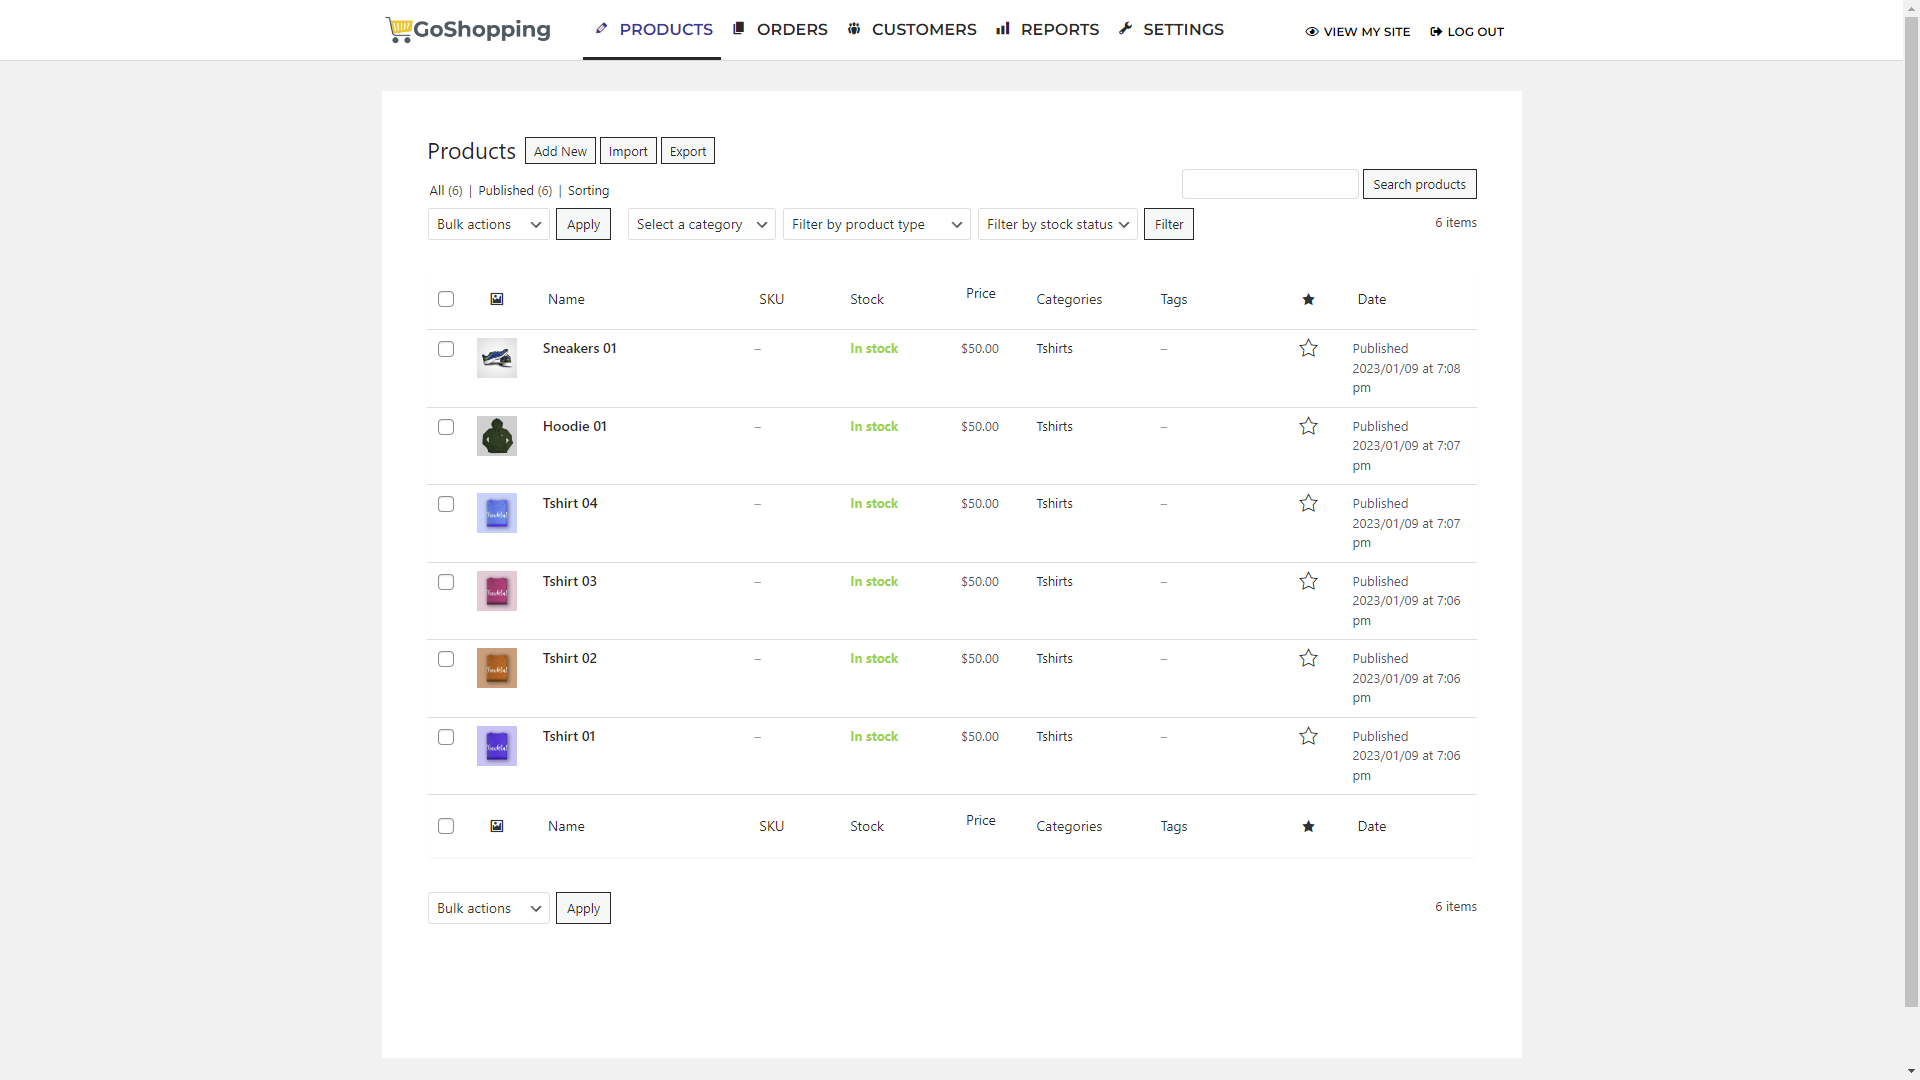
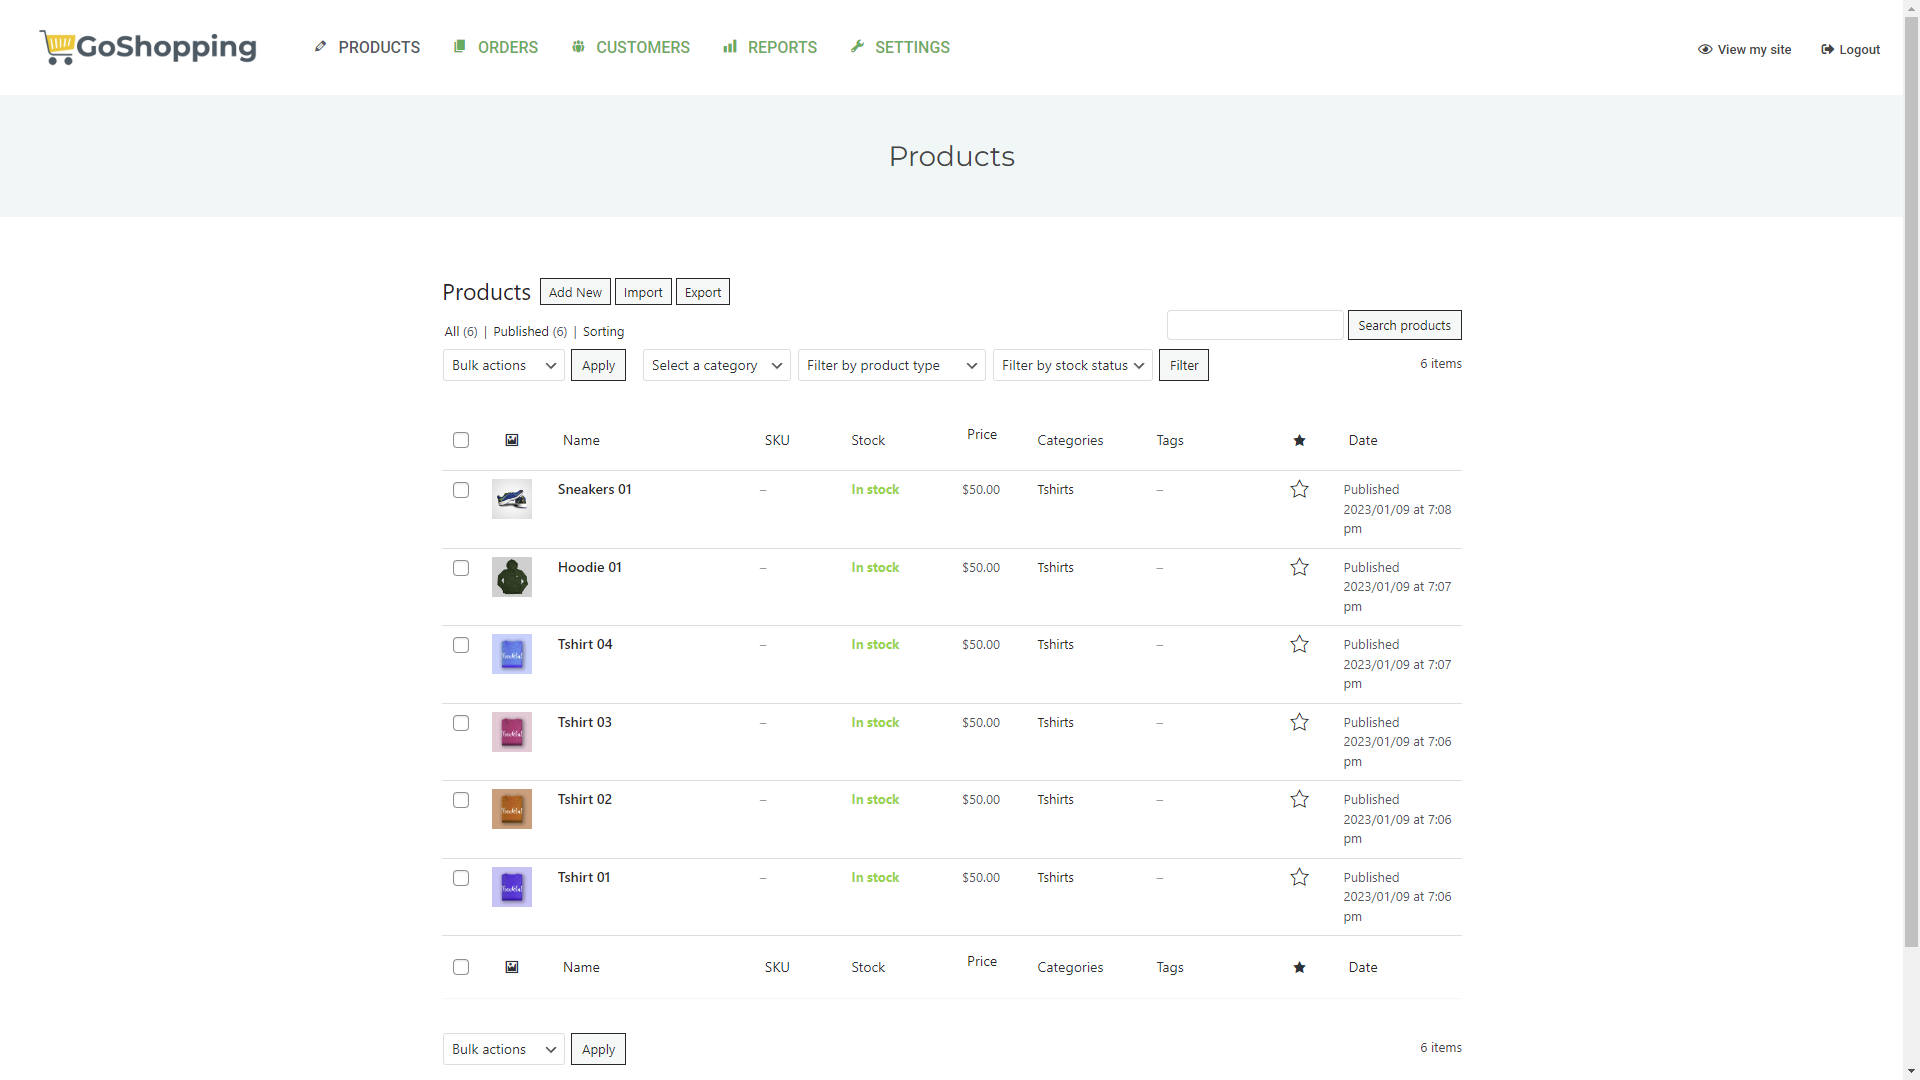
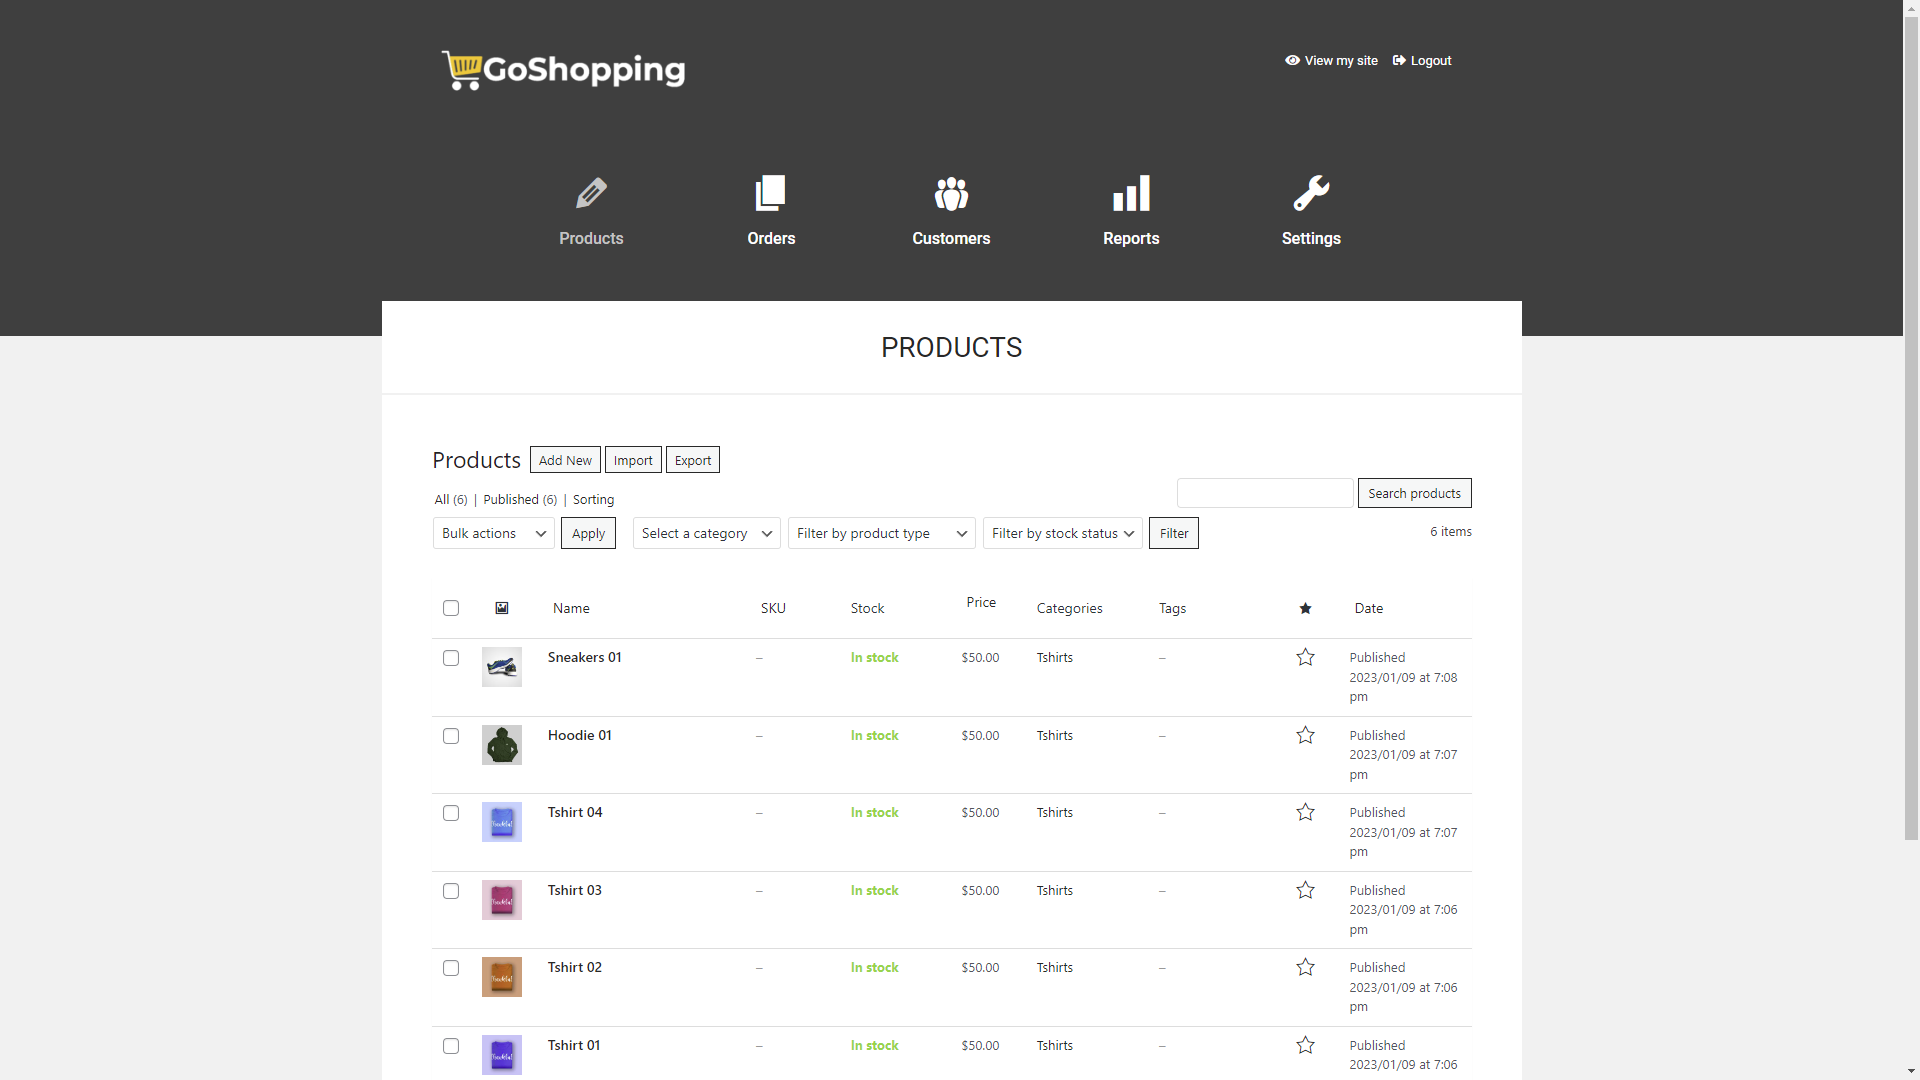
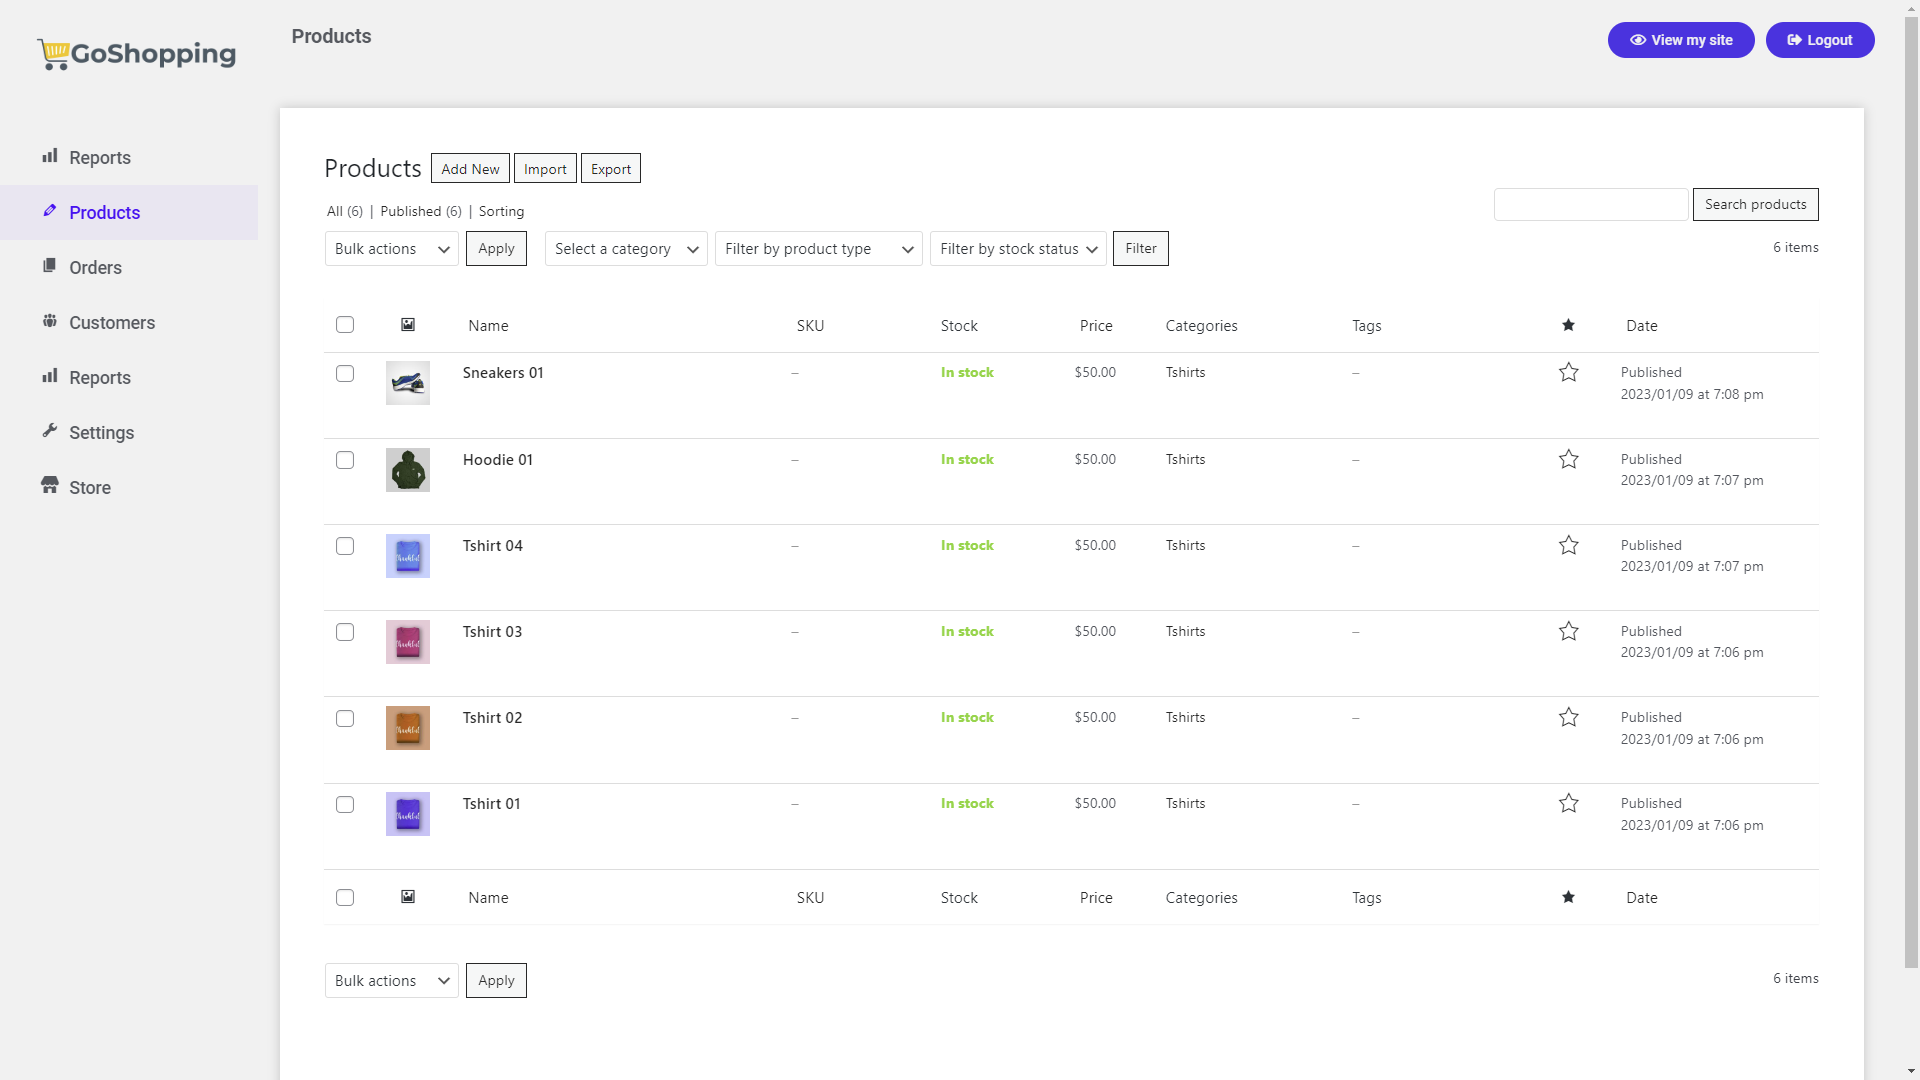
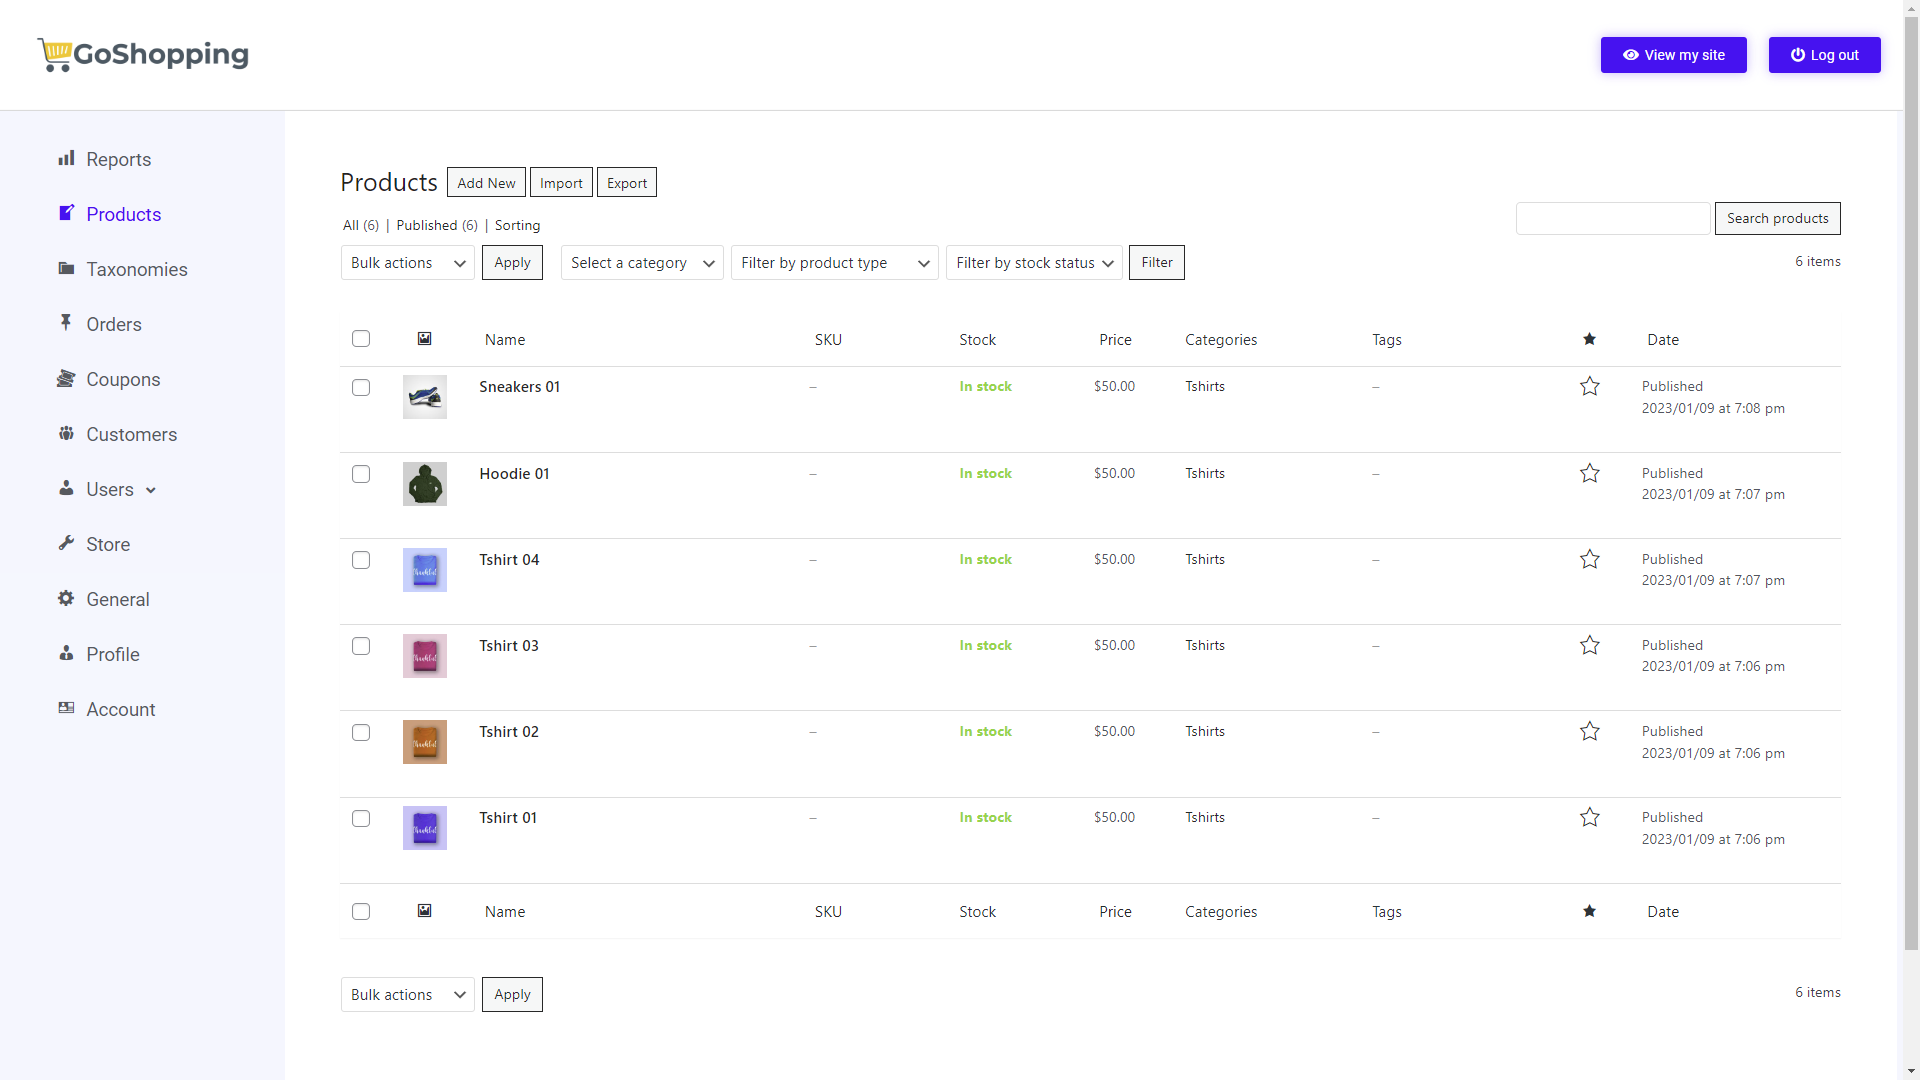
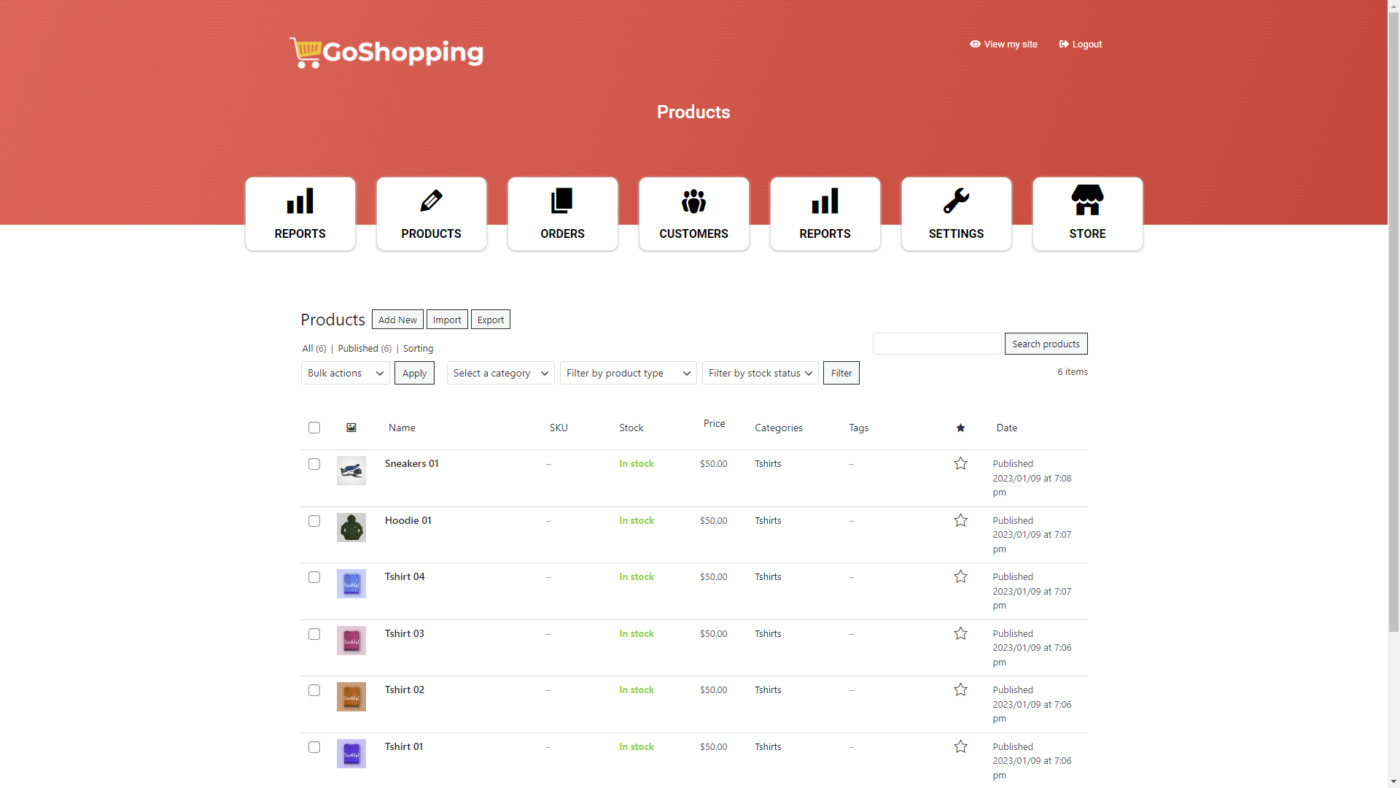
Here’s how our dashboard looks once it’s been configured:

7- How to create a custom login page with Elementor and redirect users to it
In addition to setting up a beautiful frontend dashboard with Elementor, you can also create custom login pages easily in Elementor. WP Frontend Admin allows you to display the login form on any element with a simple shortcode.
Just create a page with your own design and colors. Then, add a Shortcode element in the section or column where you want to display the login form.
Paste this shortcode to display the login form:
[wp_frontend_admin_login_form]

Note. You won’t see the login form while you’re logged in, but this is how your page could look.

Now you need to make sure users will be redirected to this page every time they try to see the frontend dashboard pages:
- Go to your network admin.
- Go to WP Frontend Admin > Settings > Login.
- Paste the login page URL in the Login Page URL field.
- Scroll down and Save.

This is how you can set up your frontend dashboard templates with Elementor. In fact, you can create a complete dashboard with the steps explained in this tutorial.


