WordPress Multisite vs. WordPress Multitenancy
A key approach to better understand the differences between WordPress Multisite and WordPress Multitenancy is to look at the way both structures use databases.
WordPress Multisite uses a single database for all sites within the network. Each site’s data is stored in separate tables within that single database. So, it’s like having different rooms (websites) in a house (database), each with its own space but still part of the same structure.
WordPress Multisite offers efficiency and centralized management, but may face scalability challenges and limited customization options for individual sites.

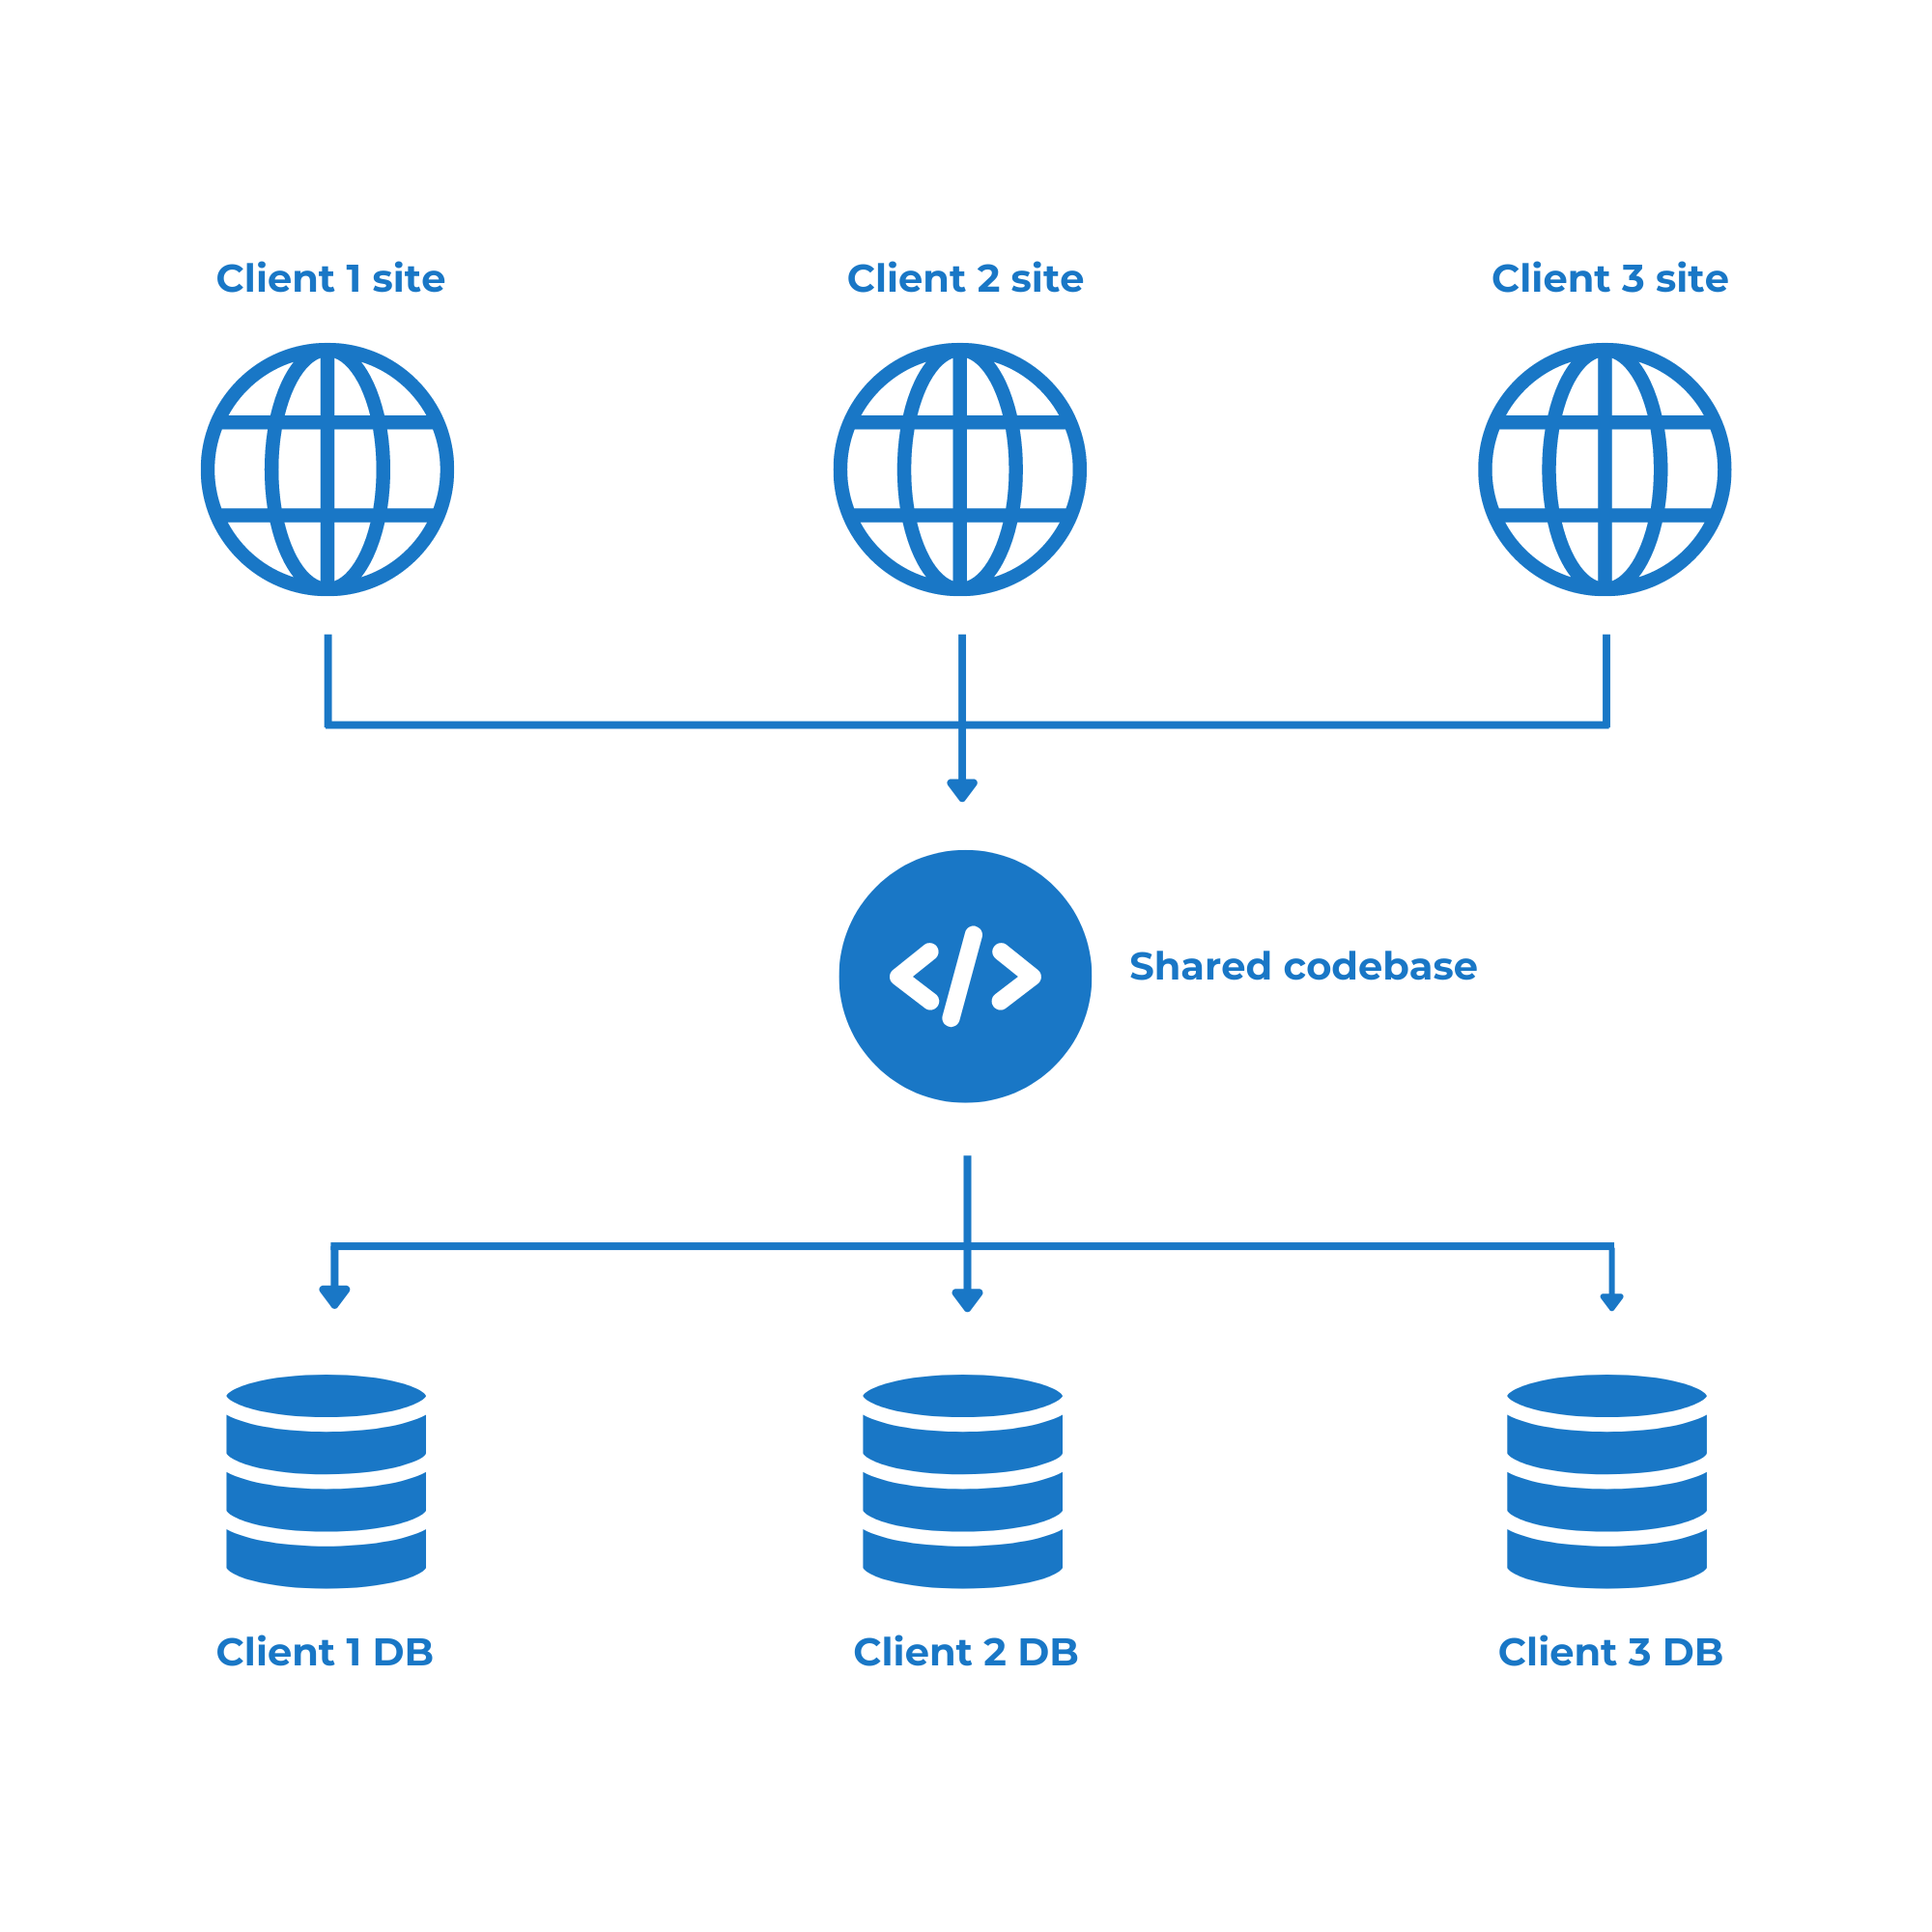
With WordPress Multi-tenancy, each tenant or site has its own separate database although it uses a shared codebase (WordPress version, plugins, themes, language files). It’s like each tenant in an apartment building having their own private storage space. Each installation of WordPress for each tenant operates independently with its own set of tables and data.
WordPress Multitenancy provides better data isolation, customization, and scalability options for individual tenants, but may require more resources and management overhead.
Note – Although in this course we will not use WordPress Multisite but WordPress Multitenancy, we have a version of this course for WordPress Multisite to which you can enroll by clicking here.
Creating a WordPress application on Wildcloud
The first thing we need to do is create the Wildcloud applications that will allow us to build our ecommerce platform.
Let’s start by creating an empty application, which will provide us with everything necessary to build the e-commerce WaaS platform.
You just have to follow these steps:
Step 1 – Log in to your Wildcloud account.
Step 2 – Click on Create Application.

Step 3 – Select Empty application and click on Next.

Step 4 – Select the region where you want to create your application and click on Next.
Tip. Select a region that is geographically closest to your primary audience for faster server response and better performance of your ecommerce platform.
We will select US1 (N. Virginia) (or any location that’s closer to your clients).

Step 5 – Give your application a name and click on Next.
We will call it My ecommerce app, but you can assign the name you want.

Creating a storefront application on Wildcloud
Step 6 – Click on Next to create a storefront application.
This storefront application will allow you to create a site where you will sell subscriptions to your e-commerce platform. You will be able to automate subscription sales, client registration, and client’s access to their sites/tenants.
Look at it this way: The empty application (WaaS) is our software for building online stores, while the storefront application allows us to create the site where we will be able to sell our software. And these two applications will be automatically connected if we create it in this step.

Step 7 – Add a name for your storefront application and click on Create and connect Storefront.

You will have to wait a few minutes for your applications to be completed.
Finally, you will see this page from which you can access the applications, versions and sites/tenants that have been created.

You can also go to the Applications page on the Wildcloud dashboard if you want to use the normal page.

This is the page we will use from now on, every time you log in to your Wildcloud account.

Adding custom domains to your sites/tenants
Wildcloud allows you to add custom domains to the sites/tenants on your applications. For example, in the storefront application, a site/tenant is created by default, which we will use in the following lessons.
If we open the details of that site, we can see the instructions to assign a custom domain.
Then, we only have to select the custom domain added as Main Domain.

In this course, we will use the default domains, but you can assign custom domains to your sites if you want.
Now that we have created our Wildcloud application, we can proceed to install all the required plugins for our ecommerce platform, which we will do in the next lesson.