In this guide, you’ll learn how to allow your users to create Amelia appointments on the frontend.

You need to install and activate these two plugins on your WordPress site:
- Amelia – Events & Appointments Booking Calendar .
- WP Frontent Admin. It allows you to display any wp-admin page on the frontend. You can create a beautiful frontend dashboard. You can also create a web app based on any WordPress plugin.
You can try the premium plugin on your website for free for 7 days.
Once you install both plugins on your site, follow these steps to display the Amelia appointments page on the frontend:
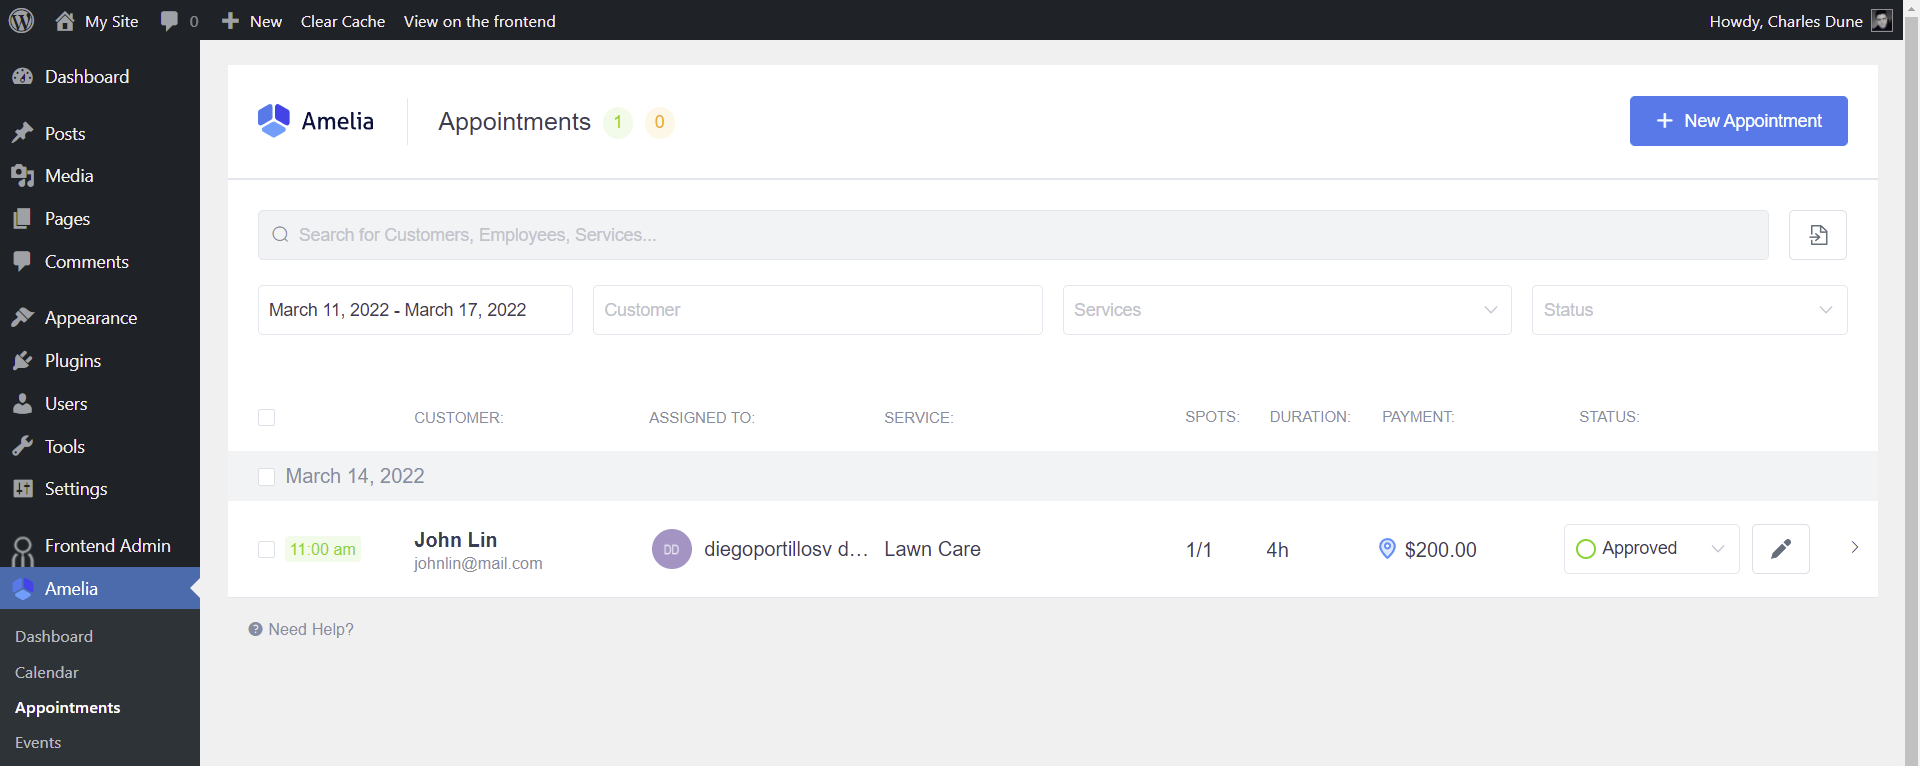
1- Open the page on wp-admin
Go to Amelia > Appointments to open the Amelia Appointments page on the wp-admin dashboard.
2- Display the Amelia appointments on the frontend
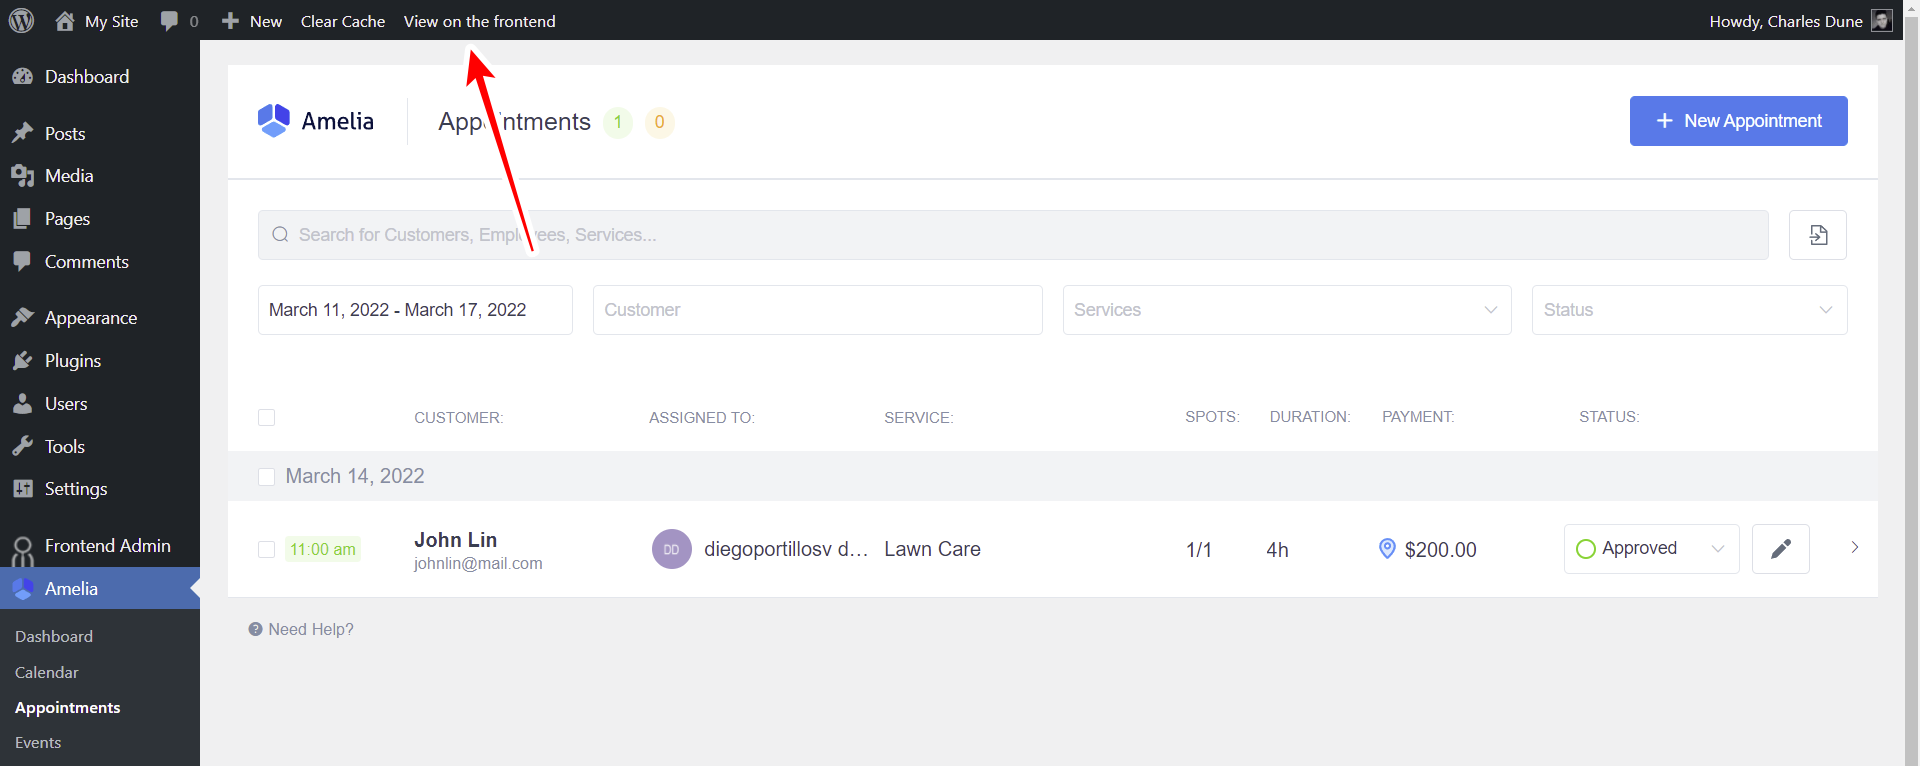
Normally, if you want to create a frontend page, you need to be an experienced programmer and frontend developer.
That takes years of study and practice. But we’ll show you how to create a frontend page with a single click.
Just click on View on the frontend to display the Amelia appointments page on the frontend.
Optionally, you can use the following shortcode to display the appointments page on the frontend, using any page builder like Elementor, Beaver Builder, etc.
[vg_display_admin_page page_url="admin.php?page=wpamelia-appointments#/appointments"]
Once you paste the shortcode on any section of your page, click on Preview to display the appointments on the frontend.
3- Set up the page on the frontend
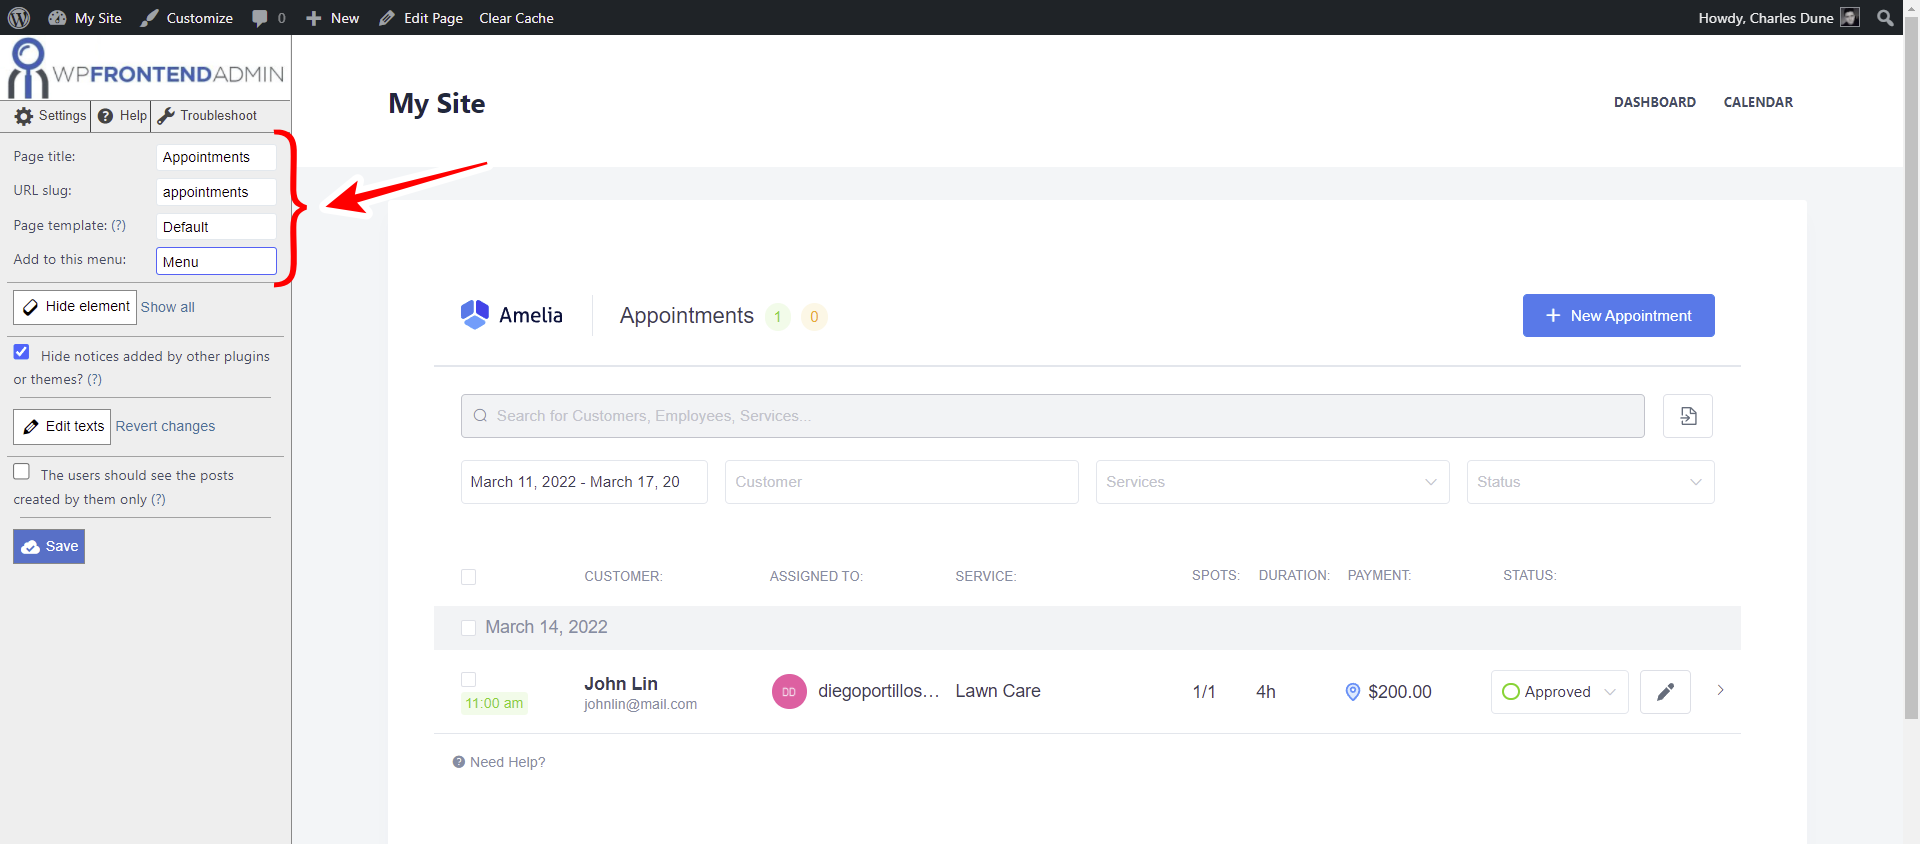
WP Frontend Admin displays a Quick Settings panel on the left side of the screen.
This panel allows you to set up your frontend pages by selecting the basic information of the page, hiding any unnecessary elements from it, editing texts, etc.
You can start setting up your frontend appointments page by entering the following information:
- Page title
- URL slug
- Page template
- Add to this menu
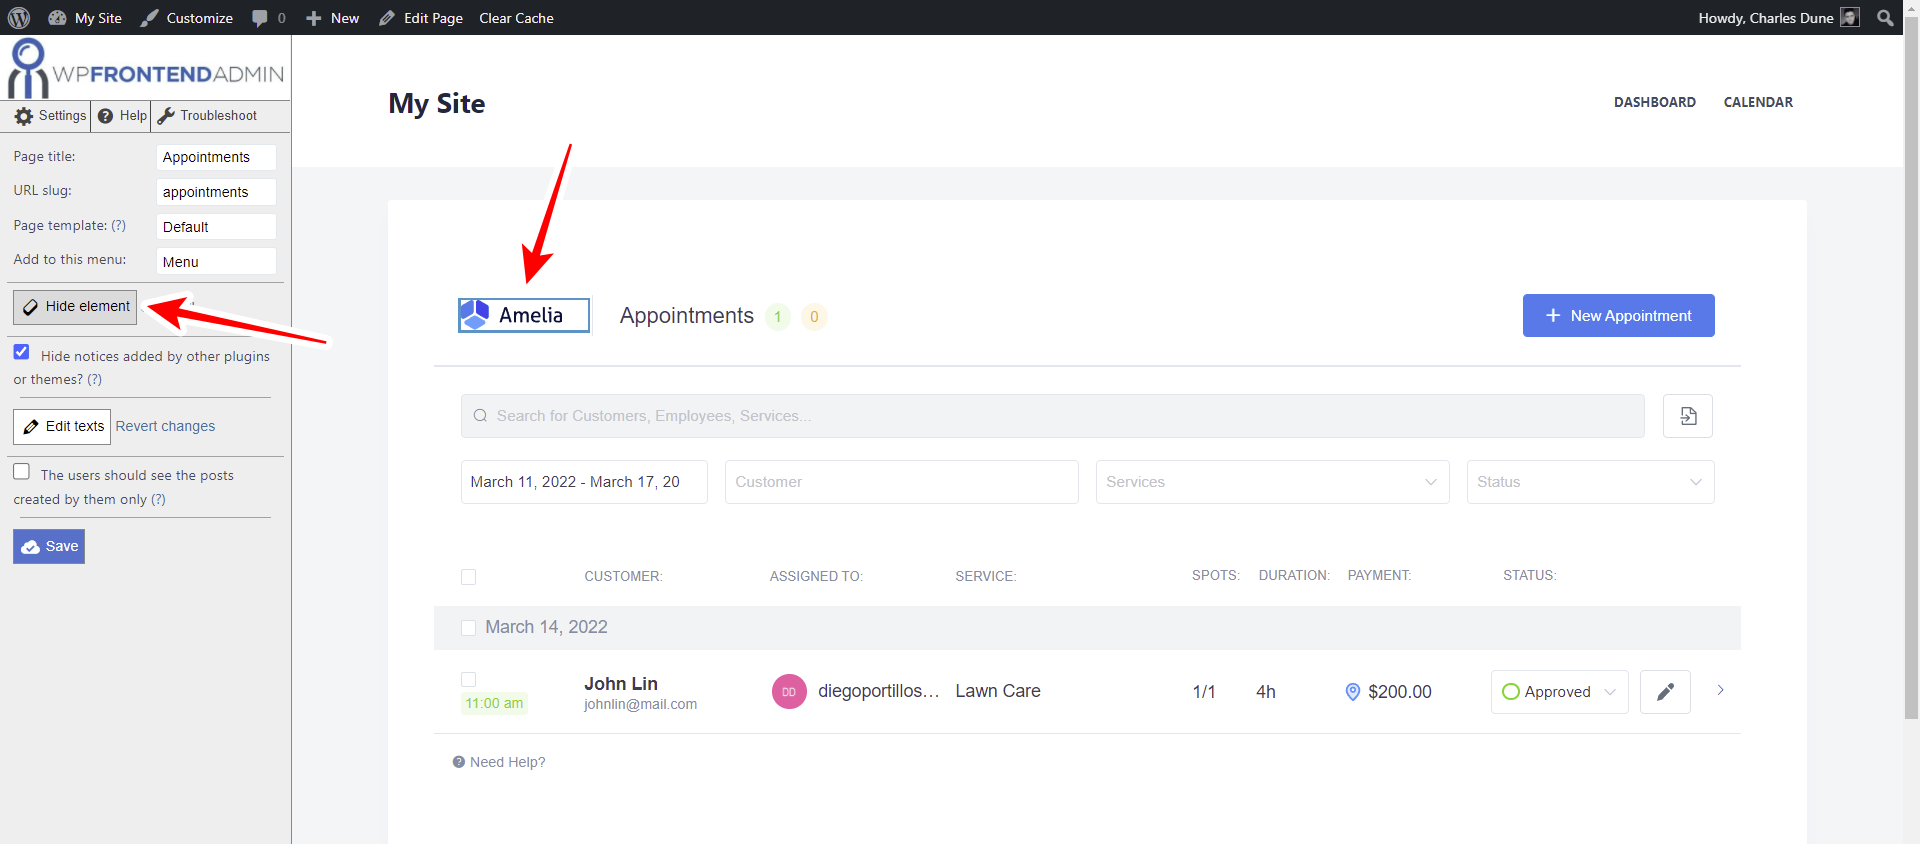
You can also hide any unnecessary elements from the page. This is useful if you want to remove the Amelia logo, the Need help message, the Add New floating button, etc.
Just click on Hide element, click on the element you want to hide.
Repeat this short process for every element you want to hide from your frontend Amelia appointments page.
You can use the Edit texts button to change names to buttons, fields and metaboxes:
- Click on Edit texts
- Edit all the texts you want
- Click on Stop editing texts.
Once you’ve applied these changes, you can tick the following checkboxes:
- Hide notices added by other plugins or themes
- The users should see the posts created by them only
Now you just need to click on Save to apply the changes to your frontend Amelia appointments page.

After saving the changes, you can open the New Appointment form to edit it.

For example, if you’re using Amelia Lite, you won’t be able to use the Extras tab on the New Appointment form.
Therefore, you can remove the tabs selector from this form using the Hide element button.

Once you’re done, you need to save the changes and publish the page.
Create Amelia appointments on the frontend
This is what the Amelia appointments page will look like on the frontend:
Your users will be able to view appointments, filter the appointments by customer, employee, service, date, status, etc., and create new appointments.

Note. Only users with these roles will be able to view the appointments page on the frontend:
- administrator
- wpamelia-customer
- wpamelia-provider
- wpamelia-manager
With WP Frontend Admin, you can display all the Amelia plugin’s pages on the frontend to create a beautiful frontend dashboard.
Here are more tutorials on the Amelia plugin.
You can try the premium plugin on your website for free for 7 days.


