This post shows you how to allow your users to translate content from your website using WPML on the frontend. Users will be able to create multilingual content quickly without having to deal with the WordPress backend dashboard.
If you want to do this manually, you must have a lot of programming knowledge to create a frontend page that allows you to view and edit any wp-admin section such as pages, products, posts, etc. on the frontend.
However, with WP Frontend Admin you can create frontend pages with admin sections as content with a few clicks. This is very useful for creating frontend dashboards, web apps from any plugin, or as in this case, post translation and submission platforms.
To allow users to create WPML translations on the frontend, you need to follow these simple steps.
Step 1. Install the “WP Frontend Admin” plugin
Important: This tutorial assumes that you have already installed and configured the WPML plugin on your site. So you can proceed to install WP Frontend Admin.
You can try the premium plugin on your website for free for 7 days.
Step 2. View the WordPress posts list on the frontend with a click
WP Frontend Admin makes it completely easy to create frontend dashboards and web apps because you can view any wp-admin section in the frontend with one click. You can display any page from any plugin to create a web app in seconds.
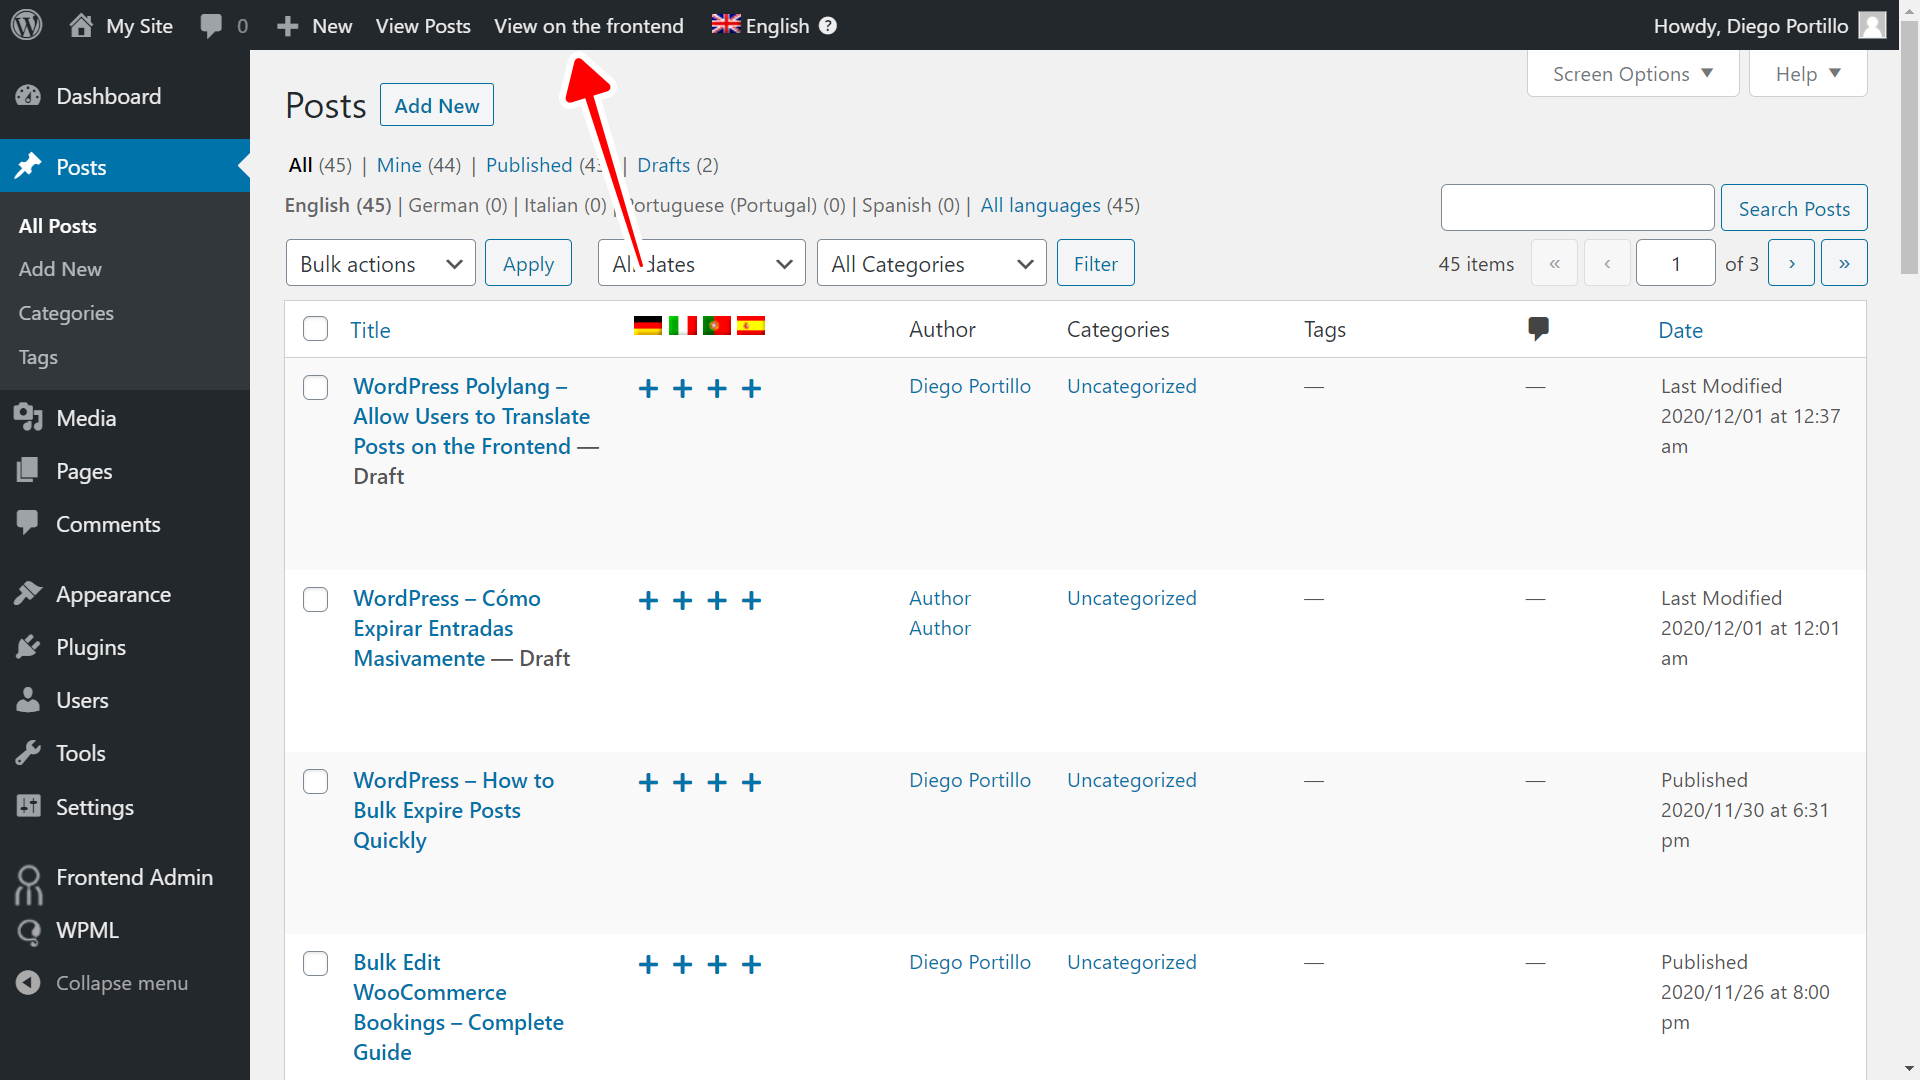
To view the WordPress posts in the frontend, go to Posts > All Posts and click View on the frontend.
Step 3. Configure the page on the frontend
WP Frontend Admin will display the posts section on the frontend. This saves hours and hundreds of lines of code and clicks.
The Quick Settings panel will show you all the settings to configure your page. You can start by selecting the basic information of the page:
- Page title
- URL Slug
- Page Template
- Add page to this menu
Once you select the page’s basic info, you can proceed to hide any unnecessary elements. You can simplify the page and make it look cleaner and elegant.
Here are some elements you can hide:
- The bulk actions
- The filters
- The search posts box and button
To remove these elements, you need to click Hide element and then click the element you want to hide. You need to repeat this with every element you want to hide.
After hiding all the unnecessary elements, you can continue editing the page by selecting the following values:
- Hide notices added by other plugins or themes: Tick the checkbox.
- Edit the texts that appear on the page: Click Edit texts, edit the texts you want, and click Stop editing texts.
- Tick columns to disable them from the frontend page.
- Select if the users will see the posts created by them only.
- Save the changes.
Step 4. Configure the edit post form
You can open the Add New button or open an existing post to simplify the edit post form. Basically, you need to hide some elements that the users won’t use to translate the posts.
Click Hide Element and click on the element you want to hide.
Here are some metaboxes you can hide:
- Publish button
- Categories
- Tags
- Featured image
- Post Settings
- Revisions
- Multilingual Content Setup
You can hide the Publish button if you want users to submit posts for revision, but you can also leave it visible so users publish posts immediately after translating them.
Once you have hidden the unnecessary elements, click Save to publish the changes.
Step 5. View and translate content on the frontend
You will need to log out and open the page you just created with a non-admin user, an author for example. When users try to enter the frontend page, they will be asked to enter their credentials to log in.
Once users log in to the frontend page, they will see the list of posts. They can add translations by clicking on the “+” button under their language flag.
This is how the post editor will look. As you see, the elements you hid won’t be displayed in the edit post form.
Users won’t be able to publish posts directly, but they can submit them as drafts for revision.
Important questions
- Does this work with other multilingual plugins? Yes. You can use WP Frontend Admin with other multilingual plugins. If you use Polylang, you can read this tutorial.
- How can I allow the user to add more languages? To allow the user to add more languages, go to WPML > Languages and display that page on the frontend. Follow the same steps in this tutorial: Click View on the frontend, configure the page, simplify it by hiding unnecessary elements, and publish it.
You can try the premium plugin on your website for free for 7 days.


