In a previous post, we showed you how to create an event submission frontend page. In this tutorial, we’ll show you how to create a complete frontend dashboard for The Events Calendar plugin. Your users will be able to manage events completely from this dashboard. You can even integrate this frontend dashboard to a WordPress Multisite network where users will manage their own events.
You will learn how to:
- Integrate WP Frontend Admin with WordPress Multisite (Optional)
- Integrate WP Frontend Admin with WP Ultimo (Optional)
- Create the Frontend Dashboard Pages
- Add “Logout” and “View User Site” Buttons to the Frontend Dashboard
Besides The Events Calendar, you need to install and activate the WP Frontend Admin plugin, which will allow you to create frontend dashboards, web apps from WordPress plugins, etc.
You can try the premium plugin on your website for free for 7 days.
This dashboard does not only work in a multisite network. You can create it on a normal site as well because the integration with WordPress Multisite and WP Ultimo is optional. However, if you are going to integrate it, you need to create a site in your multisite network that will serve as a global dashboard from which users will manage events.
1- Optional: Integrate WP Frontend Admin with WordPress Multisite
We have written tutorials to help you understand the multisite options of WP Frontend Admin and we leave them below:
2- Optional: Integrate WP Frontend Admin with WP Ultimo
In addition to the multisite options, we have created a tutorial to help you understand how to integrate WP Frontend Admin with WP Ultimo to sell memberships on your multisite network.
Our documentation can help you understand many basic aspects of WP Frontend Admin configuration.
3- Create “The Events Calendar” frontend dashboard pages
Note: If you are working with a multisite network, everything you do from now on must be done on a specific site that will function as a global frontend dashboard.
With WP Frontend Admin you don’t have to program the frontend admin pages from scratch. You don’t have to write a single line of code, and you can do it without knowing anything about programming. That’s because the plugin allows you to display any wp-admin page in the frontend with a single click or using a simple shortcode.
Here we will show you how to display the event list in the frontend with a single click so that you can then create the other frontend dashboard pages yourself with a few clicks.
a) Go to the page you’ll show on the frontend and view it on the frontend
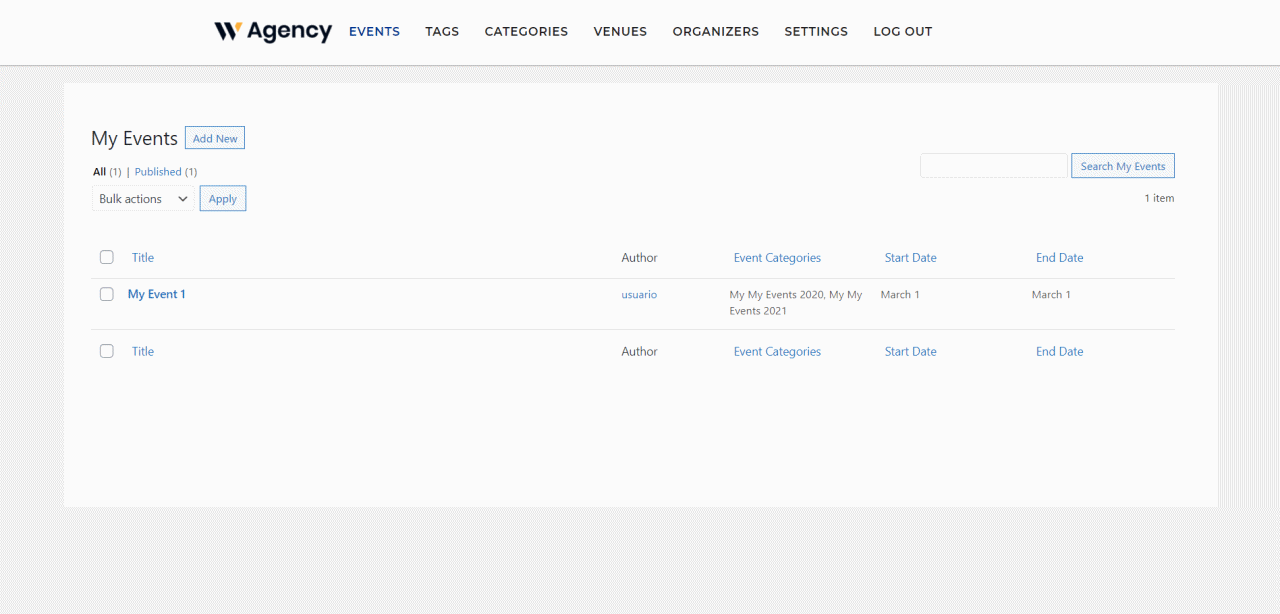
In this case, we need to go to Events > All Events and click View on the frontend to display The Events Calendar list of events on the frontend.

b) Select the frontend page’s basic information on the frontend
Once you click the View on the frontend button on the admin top bar, you will see the events list from The Events Calendar on the frontend. You can now start configuring the frontend page by selecting its basic information:
- Page title: Enter the page title here.
- URL slug: You need to enter the page slug using keywords only.
- Page template: Select the page template using this dropdown. We’ll use the Default template to use the theme’s options.
- Add page to this menu: You need to create and select a navigation menu for your frontend dashboard.
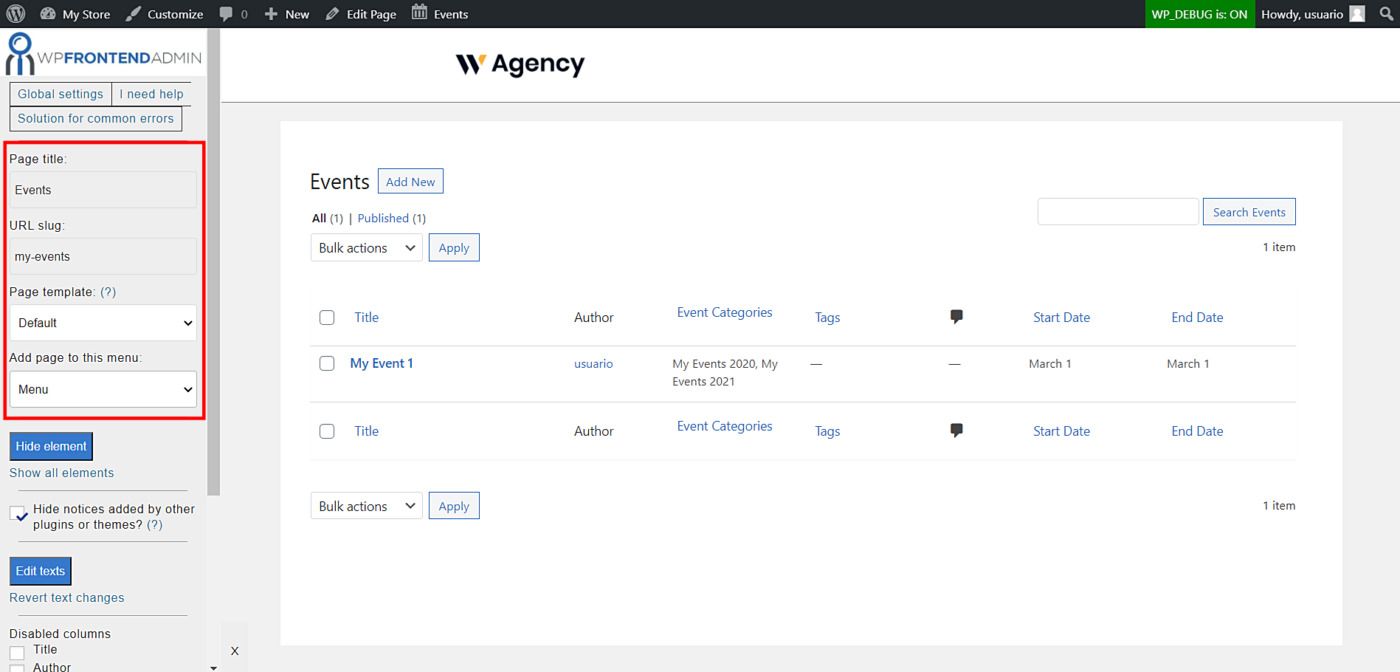
c) Hide any unnecessary elements from your frontend page
After selecting the page’s basic information, you can easily remove any unnecessary elements from it. This is really useful because you can simplify the pages and make them look more elegant:
- Click Hide element.
- Click the element you want to hide.
- Repeat these steps for every element you want to remove from your frontend page.

d) Edit the frontend page’s texts
Besides hiding any unnecessary elements, you can customize the frontend page’s texts:
- Click Edit texts.
- Edit all the texts you want. The plugin will highlight all the editable texts.
- Click Stop editing texts.

e) Complete the frontend page configuration
These are some options you have to complete the frontend page configuration:
- Toggle the Hide notices added by other plugins or themes. Users won’t see any wp-admin notices on the frontend when this checkbox is enabled.
- Hide any unnecessary columns. The WP Frontend Admin‘s quick settings panel contains a Disabled columns section that shows the columns of the page if it displays lists of events, organizers, etc. You can toggle the columns you want to hide from the page.
- Toggle the The users should see the posts created by them only checkbox.
- Click Save to apply the changes.

Once you save the changes, the page will be published, and this is how the page will look on the frontend for logged-in users:
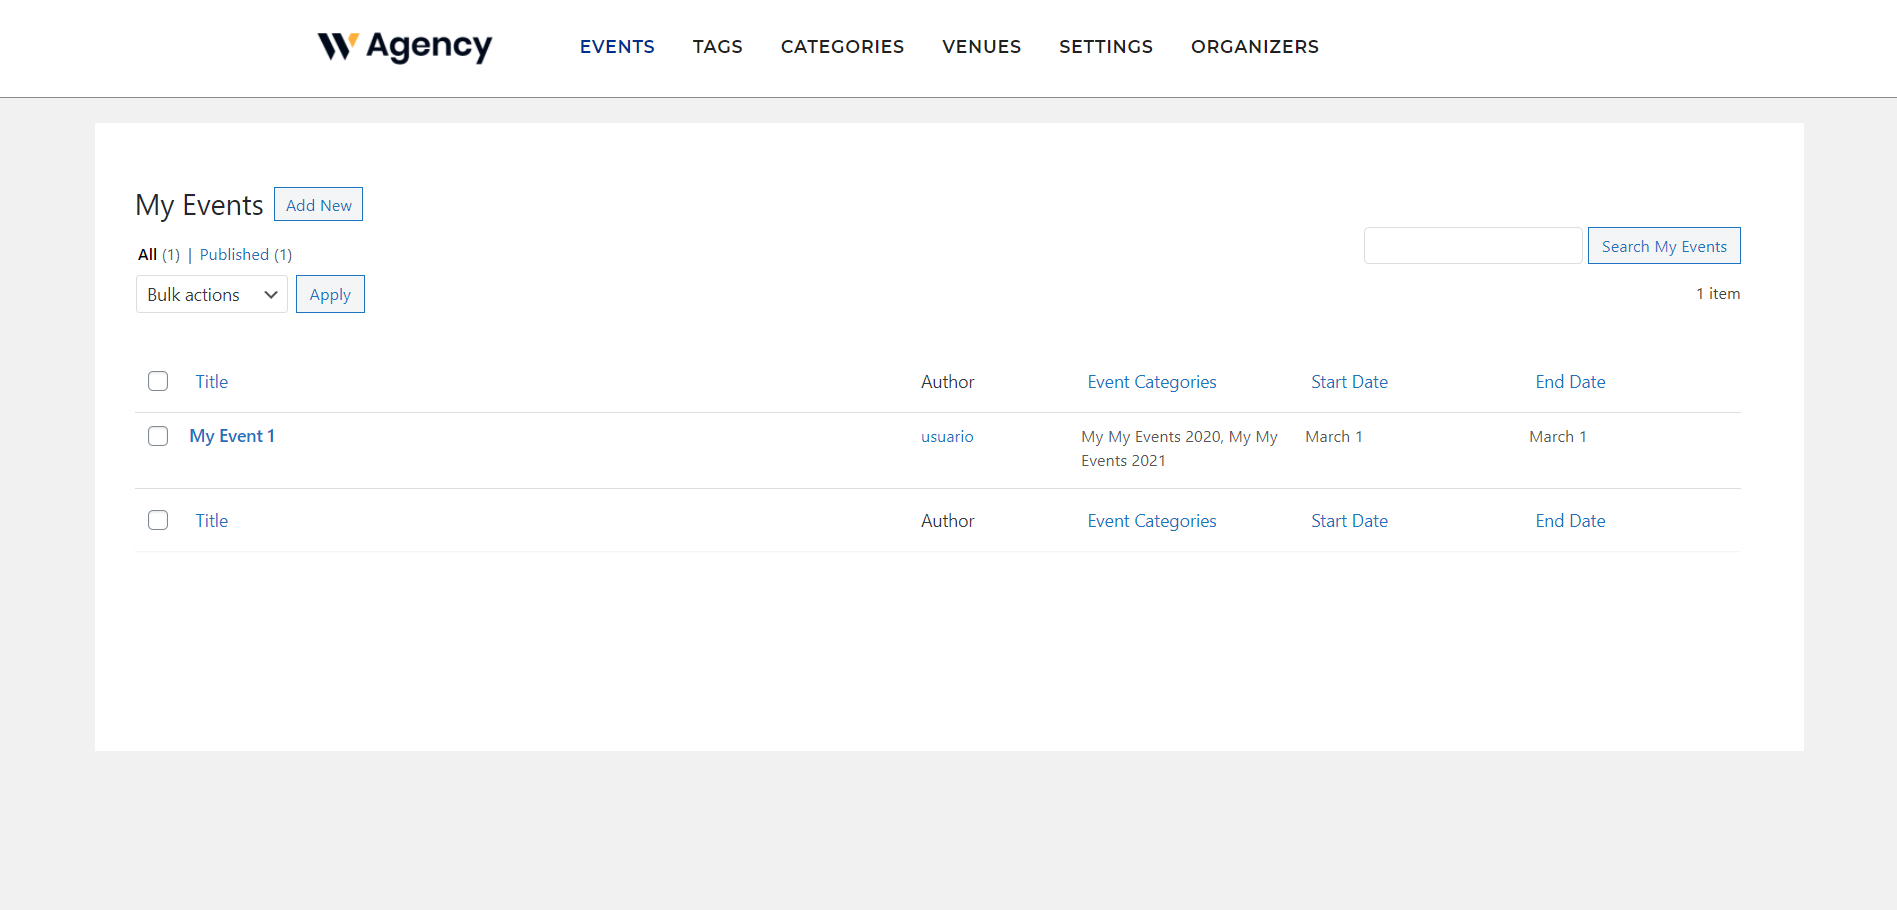
Using the same logic and process, you can continue creating the other frontend dashboard pages.
4- Add “Log Out” and “View user site” buttons to the dashboard menu
To add the logout and view user site buttons to the frontend dashboard, you need to add the following two shortcodes to the menu as custom links:
- Log out: [vg_display_logout_url]
- View User Site: [wp_frontend_admin_my_site_url]

Here we show you a gif where you can see our frontend dashboard to manage The Events Calendar events, organizers, etc.
This is how you can easily create a frontend dashboard for managing The Events Calendar events. It’s really simple and you don’t need to know anything about programming or coding.
You can try the premium plugin on your website for free for 7 days.

