In this tutorial, we will show you how to allow instructors to submit LearnPress courses on the frontend. This is great if you want to allow frontend submissions for the LearnPress plugin.
What you need to submit LearnPress courses on the frontend
If you want your teachers to add or create courses on the frontend, without having to use the backend dashboard of WordPress, then you can use the WP Frontend Admin plugin to create such a dashboard.
WP Frontend Admin can work with LearnPress or any other WordPress plugin, as it allows you to display any wp-admin page on the frontend of your web site. In this case, we will display the Courses page from LearnPress on the frontend.
You can try the premium plugin on your website for free for 7 days.
Once installed and activated, just follow these simple steps:
1- Open the LearnPress courses page
The first thing you need to do if you want to allow LearnPress instructors to submit courses on the frontend is to open the LearnPress Courses page by going to LearnPress > Courses.
2- View the LearnPress Courses page on the frontend
To display the LearnPress Courses page on the frontend, you have at least two options.
First, you can display this page on the frontend by clicking on View on the frontend on the toolbar.
This is useful if you will create a frontend page where users can submit courses, using any WordPress theme.
Second, you can use the following shortcode to display the LearnPress Courses page on the frontend:
[vg_display_admin_page page_url="edit.php?post_type=lp_course"]
This is useful if you’re using a page builder like Elementor, Beaver Builder, Visual Composer, or any other page builder for WordPress. You just need to create a new page and edit it with your preferred page builder and paste this shortcode where you want to display the LearnPress courses.
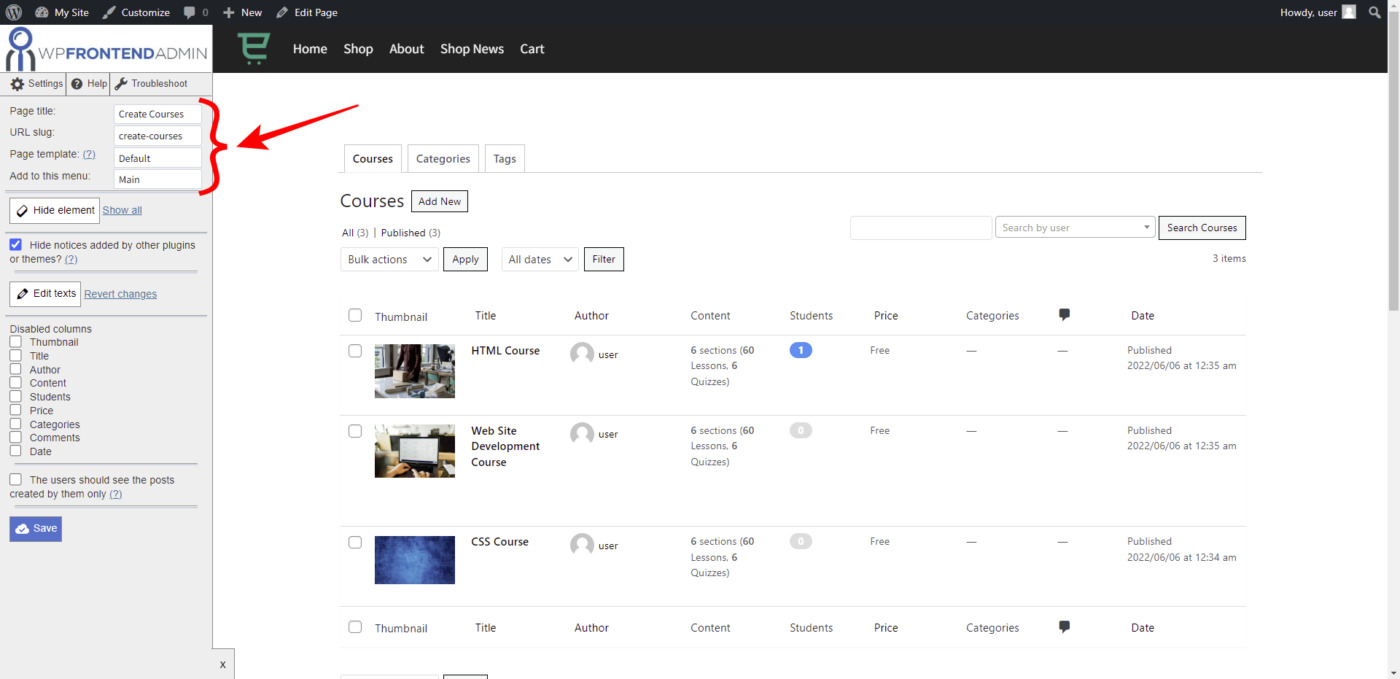
3- Select the page’s basic information
You can use the Quick Settings panel to configure your new frontend page on the frontend. This panel will allow you to customize the frontend courses page by hiding any unnecessary elements and editing any texts.
You can start by selecting the page’s basic information:
- Page title
- URL slug
- Page template
- Navigation menu
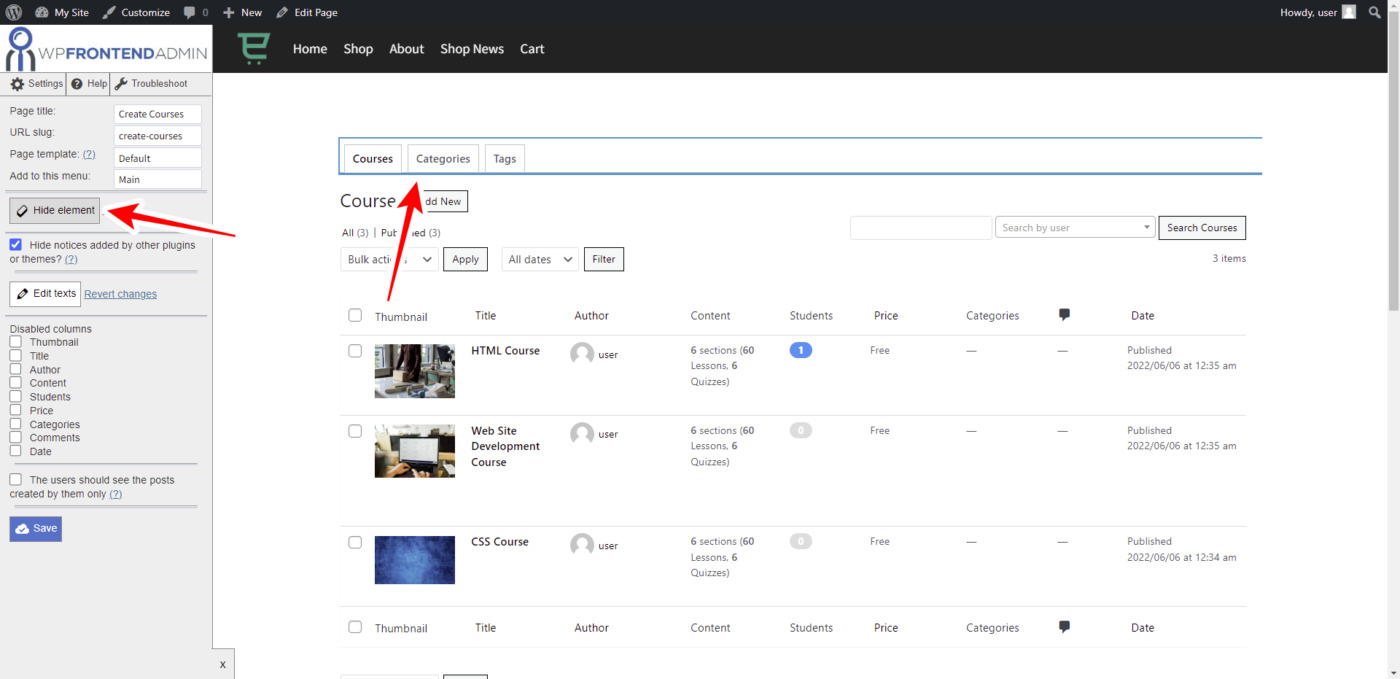
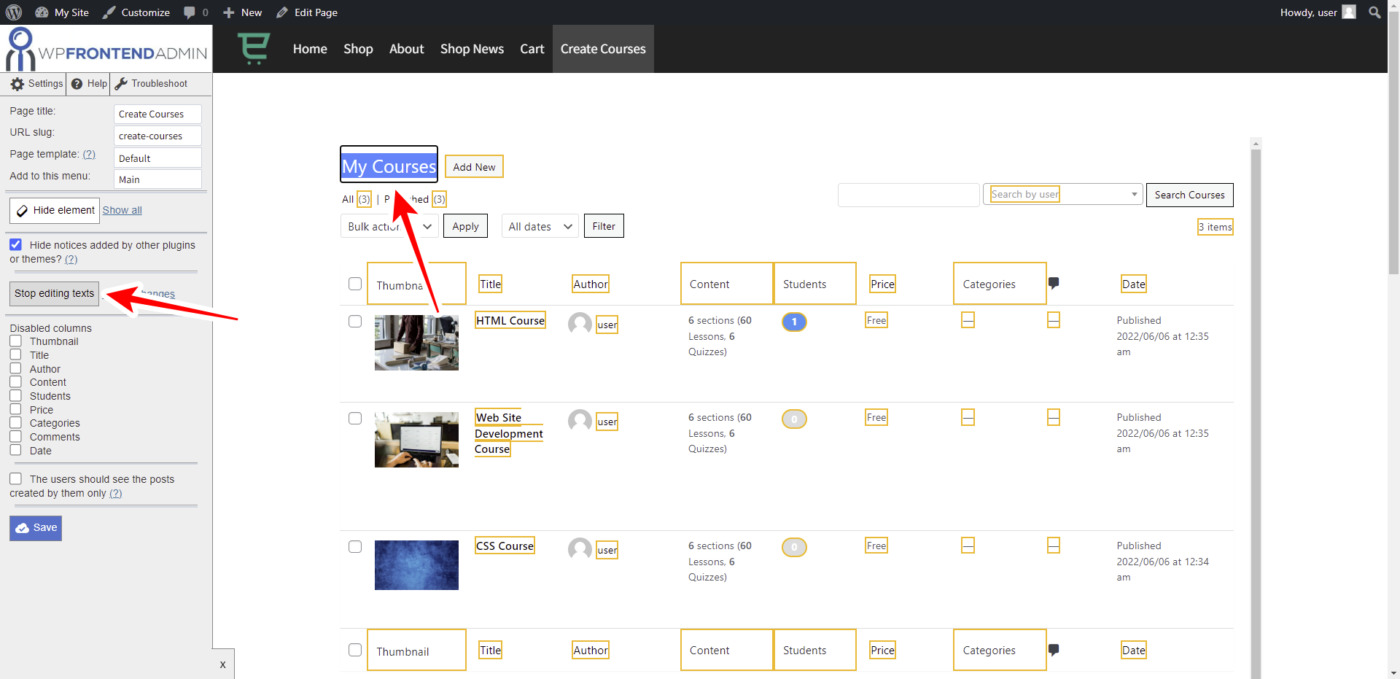
4- Hide unnecessary elements and edit texts
You can hide any unnecessary elements and edit texts on this frontend page.
To hide any unnecessary element from the page, click on Hide element and then click on the element you want to hide.
To change any texts on this frontend page, you need to click on Edit texts, change any texts, and finally click on Stop editing texts.
5- Complete the page configuration and save changes
You can tick the Hide notices added by other plugins or themes to prevent admin notices from appearing on this frontend page.
You can also disable columns from the courses list. Just tick the columns you want to hide in the Disabled columns section.
Besides, you can limit the courses to have instructors see their own courses only. You can do this by ticking the The users should see the posts created by them only checkbox.
Finally, Save the changes.
6- Edit the “Add New Course” form
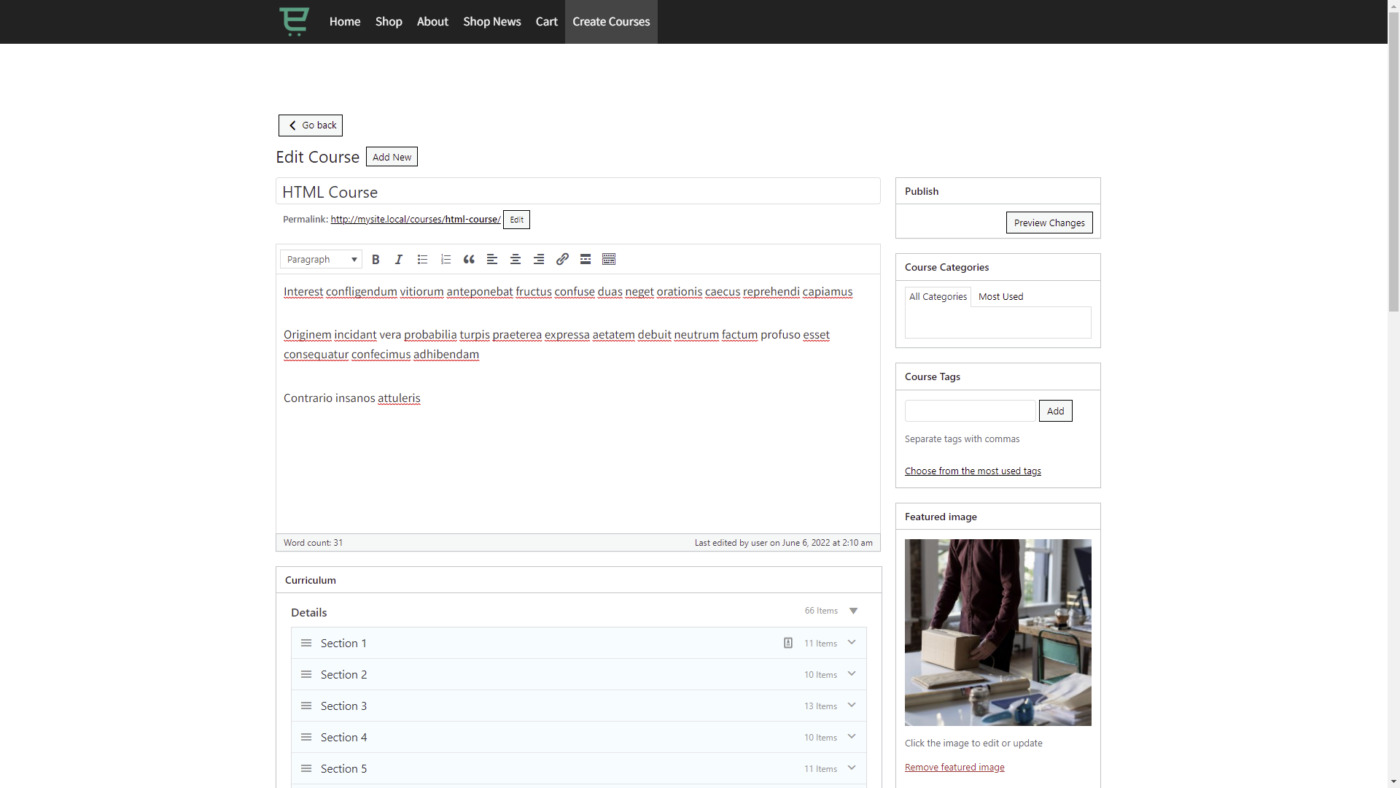
If you click the Add New button, you can open the new course form on the frontend.
Here you can hide any unnecessary elements and hide any unnecessary texts. For example, if you don’t want users to publish courses, you should hide the Publish button, and only leave the Save Draft and Preview buttons.
You can also hide the Visual / Text switcher, the post options section, the comments section, etc.
Allow instructors to submit LearnPress courses on the frontend
Now that you have published the page, your instructors will be able to access their accounts and submit LearnPress courses on the frontend.
This is the add/edit course page on the frontend.
This is how you can allow your instructors to submit LearnPress courses on the frontend of your WordPress website. It’s a great way to allow frontend submissions for your online learning website built with LearnPress.
You can try the premium plugin on your website for free for 7 days.


