Learn how to allow your users to manage Groundhogg funnels on the frontend of your WordPress website. This is useful if we want to create a web application that is CRM, Email and Marketing Automation system for WordPress.

In previous tutorials we have already shown you how to display contacts, tags, emails, and broadcasts on the frontend. Now we will continue using Groundhogg and WP Frontend Admin to display the funnels in the frontend.
You can try the premium plugin on your website for free for 7 days.
Follow these steps to allow users to create Groundhogg funnels on the frontend:
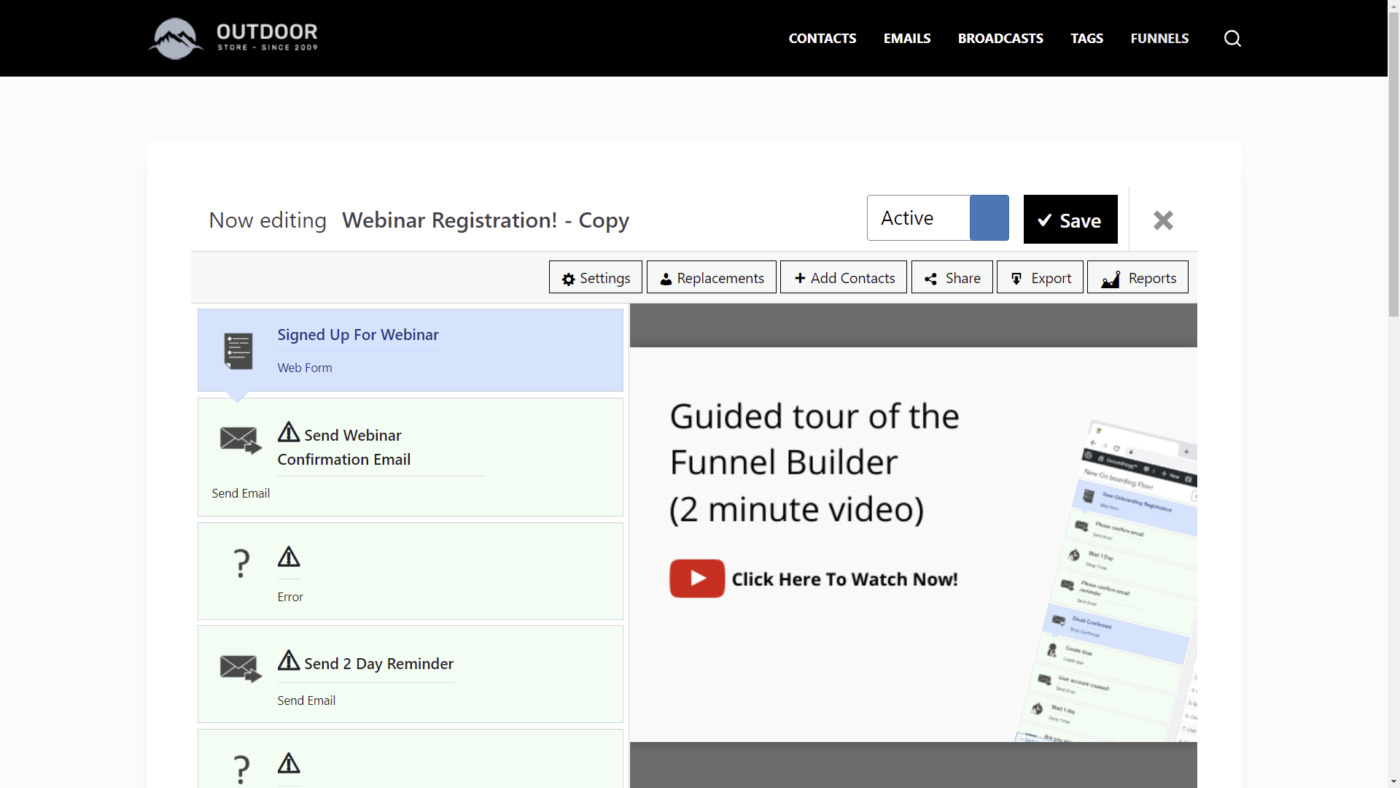
Step 1 – Open the Groundhogg Funnels page in wp-admin
Go to Groundhogg > Funnels to open the page in wp-admin.
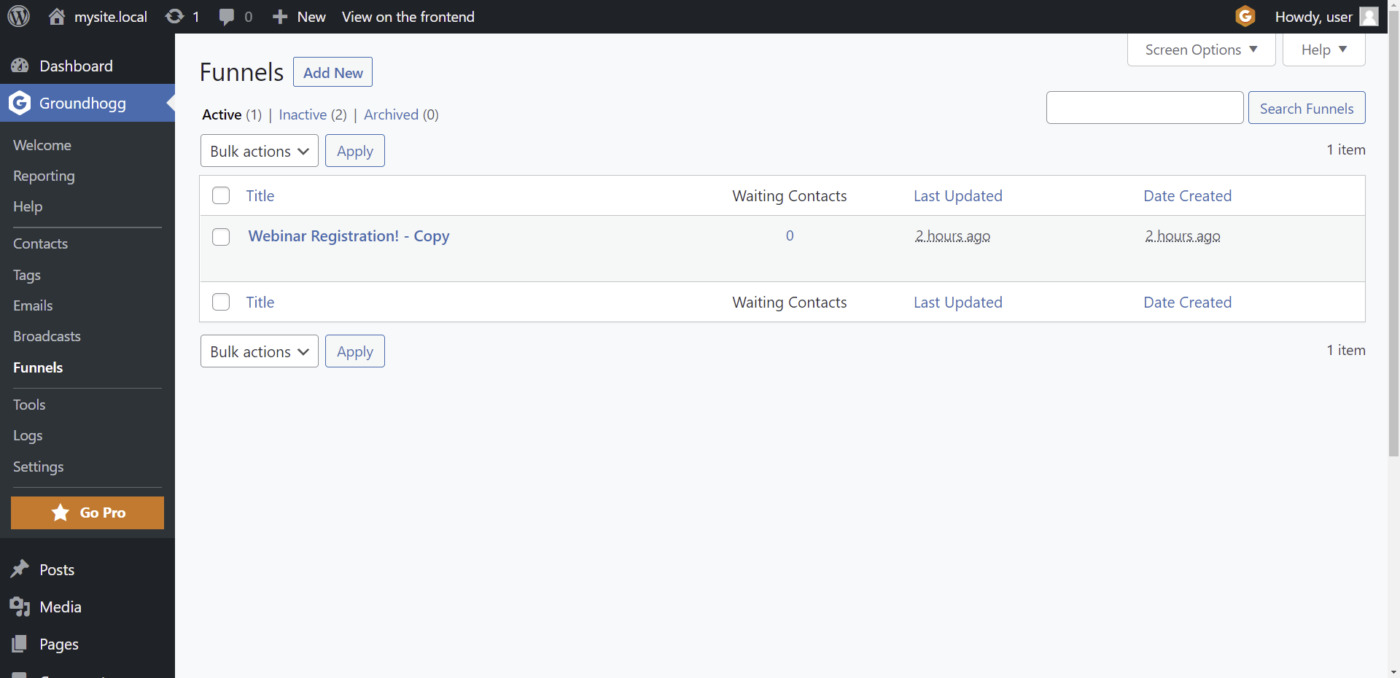
Step 2- Display the Funnels page on the frontend
Now you can display the Funnels page on the frontend by clicking on the “View on the frontend” button.

Step 3 – Select the general information of the frontend page
WP Frontend Admin shows the Quick Settings panel on the left side of the screen. You can use this panel to customize your frontend pages.
Start by selecting the following information for this page:
- Page title
- URL slug
- Page template
- Add to this menu
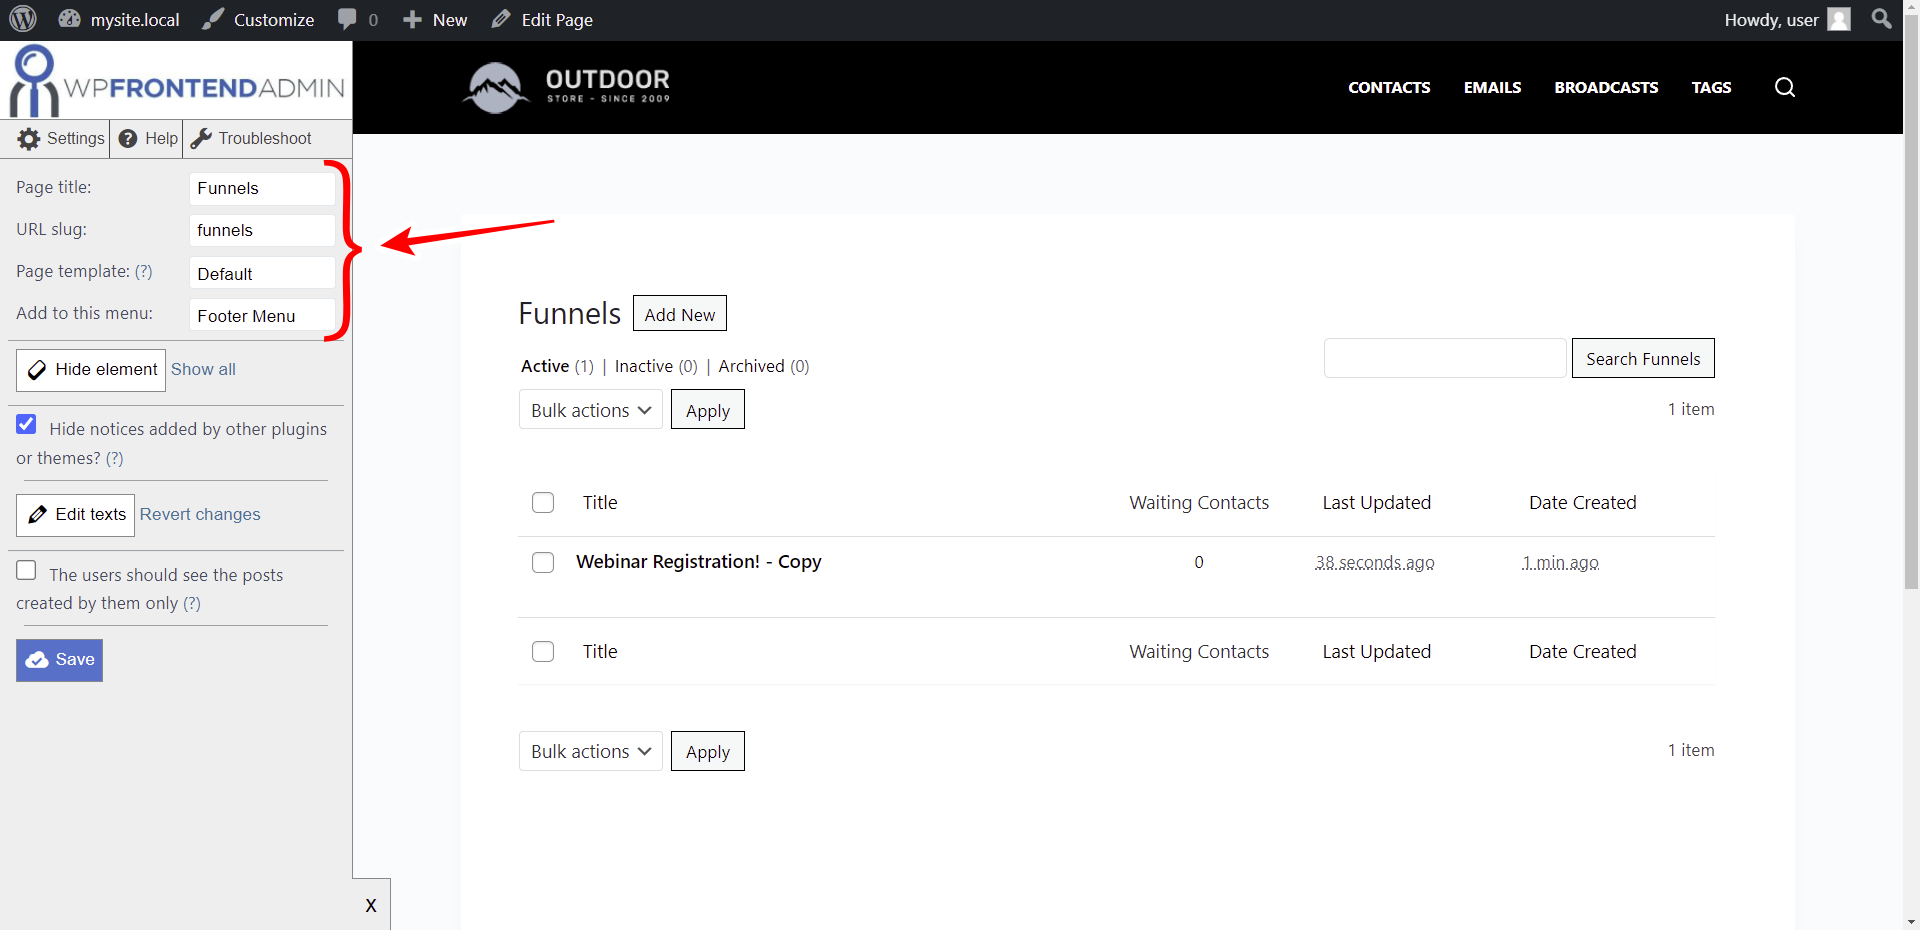
Step 4 – Remove any unnecessary element from the page
WP Frontend Admin allows you to customize your frontend pages by removing any unnecessary element. In this case, you can remove elements your users don’t need to create funnels on the frontend.
For example, you can remove all mentions to buy the Pro version of the plugins, remove any buttons or fields that users won’t need, etc.
- Click on “Hide element”.
- Click on the element you want to hide.
Do this for every element you want to hide.

Step 5 – Edit the frontend page texts
Another way to customize the frontend pages is to change the texts. This is useful for renaming buttons, renaming plugins and inserting a name that you consider appropriate, simplifying the directions texts, and so on.
- Click on “Edit texts”
- Edit all the texts you want
- Click on “Stop editing texts”
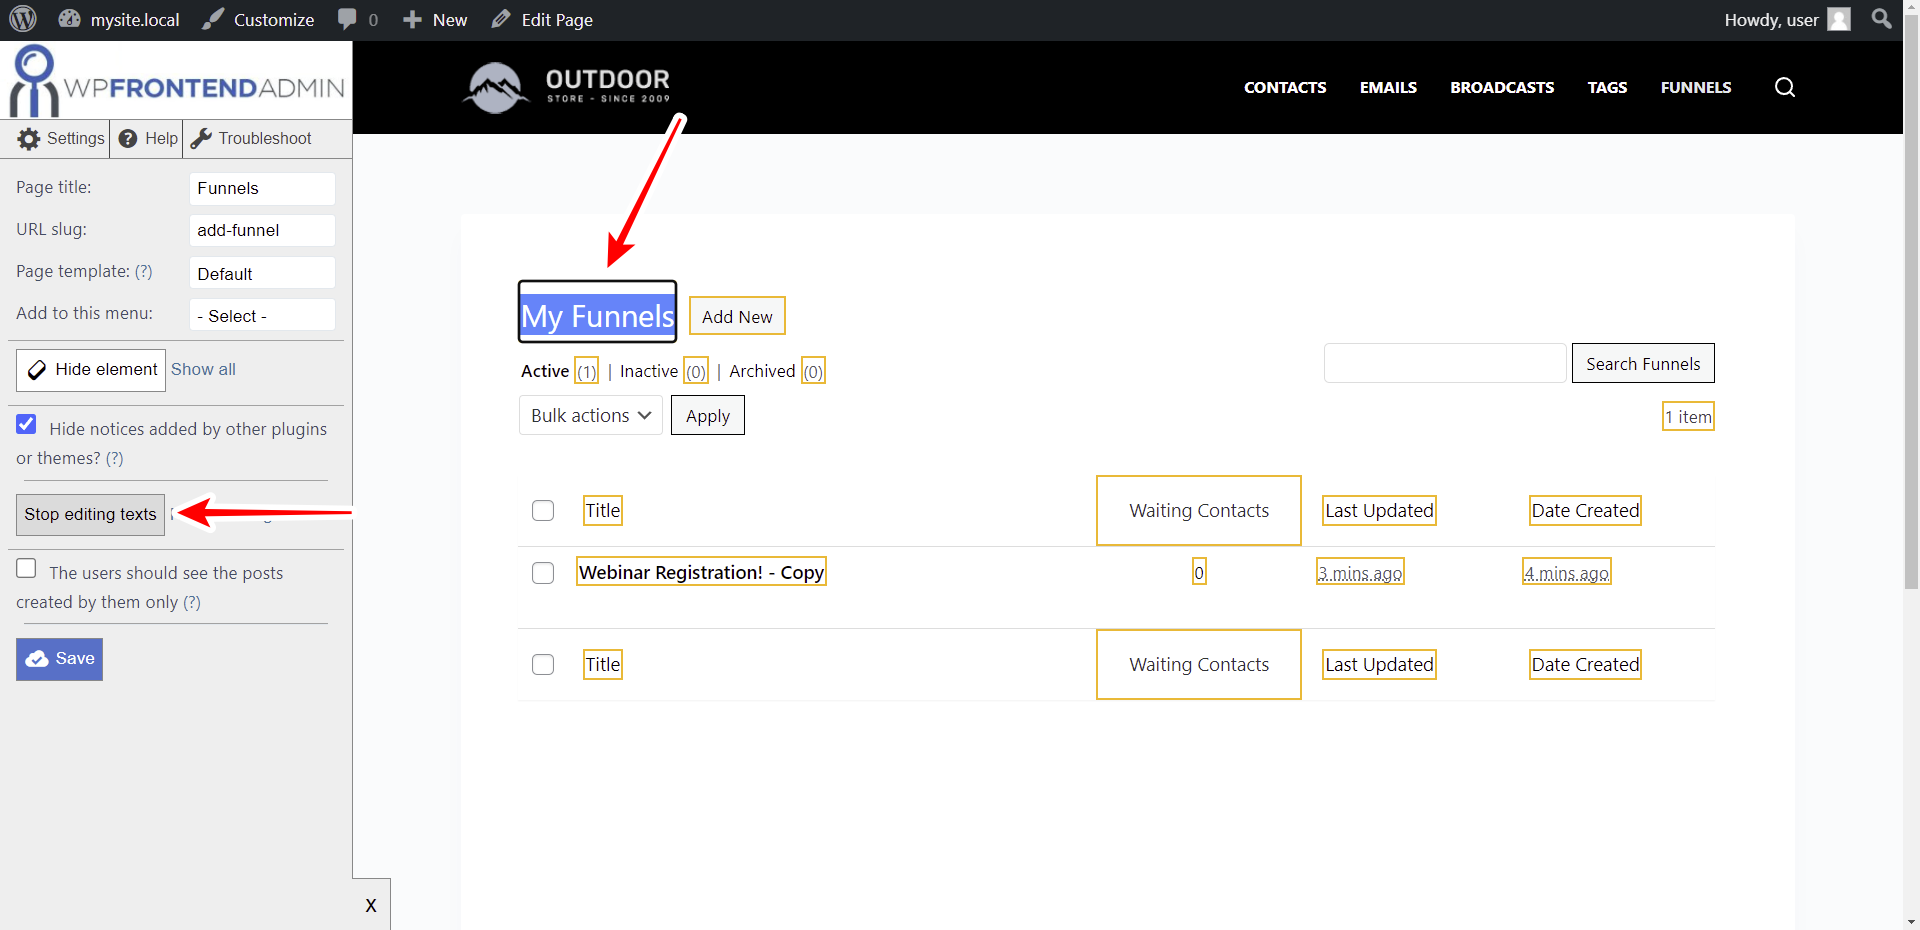
Step 6 – Save the changes
Once you’ve applied all the changes, you can tick the following checkboxes:
- Hide notices added by other plugins or themes?
- The users should see the posts created by them only
Now click on “Save” to apply the changes and publish the page.

Step 7 – Edit the “Add Funnel” form on the frontend
You can open the “Add Funnel” form and hide any unnecessary elements and edit the texts.

Manage Groundhogg funnels on the frontend
Once you publish the Funnels page on the frontend, this is what the users will see:
They will be able to create, edit and remove funnels right from the frontend of your WordPress website.

This is what users will see when they build a new funnel.
If users want to import funnels, this is what they’ll see on the frontend.

WP Frontend Admin and Groundhogg allow you to create a frontend email automation system for your WordPress site. Your users won’t need to know how to use WordPress because you’ll create your own web app with its own user interface.
Read more tutorials on how to manage the Groundhogg pages on the frontend.
You can try the premium plugin on your website for free for 7 days.