In this tutorial, you will learn how to allow users to create and edit WPForms on the frontend.
This is useful if a client has asked you to build a forms website, where he will create and manage forms to collect information from visitors.
For this, you need two plugins:
- WPForms
- WP Frontend Admin
With WP Forms, you can create the forms in WordPress, and with WP Frontend Admin, you can display the forms page from wp-admin to the frontend of your WordPress website.
In fact, you can display any wp-admin page on the frontend, to build frontend dashboards and web apps based on WordPress plugins.
You can try the premium plugin on your website for free for 7 days.
Once installed and activated, you need to follow these steps to display the WPForms page on the frontend and allow users to build forms from the frontend, without having to use the normal wp-admin dashboard.
1- Open the All Forms page in wp-admin
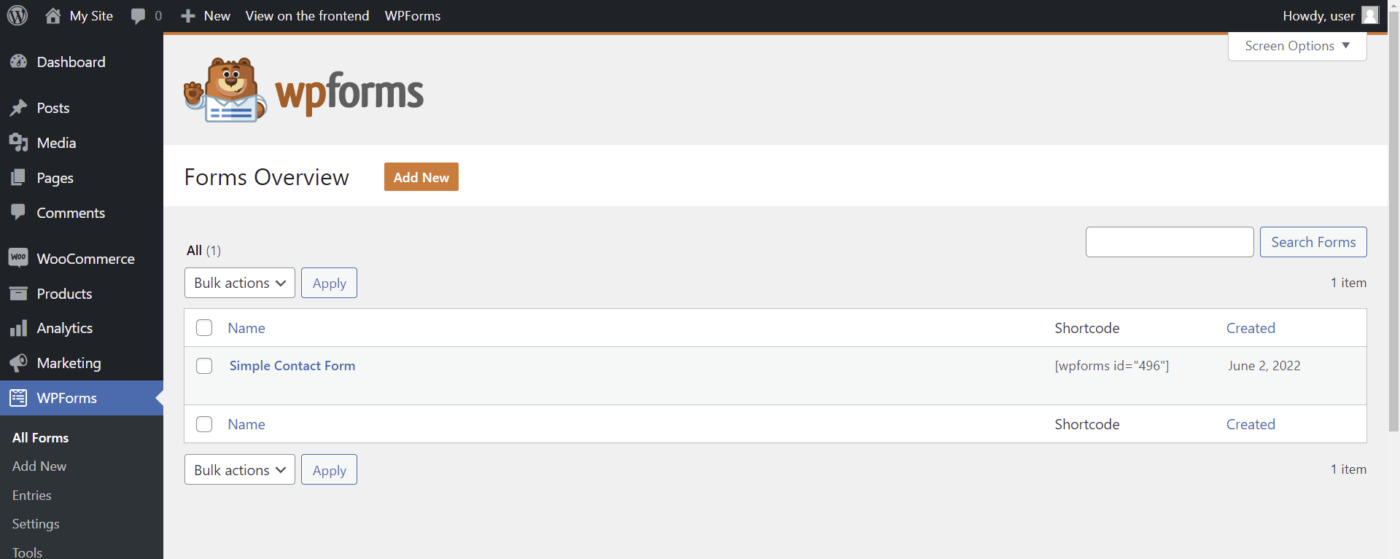
First, go to WPForms > All Forms in wp-admin.
If you already created some forms, you will view them listed on this page.
2- Display the WP Forms page on the frontend
To view the All Forms page on the frontend, click on View on the frontend.
3- Set up the frontend WP Forms page
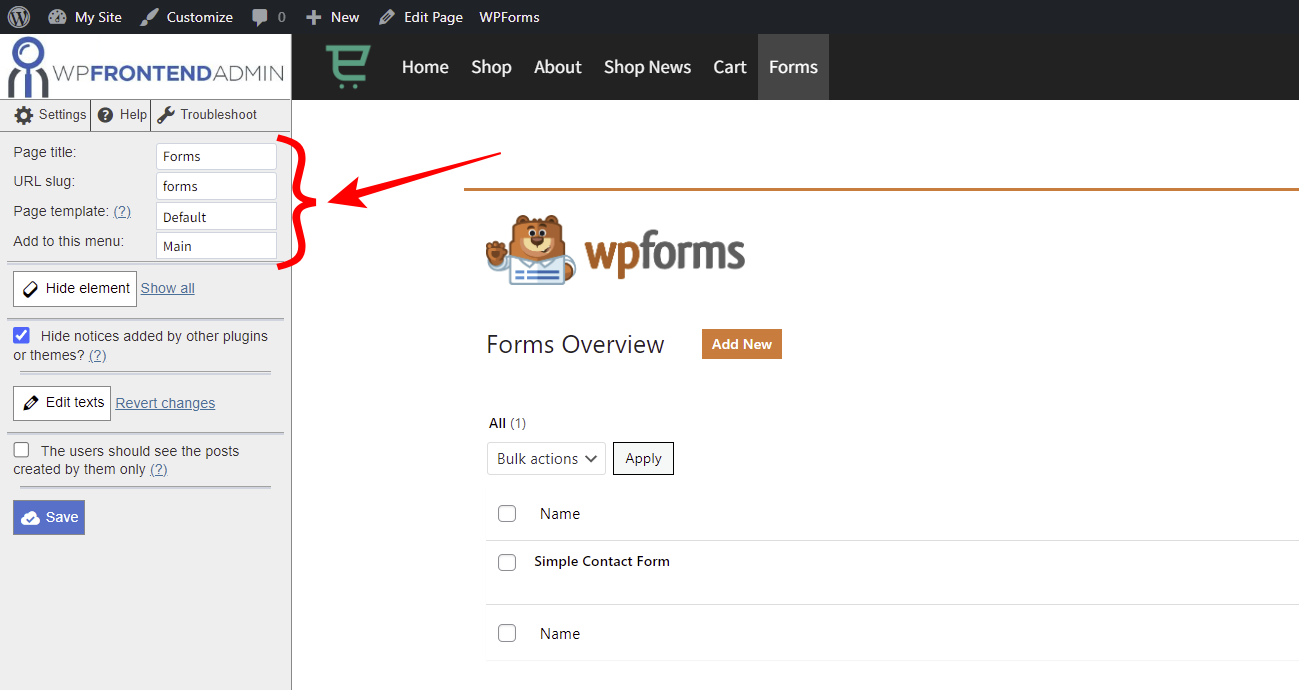
Once the All Forms page is displayed on the frontend, you can use the Quick Settings panel to set up the page.
You can start by selecting the basic page information:
- Page title
- URL slug
- Page template
- Navigation menu
You can also remove any unnecessary elements like plugin logos, help links, pro update banners, etc.
Just click on the Hide element button, and then click on the element you want to hide. In this example, we’re showing you how to remove logo of the WPForms plugin.
Once you remove all the unnecessary elements, you can tick the Hide notices added by other plugins or themes checkbox. This means your allowed users won’t see admin notices when managing WP Forms on the frontend.
Once done, click on Save to apply the changes you’ve made so far.
4- Set up the Add New Form page on the frontend
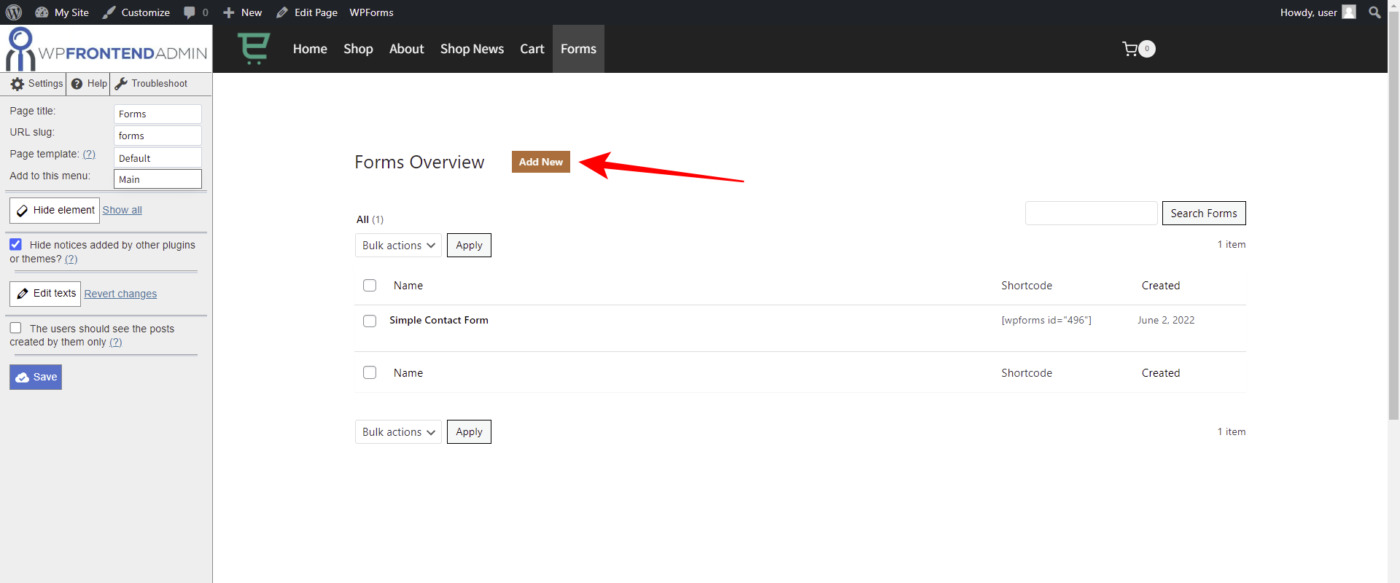
You can click on the Add New button to open the form builder page on the frontend and apply some changes.
For example, you can remove any unnecessary elements such as help links, forms that require paid plans, etc.
Again, you just need to click on Hide element and then click on the element you want to remove from the frontend form builder page.
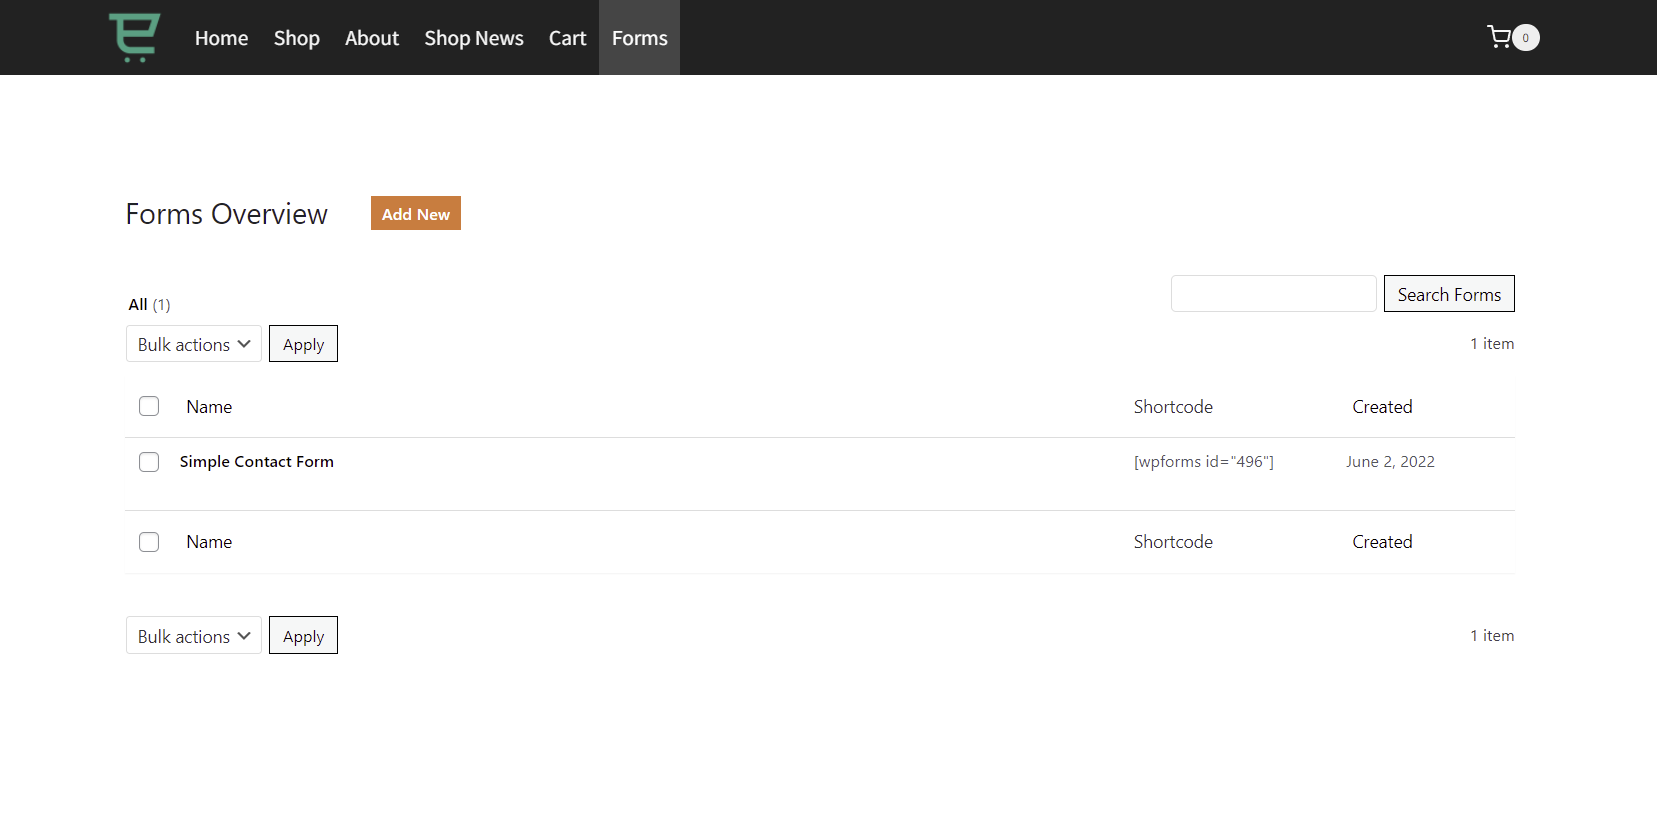
This is what the Forms page from the WPForms plugin will look like on the frontend:
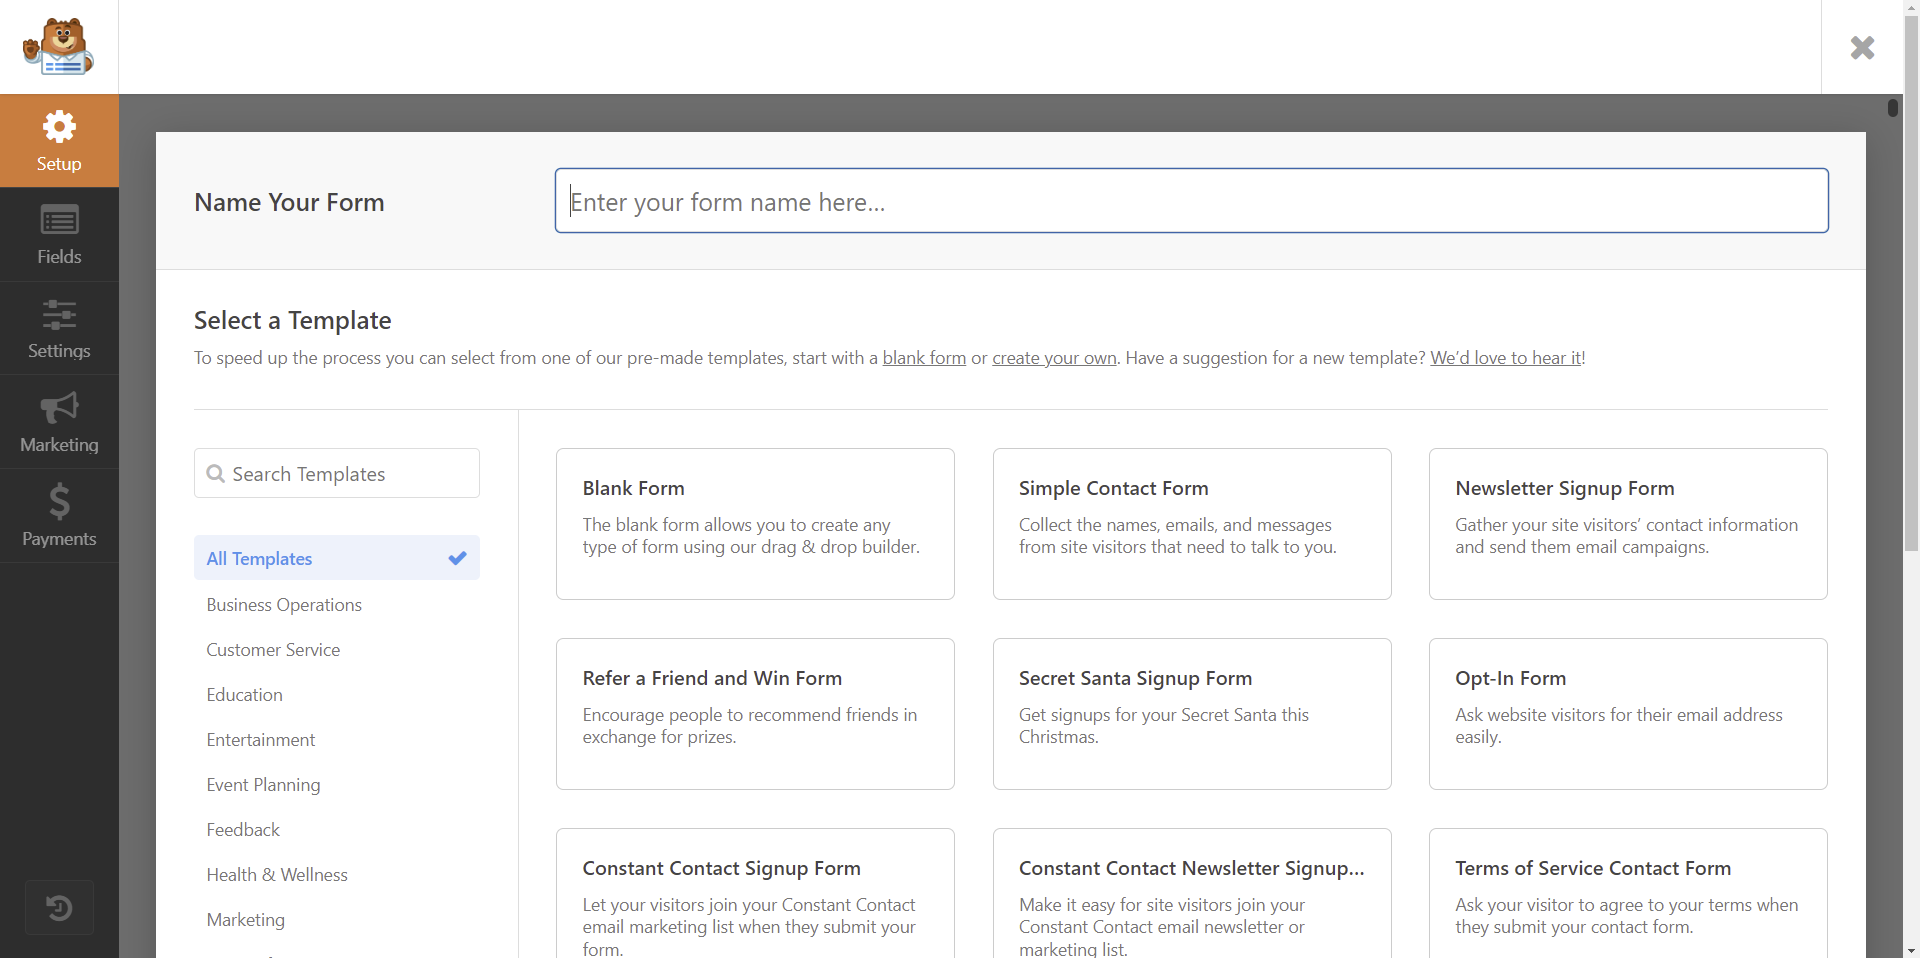
And this is what the Add New Form page will look like on the frontend:
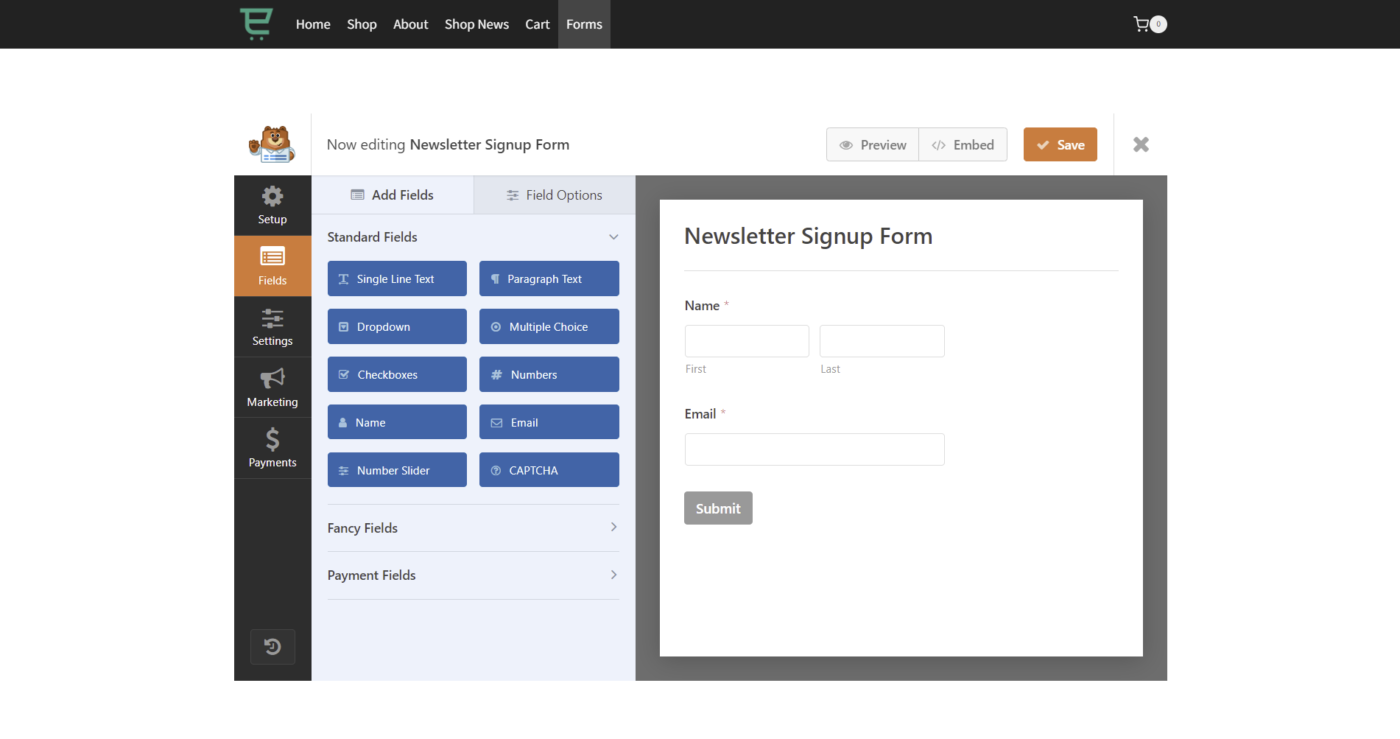
Here’s what building a new form on the frontend will look like for users:
5- Allow users to create and edit WPForms on the frontend
- WP Forms only accepts users with the Administrator role to create and edit forms.
- You need to create a new user with the Administrator role, or assign the “manage_options” capability to any other user. You can use the “User Role Editor” plugin, which allows you to add any permission to any user role.
- This is a decision you need to take consciously, because your users could also access the wp-admin dashboard.
- To prevent users from viewing the admin bar on the frontend, you can open a specific user’s profile and disable the Show Toolbar when viewing site checkbox.
6- Optional – Disable the full screen feature for the frontend forms builder
By default, WP Frontend Admin displays specific pages in full screen mode, including the form builder from the WPForms plugin.
However, you can disable the full screen mode by going to WP Frontend Admin > Settings > Solution to Errors.
Once there, go to the Disable full screen for these pages field and enter this value:
page=wpforms-builder
Once done, save the changes.
After disabling the full screen mode for the WP Forms form builder, this is what the page will look like:
This is how you can allow specific users to create and edit forms from the WP Forms plugin on the frontend of your WordPress website.
You can try the premium plugin on your website for free for 7 days.

