Let’s see how to build a WordPress frontend dashboard in 5 minutes or less.
At WP Frontend Admin, we are passionate about helping you build frontend dashboards and web applications based on WordPress plugins.
That’s why today we’re excited to announce our Frontend Dashboard Template Wizard. We wanted to simplify the process of displaying wp-admin pages in the frontend, and now you can do the whole process of creating a frontend dashboard in a few simple steps.
Previously, to create a frontend dashboard or web application, you had to create the dashboard pages one by one, not counting the steps of installing each plugin needed for the Elementor templates to work properly, importing the template to each frontend dashboard page, etc.
Now, we have prepared a simplified workflow that will allow you to create a complete frontend dashboard for WordPress in five minutes or less.
Why do you need a frontend dashboard?
You might need a WordPress frontend dashboard for a variety of reasons.
Here are some:
- Improve your website security: By reducing the number of users who have access to the back end of the site, a front-end dashboard can help improve site security.
- Make it easier for users to submit content: A dashboard on the front end can make it easier for users to submit content to a Web site. This can help sites that rely on user-generated content like blogs or forums.
- Give users more control over their content: This is especially helpful for users who are not comfortable using the WordPress backend dashboard. A front-end dashboard can allow users to manage their own content without having to log in to the back end of the site.
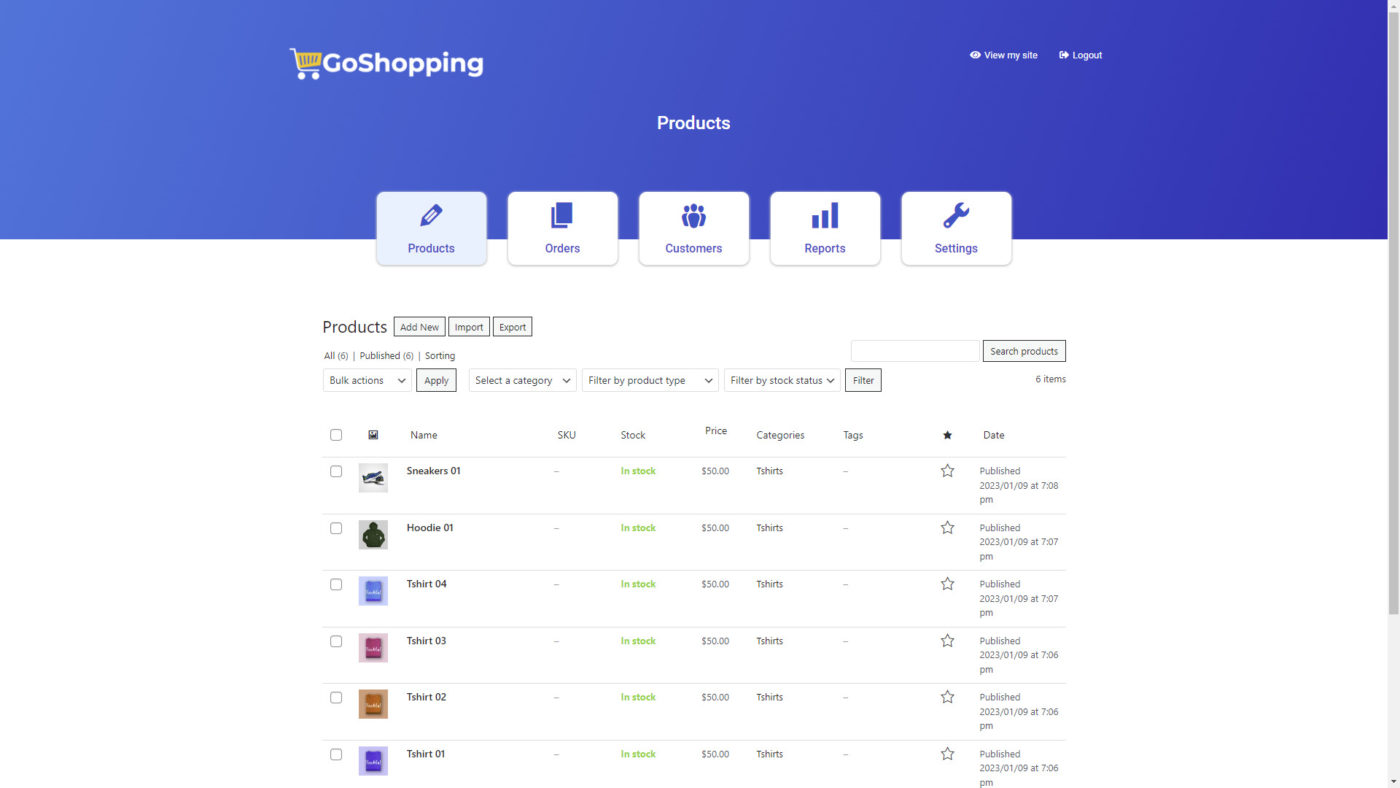
Do you want to create a beautiful minimalist frontend dashboard like this?

Or do you want to build a frontend dashboard with beautiful icons like this one?
You can do it in less than five minutes with our Frontend Dashboard Template Wizard.
Just follow these simple steps to build your WordPress frontend dashboard:
1- Install or update WP Frontend Admin
If you have WP Frontend Admin installed and activated on your WordPress site or multisite network, just make sure it’s updated to the newest version.
In case you don’t know what WP Frontend Admin is, it is a plugin that allows you to display any wp-admin dashboard page in the frontend.
You can create frontend dashboards and web applications, sell access to the applications and make money online.
You can try the premium plugin on your website for free for 7 days.
2- Open the template wizard
Multisite users:
- Go to Network Admin > Frontend Admin > Template Wizard.
Normal site users:
- Go to Frontend Admin > Template wizard.
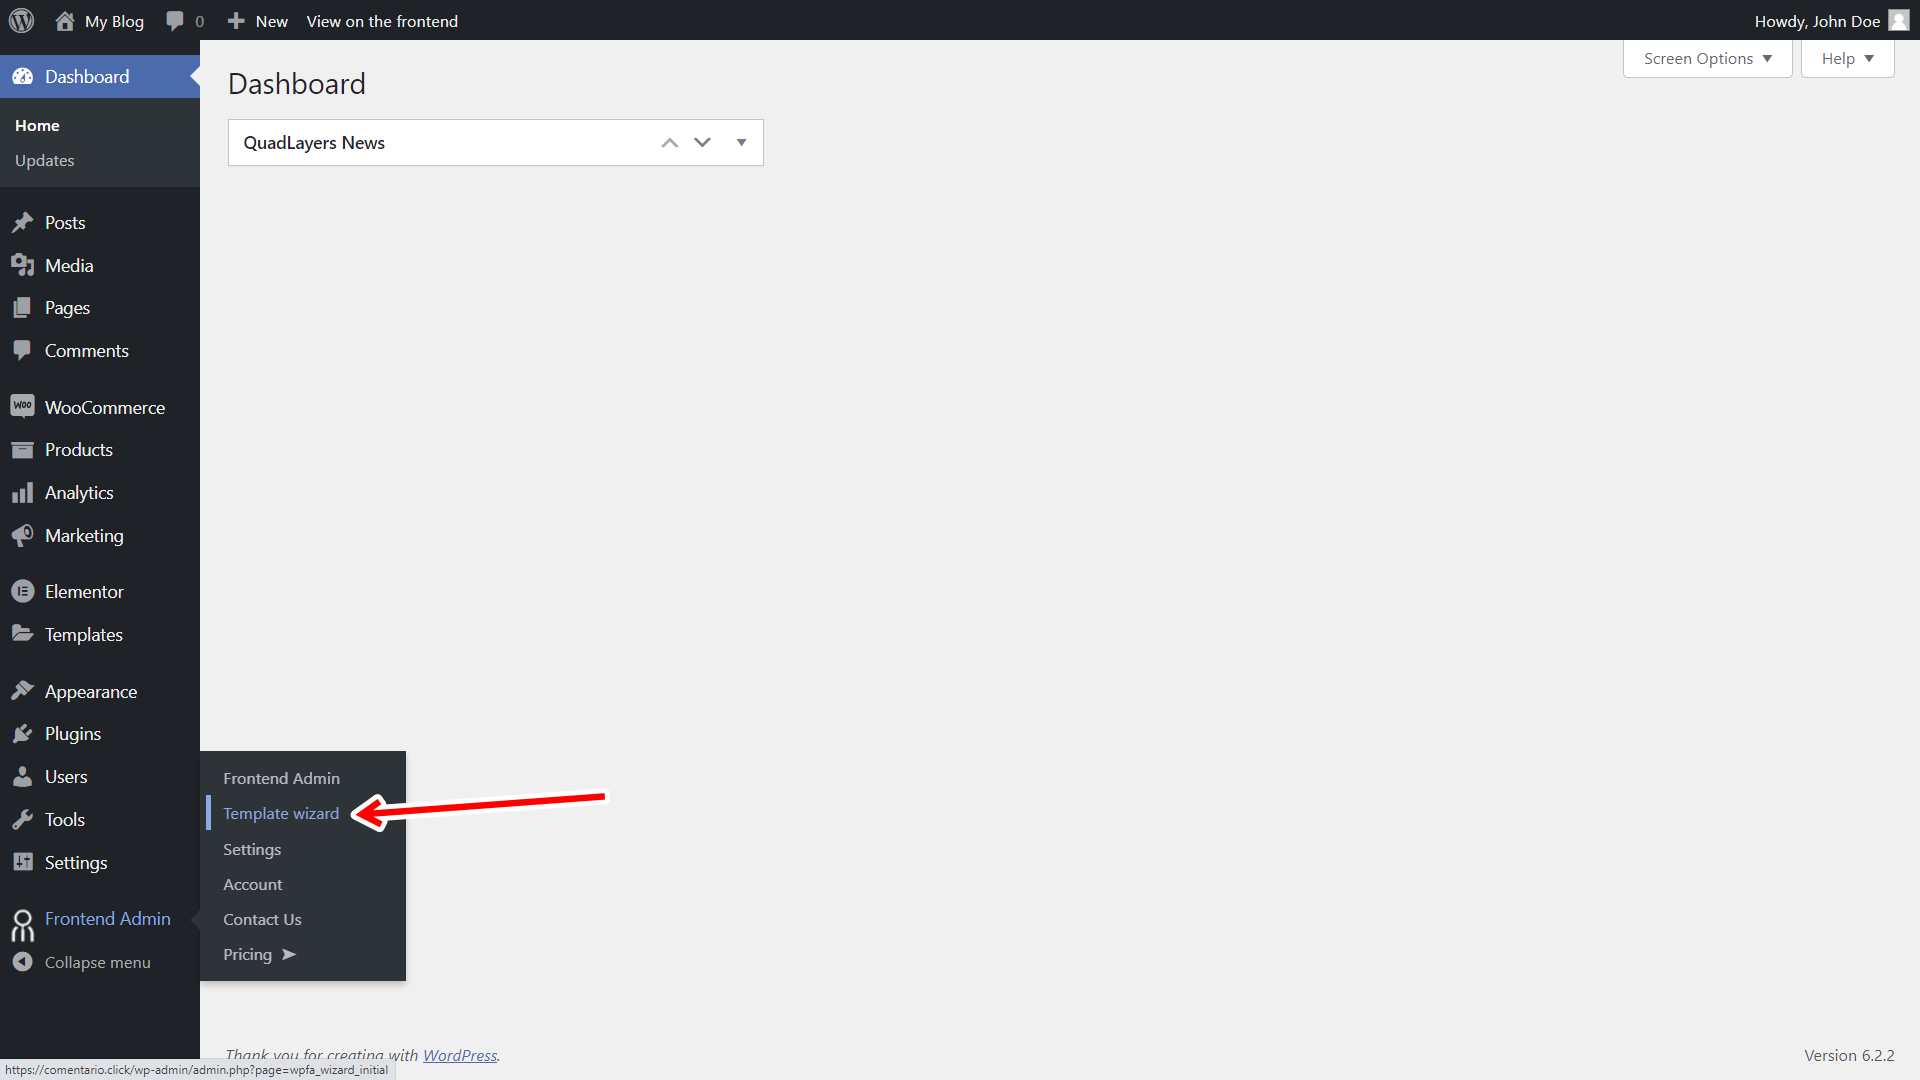
You’ll see a welcome page with some text, where you can read what the wizard is about, etc.
Click on Next.

3- Install all the required plugins at once
In order for our Elementor templates to work properly, they require some free plugins, but we have made the process completely easy as you can install all the plugins at once by clicking the Install all plugins button.
Note: To add menu icons to the dashboard, you can install either “WP Menu Icons” by Quadlayers or “Menu Icons” by ThemeIsle. To avoid conflicts, we recommend that you use only one option.

Multisite only: Select the global dashboard site
With WP Frontend Admin, you can create a global frontend dashboard to allow all subsite administrators in your WordPress multisite network to manage their sites from this frontend dashboard.
This step is only displayed if your WordPress installation is a multisite network.
You need to select the subsite where you want to create the global frontend dashboard.
This should not be the main site of the network, so you may need to create the subsite first.
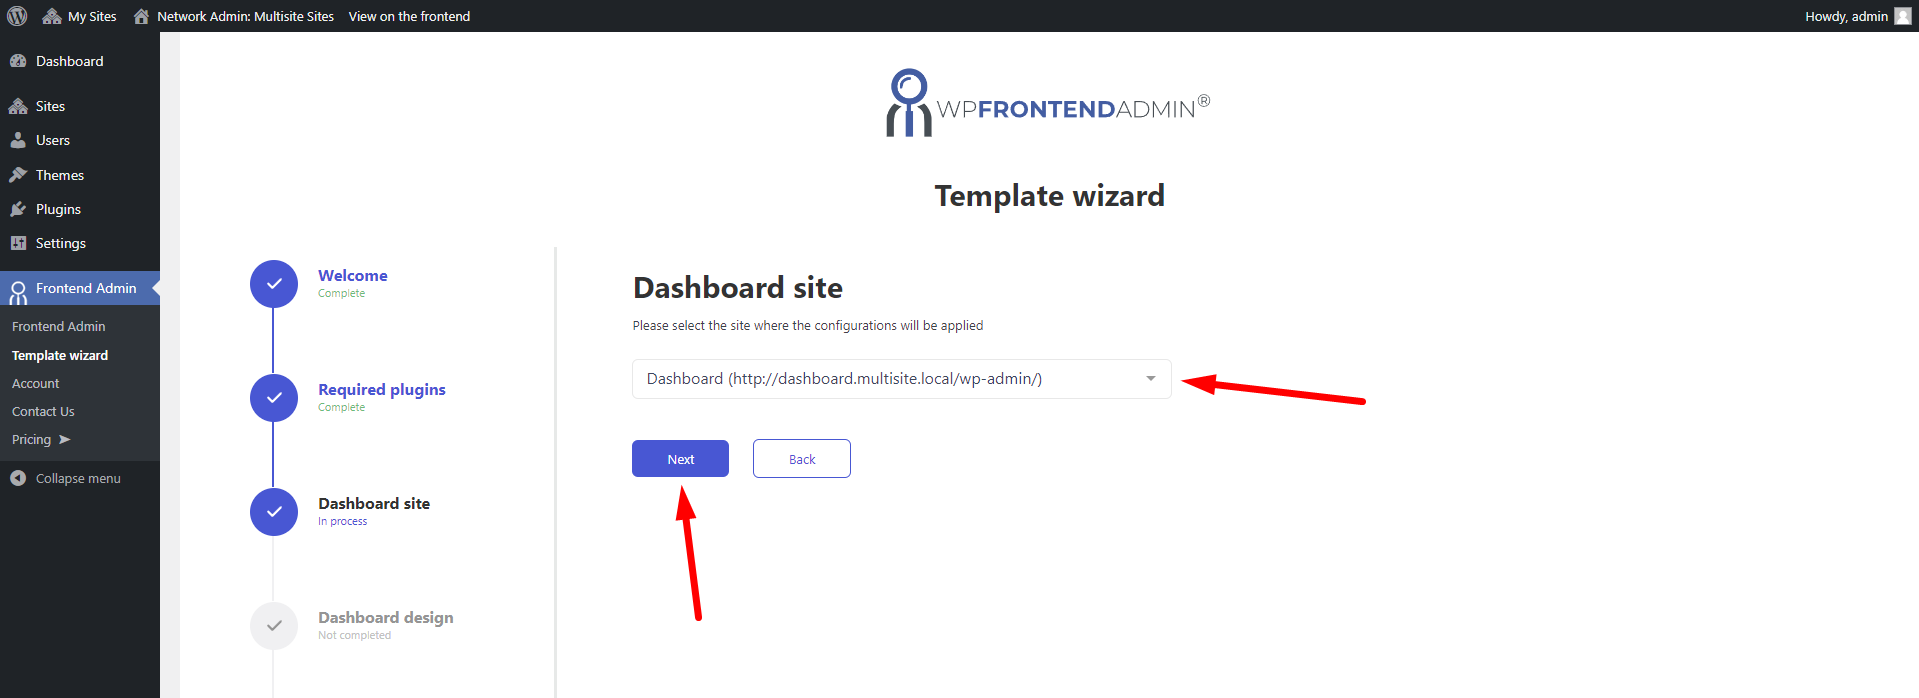
After selecting the Global Dashboard site, you will be redirected to the site. There we will continue the workflow to complete the dashboard.
4- Select the frontend dashboard template
We have prepared different frontend dashboard designs for you to use. You can preview them on this page, but you don’t need to download them there, because you can select them in the wizard.
In this step, you only need to select the template you will use to create all the pages of your frontend dashboard by clicking on Select template.
In this example, we’ll use Template 1.

5- Select which wp-admin pages you’ll add to the frontend dashboard
In this step, you need to select the wp-admin dashboard pages you want to add to the frontend dashboard.
The wizard will automatically detect all available pages.
If you have other plugins installed, such as WooCommerce, LearnPress, or any other plugin, the wizard will detect and display the pages here, so you can select and add them to the frontend dashboard.

Note: the wizard adopts the hierarchy of pages as they appear organized in the wp-admin dashboard menu, but you can change the order of pages or convert sub items to main items in the navigation menu settings after the process is completed.
Once you have selected all the pages you want to add to the frontend dashboard, click on Next, and the import process will start.
You’ll need to wait some seconds while the wizard completes the following tasks:
- Import the selected template
- Create all the selected frontend dashboard pages
- Create a navigation menu for the frontend dashboard
- Automatically add menu icons to your frontend dashboard menu
- Create “View site” and “Log out” buttons and add them to the dashboard menu (if necessary)

Once the process is completed, you can click on Go to pages.

And this is what our frontend dashboard looks like.
Optional – Final tweaks to build a WordPress frontend dashboard
After you have created all the frontend dashboard pages, there are a few things you can do to make your dashboard more functional for your users.
a) Select who will use the frontend dashboard
WP Frontend Admin allows you to select which user roles will use the frontend dashboard.
This is important because these users will not have access to the normal WordPress dashboard, but will only use the frontend pages.
To do this, go to WP Frontend Admin > Settings and enter the user roles under Access Restrictions > These user roles will use the frontend dashboard.
Important
You can use the User Role Editor plugin to assign a required capability to any user role, or create a new user role from scratch if the existing user roles on your site do not have all the necessary permissions to use the front-end dashboard pages.
b) Create a custom login page for your WordPress site
WP Frontend Admin allows you to create a custom login page using any WordPress theme or page builder.
You just need to add the following shortcode to display the login form on any page:
[wp_frontend_admin_login_form]
c) Add a link to the frontend dashboard to your website’s main menu
A good way to make access to the frontend dashboard more immediate is to add a link to the main page of the frontend dashboard to the main menu of your website.
Optionally, you can add a link to the login page.
As you can see, in this guide we have shared with you a simplified workflow to build a WordPress frontend dashboard to simplify your users’ experience and strengthen the security of your WordPress website.
You can try the premium plugin on your website for free for 7 days.
