If you are a programmer or an entrepreneur who wants to create a web app or platform where users will be able to install WordPress plugins from the frontend, this tutorial is for you.
As a programmer, you will have the opportunity to earn good money in a very short time, since you will not have to write the code necessary to install WP plugins from the frontend. On the other hand, as an entrepreneur full of projects in mind, you won’t have to learn how to program or hire a programmer who will charge you with a big amount of money and ask you for a considerable time to give you the site.
We want to show you how to create a frontend page to install WP plugins with a single click and a few minutes to configure the quick settings of this new page. For this, we’ll use the WP Frontend Admin plugin, which allows you to view and display any wp-admin page on the frontend.
You can get the plugin here:
You can try the premium plugin on your website for free for 7 days.
1- Display the WordPress plugins page on the frontend
WP Frontend Admin allows you to display the WordPress plugins admin page on the frontend with one simple click:
- Go to Plugins > Installed Plugins.
- Click View on the frontend.
Just by clicking this button, the wp-admin plugins page will be displayed on the frontend. You don’t have to program anything nor write a single line of code.

Important
If you’re using page builders such as Elementor, Visual Composer, Gutenberg, Divi, Beaver Builder, WP Page Buildder, Page Builder by SiteOrigin, Oxygen, Live Composer, Brizy, and any other page builder, you can create a frontend plugins page by following these simple steps:
- Create a new page with your preferred page builder.
- Insert the following shortcode where you want to display the wp-admin plugins page:
[vg_display_admin_page page_url="plugins.php"]
- Once you enter this shortcode on the page content area, click Preview and WP Frontend Admin will display the WordPress plugins page on the frontend.
2- Select the basic information of your new frontend plugins page
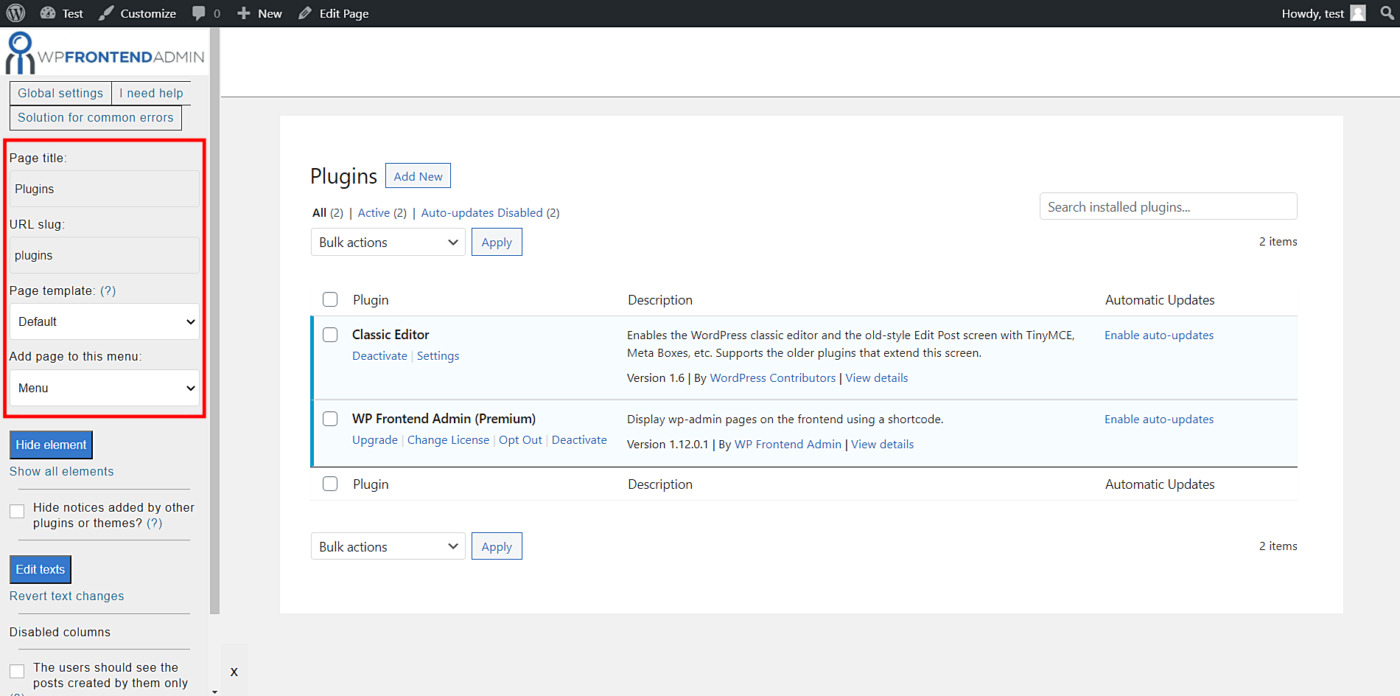
As you see in the screenshot below, WP Frontend Admin will display the WordPress plugins page on the frontend. Also, it will display a Quick Settings panel on the left side of the screen, with all the necessary tools to configure your new frontend page.
You can start configuring the frontend WordPress plugins page by selecting the following basic information:
- Page title: Enter the page title here. We’ll call this page “Plugins”.
- URL slug: You need to select the URL slug here using keywords only. You can enter plugins as the URL slug.
- Page template: We’ll select the Default template to keep the theme’s options.
- Add page to this menu: You need to select the menu where you’ll add this page.
3- Hide any unnecessary elements from the frontend plugins page
You can hide any unnecessary elements to allow your users to use the essential fields only. In this case, there aren’t many elements that could be hidden, but you decide which elements will be present on your frontend plugins page.
- Click Hide element.
- Click the element you want to hide.
You need to repeat this with all the elements you want to hide from your frontend page.

4- Edit your frontend plugins page’s text
With WP Frontend Admin, you can customize your frontend plugins page texts easily by following these simple steps:
- Click Edit texts.
- Edit all the texts you want to change.
- Click Stop editing texts.
This can be really useful if you want to remove any references to WordPress or if you want to make texts clearer for the users.

5- Hide automatic notices from plugins on themes and publish the page
Besides manually hiding unnecessary elements from the frontend plugins page, you can automatically hide notices that could be shown in the future to your users. For this, you need to toggle the Hide notices added by other plugins or themes checkbox.
Finally, you can hit Save to apply the changes and publish the frontend plugins page.

6- Edit the “Add New” plugin page on the frontend
Now we’ve configured the installed plugins page on the frontend, but we need to configure the “Add New” page on the frontend so users have a great experience uploading and installing plugins from the frontend on your WordPress site.
Click Add New to open the page install plugins page on the frontend.
Now you can follow the same steps we explained for the installed plugins page: Hide unnecessary elements, edit texts if necessary, etc.

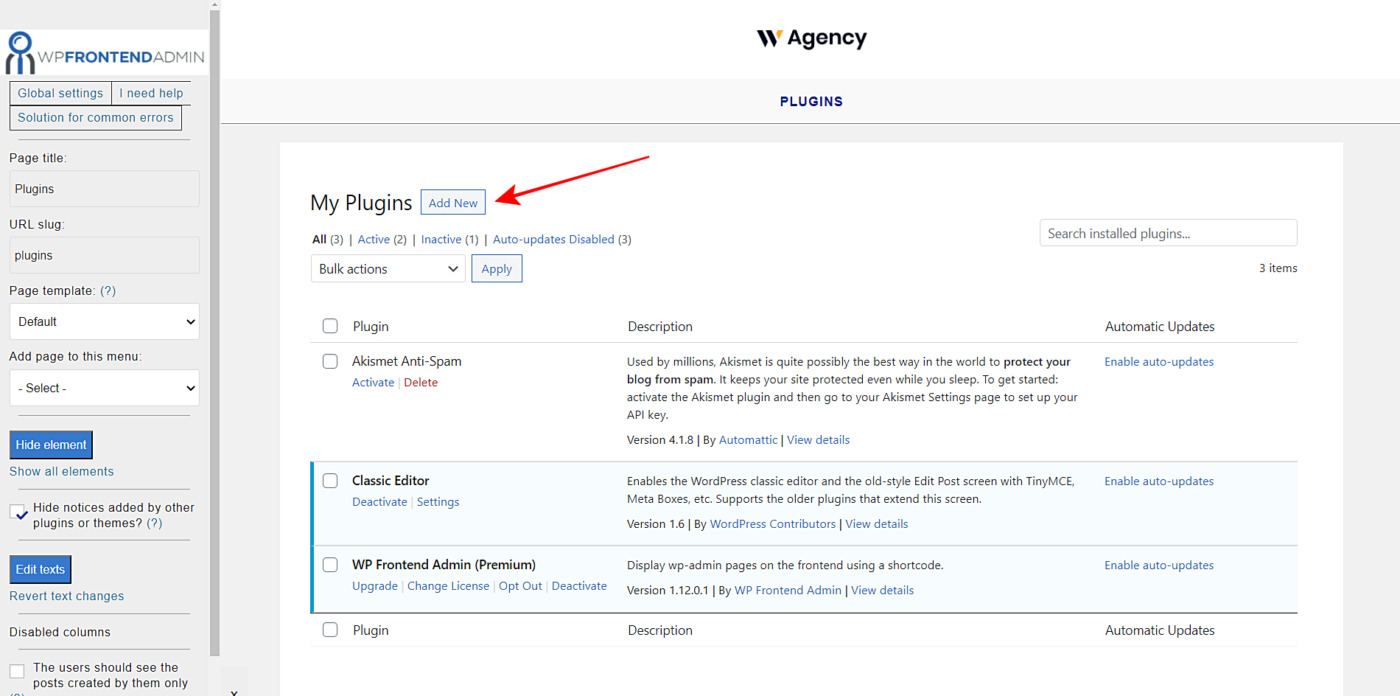
7- Install and manage WordPress plugins from the frontend
This is how the Installed Plugins page will look on the frontend:
This is how the Add Plugins page will look on the frontend:

Important
Something to keep in mind is that only logged-in users who have the activate_plugins capability enabled for their user role will be able to install and manage WordPress plugins on the frontend.
If you want to know how to add that capability to other user roles, you can follow this tutorial.
Done!
As you can see, it’s really simple to create a frontend page that will allow your users to install plugins form the frontend. With WP Frontend Admin, you don’t need to program anything. Just some simple clicks and you’ll be done with your frontend page.
You can try the premium plugin on your website for free for 7 days.