If a client has asked you to program a site that he can completely manage from the frontend, or if you yourself want to save the money and time that hiring a programmer could require and create the site yourself, this tutorial is for you.
We’ll show you how to display any wp-admin page or plugin on the frontend. And we want to use an excellent example that can be very useful.
If you are thinking of hiring someone to sort, classify, add alternative text, to your WordPress media library, you can easily display it on the frontend so that the person doesn’t take control of any other part of your site.
For this, you can use the WP Frontend Admin plugin. It helps you display any of your wp-admin plugins or pages. You can quickly create web apps and frontend pages with this plugin.
You can try the premium plugin on your website for free for 7 days.
Once you install the plugin, just follow these simple steps:
1- Display your WordPress Media Library on the frontend
It’s really simple to display and manage the WordPress media library on the frontend without having to write a single line of code. Just follow these simple steps:
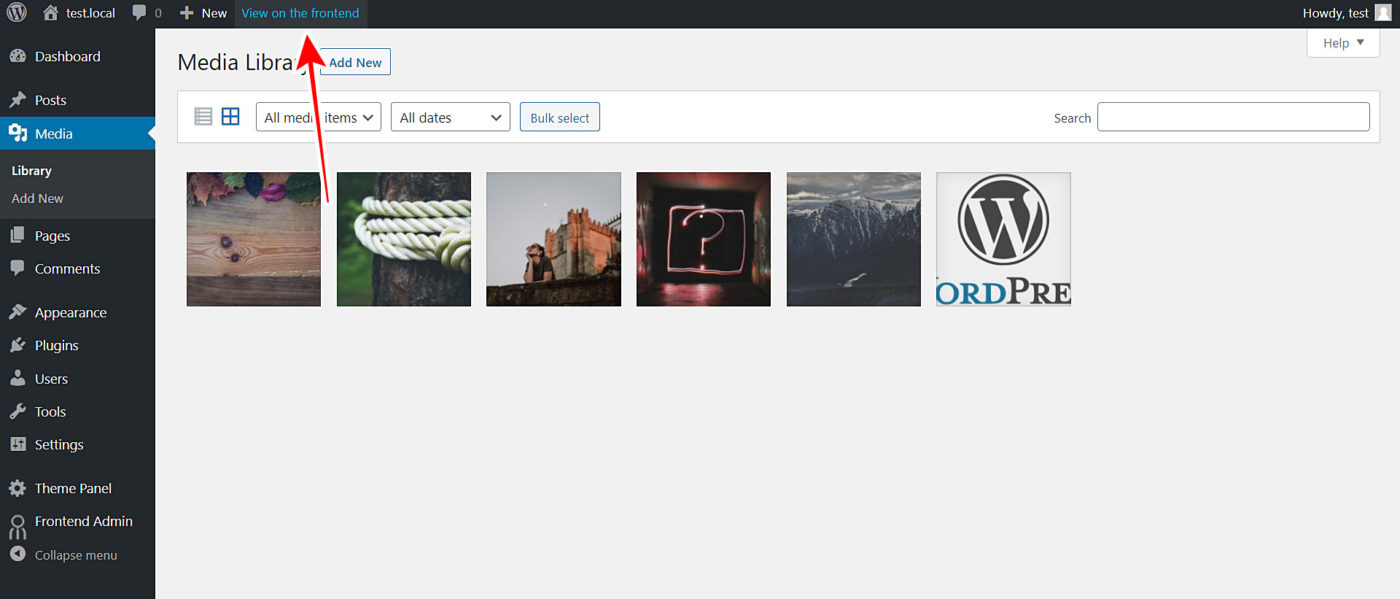
- Go to Media > Library.
- Click View on the frontend.
Something important to mention is that WP Frontend Admin is compatible with any of the following page builders:
- Elementor
- Visual Composer
- Gutenberg
- Divi
- Beaver Builder
- WP Page Builder
- Page Builder by SiteOrigin
- Oxygen
- Live Composer
- Brizy
- Etc.
Therefore, you can use the following shortcode to display WordPress media library on pages created with any of these page builders:
[vg_display_admin_page page_url="upload.php"]
Once you enter the shortcode, click Preview to display the WordPress media library on the frontend.
2- Select the frontend media library page’s basic information
Once you click the View on the frontend button, you will see the WordPress media library displayed on the frontend. Also, you’ll see the Quick Settings panel on the left side of the screen. You can use this panel to configure your frontend pages easily.
You can start configuring your page by selecting the following basic information:
- Page title: Enter the page title in this field.
- URL slug: Enter the URL slug here, using keywords only.
- Page template: Select the page template from this dropdown. We’ll select the Default template.
- Add page to this menu: You can add the page to a navigation menu previously created; just select it from this dropdown.
3- Hide any unnecessary elements from the frontend media library page
You can customize your frontend pages by hiding any unnecessary elements form them. It’s really simple because you don’t have to code anything. Just follow these two simple steps with every element you want to hide from your frontend media library page:
- Click Hide element.
- Click the element you want to hide.
4- Edit any of the texts on your frontend media library page
You can edit any texts on your frontend media library page to customize it even more. Just follow these three simple steps:
- Click Edit texts.
- Edit all the texts you want.
- Click Stop editing texts.
5- Finish configuring the frontend media library and publish the page
These are some things you can do to finish configuring your new frontend media library page:
- Toggle the Hide notices added by other plugins or themes checkbox.
- Tick the The users should see the posts created by them only checkbox.
- Click Save to apply the changes and publish the page.
4- Done!
After these simple steps, your users will be able to view and manage the WordPress media library on the frontend.
Important: Only the users with the upload_files capability will be able to view and manage the frontend media library. You can follow this tutorial to learn how to assign that capability to any user role.
You can try the premium plugin on your website for free for 7 days.


